Share your love
Easy Guide Steps for Email Settings in Virtualizor
Like any control panel and service, it is so important to send emails to our users. It is so important to notify any users about their account and service status. Now, we want to describe how to set email settings in Virtualizor. Also, we will learn how to edit email templates.
Table of Contents
How to edit Email Settings in Virtualizor?
In this tutorial, we want to describe how to enable and edit Virtualizor email settings. In email service, there is so important to have email templates and send emails based on these templates. Therefore, We will discuss how to edit email templates. Please follow the below steps.
step 1 – Where is Email Settings in Virtualizor?
Let’s log in to our Virtualizor panel by entering ServerIP:4085 on a browser. Then complete the login credentials and enter the Virtualizor main page. Navigate to “Configuration >> Email settings” to see Email settings in Virtualizor like the below page.

Step 2 – Edit Email Settings
As you see in the image, The first field is selecting the “Mailing Method” drop-down list. We have 2 options to select, “PHP Mail” and “SMTP”.
That is a great option we can use SMTP in our Virtualizor panel. Therefore, We are going to see these two options. You can read more about Google’s SMTP service.
Step 2-1 – PHP Mail
This option is default and all emails will be sent from the PHP mail() function. If you want to Disable Email service, check the checkbox and click on “Edit Settings” to make changes.
Step 2-2 – SMTP Settings
If you select SMTP from the first drop-down list, you will see fields like the below image in the Virtualizor Email Settings.
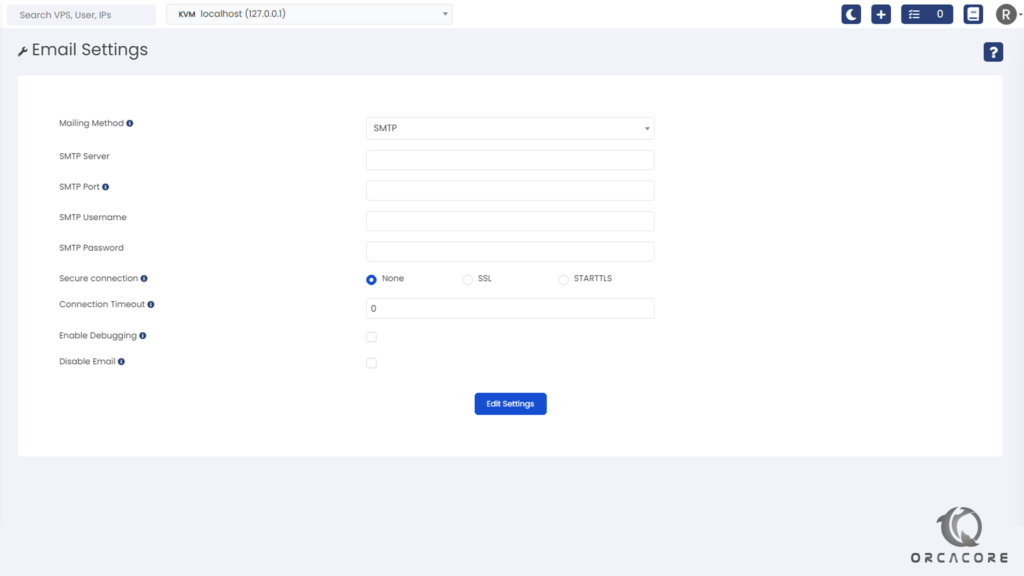
Please enter the SMT Server address and in the next field, complete the SMTP Port number. You can define 465 or 587 as the port number. The next two fields will be complete with SMTP Username and SMTP Password. Then select Secure Connection type with radio buttons. You can select None, SSL, and STARTTLS.
Let’s set the Connection Timeout field with a digit number in seconds. This shows how many seconds the Virtualizor can wait to make a connection to the SMTP server. Then you can Enable Debugging mode to save login in the /var/virtualizor/log/email/email.log file.
Also, Disable Email option is available here to avoid sending any emails. Finally, Click on “Edit Settings” to save settings Email Settings Virtualizor.
Step 3 – Email Templates
Navigate to the “Configuration >> Email Templates” menu to see all templates available in Virtualizor. It uses these templates to notify users about services and the status of them.
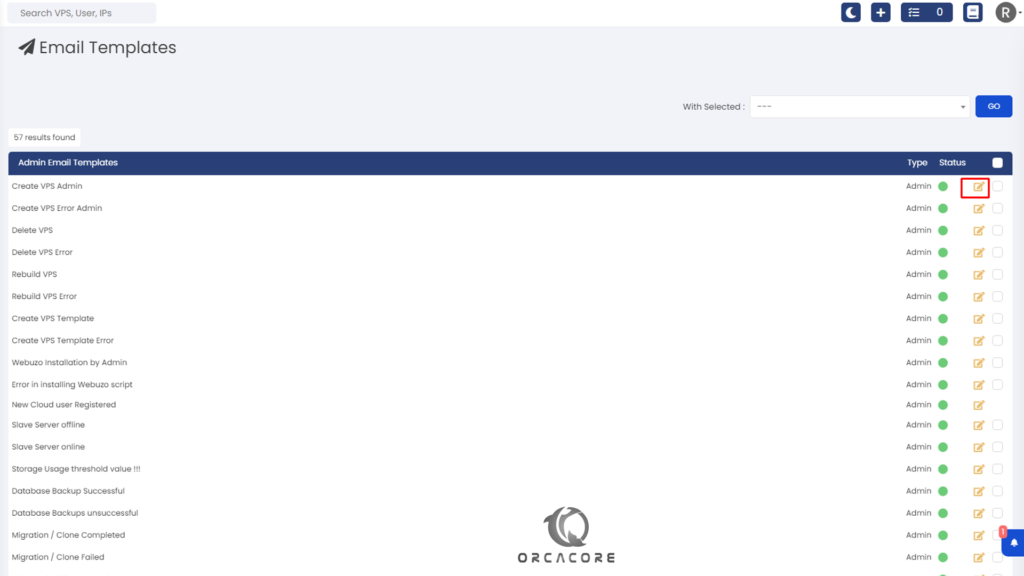
You can click on the edit icon that is available at the end of each line to personalize each email’s content. Also, you can see green circles that show this template is enabled. You can disable or enable each template you want. Therefore, pick the emails you want and select Disable Templates from the drop-down list and click on GO to make changes.
Conclusion
In this article, We learned how to set email settings in the Virtualizor panel. Also, we found out how to edit email templates. Maybe you are interested to read our other articles about Vitualizor from this link.
It’s my honor to share what I know with anyone anywhere. Please don’t hesitate to comment under the post if you have any questions.