Share your love
Froxlor Server Management Software on Debian 12 Bookworm
In this guide, we want to show you to Install, Configure, and Access the Froxlor Server management Software via the Web Interface on Debian 12 Bookworm. Froxlor is an open-source and easy-to-use server management software that you can use to manage your hosting platform.
You can follow the steps below to install Froxlor from the command line with LAMP Stack on Debian 12 and Access its dashboard via Web GUI.
How To Set up Froxlor Server Management on Debian 12 Bookworm?
To install Froxlor software on Debian 12, you need some requirements. Let’s see what we need.
Requirements
First, you must have access to your server as a non-root user with sudo privileges to run commands as a root user. For this purpose, you can visit this guide o Initial Server Setup with Debian 12 Bookworm.
As we said, we want to install Froxlor with LAMP Stack. So you can install it by following this guide on Install LAMP Stack on Debian 12 Bookworm.
When you are done, follow the steps below to start your Froxlor Software Setup on Debian 12.
Step 1 – Required PHP Extensions For Froxlor Server Management Software
At this point, we assumed that you have installed PHP from the LAMP Stack installation. Now you need some PHP extensions for your Froxlor installation on Debian 12 Bookworm. To do this, you can run the commands below:
sudo apt install php-xml php-posix php-mbstring php-curl php-bcmath php-zip php-jsonStep 2 – Create Froxlor User Database on Debian 12 Bookworm
In this step, you must log in to your MariaDB shell which you have installed from the requirements. To do this, run the command below:
sudo mysql -u root -p
From your MariaDB shell, create a user for Froxlor and grant all privileges to it with the commands below:
MariaDB [(none)]> CREATE USER 'froxloruser'@'localhost' IDENTIFIED BY 'password';

MariaDB [(none)]> GRANT ALL PRIVILEGES ON *.* TO 'froxloruser'@'localhost' WITH GRANT OPTION;
Next, flush the privileges and exit from your MariaDB shell:
MariaDB [(none)]> FLUSH PRIVILEGES;

MariaDB [(none)]> EXIT;
Important Note: You must specify this user as the MySQL root user in the web installer.
Now proceed to the following steps to add the Froxlor GPG key and Repository to your Debian 12 server.
Step 3 – Add Froxlor GPG Key on Debian 12
At this point, use the following curl command to add the Froxlor server management GPG key:
sudo curl -sSLo /usr/share/keyrings/deb.froxlor.org-froxlor.gpg https://deb.froxlor.org/froxlor.gpgStep 4 – Add Froxlor Repository on Debian 12
Now use the following command to add the Froxlor repository on Debian 12 so that you can install the latest Froxlor:
sudo sh -c 'echo "deb [signed-by=/usr/share/keyrings/deb.froxlor.org-froxlor.gpg] https://deb.froxlor.org/debian $(lsb_release -sc) main" > /etc/apt/sources.list.d/froxlor.list' Step 5 – Install Froxlor on Debian 12 Bookworm
In this step, you can run the system update and install Froxlor software on Debian 12:
# sudo apt update
# sudo apt install froxlor -y
During your Froxlor installation, you will be asked to choose one of the mail server configurations and set the mail system name.
Choose your desired one and press ok to finish your installation.
Step 6 – Access Froxlor Server Management Web Interface
Here you can continue your Froxlor installation from the web interface on Debian 12 Bookworm. Type your server’s IP address in your web browser followed by froxlor:
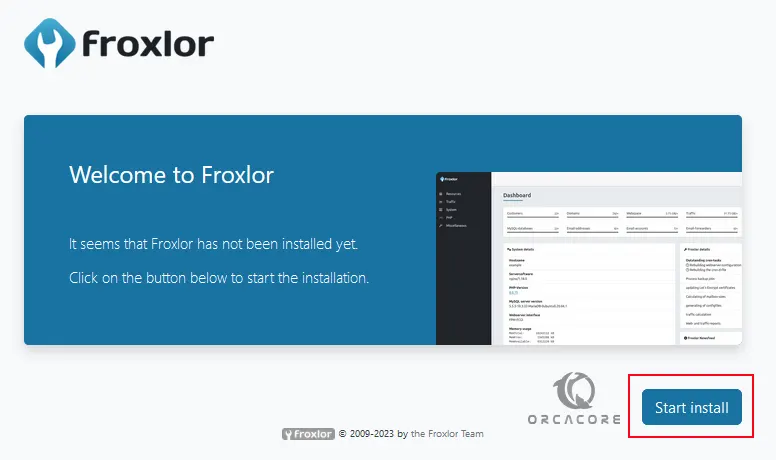
http://server-ip-address/froxlorWhen you access your Froxlor welcome screen, click Start Install.
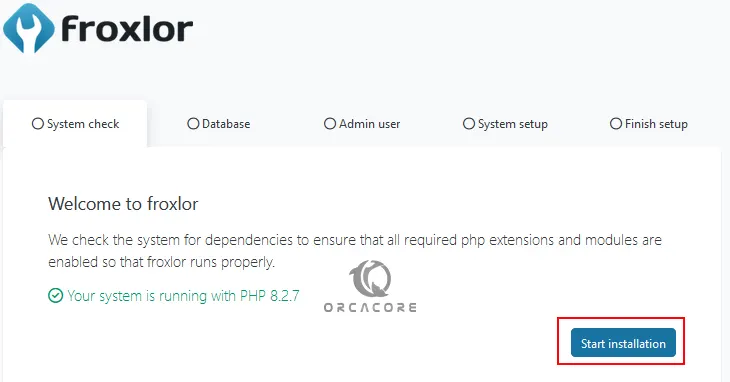
Then, from the system check, when everything is ok, click start installation.
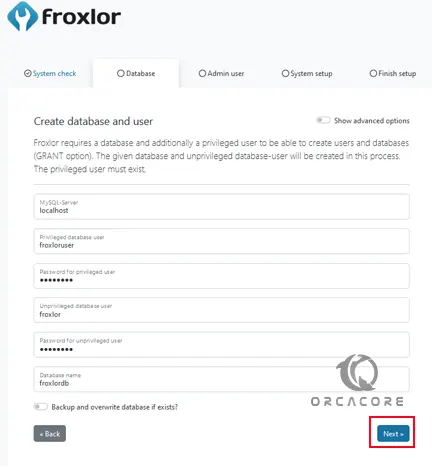
At this point, you must enter your Froxlor privileged user that you have created in step 2. Also, the given database and unprivileged user will be created here. When you are done, click Next.
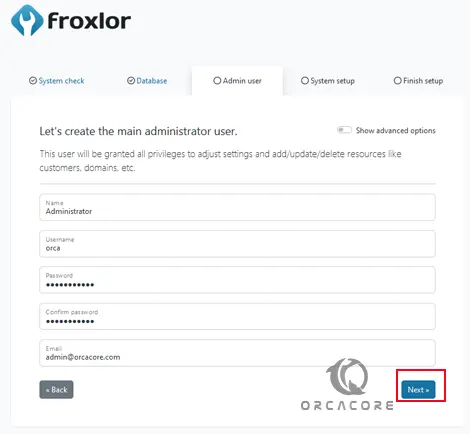
Now you must create an admin user to access your Froxlor dashboard on Debian 12 Bookworm and click Next.
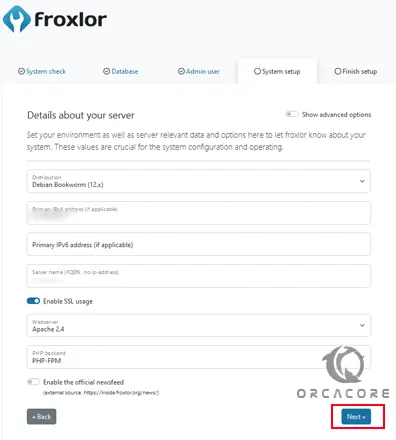
Here you need to enter your server details like the server’s IP address and hostname.
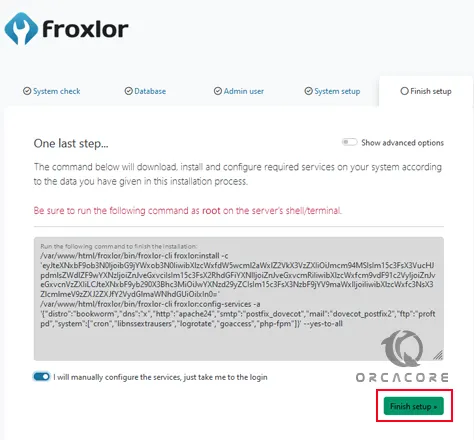
Now you will see a command. You can wait to automatically finish or do it manually and click Finish setup.
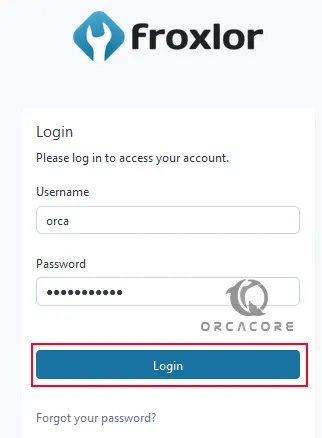
Then, you will see your Froxlor server management login screen. Enter your Admin user and password and click Login.
Finally, you will see your Froxlor dashboard on Debian 12 Bookworm.

From here you can easily manage your server via the Froxlor web panel dashboard.
For more information, you can visit Froxlor documentation.
Conclusion
At this point, you have learned to Set up Froxlor Server Management Software on Debian 12 Bookworm by using the LAMP Stack, Adding the Froxlor Repository to your server, and accessing it through the web interface.
If you are looking for any help, please comment for us.
Hope you enjoy using it. You may be interested in these articles:


