Share your love
Install and Configure DHCP Server on Windows Server 2019
In this guide, we want to teach you to Install and Configure DHCP Server on Windows Server 2019.
A DHCP Server is a network server that automatically provides and assigns IP addresses, default gateways, and other network parameters to client devices. It relies on the standard protocol known as Dynamic Host Configuration Protocol or DHCP to respond to broadcast queries by clients.
A DHCP server automatically sends the required network parameters for clients to properly communicate on the network. Without it, the network administrator has to manually set up every client that joins the network, which can be cumbersome, especially in large networks. DHCP servers usually assign each client a unique dynamic IP address, which changes when the client’s lease for that IP address has expired.
Install and Configure DHCP Server on Windows Server 2019
In this article, you will learn to install DHCP and create DHCP scope on your Windows Server.
Follow the steps below to complete this guide.
Install DHCP Server Role on Windows Server 2019
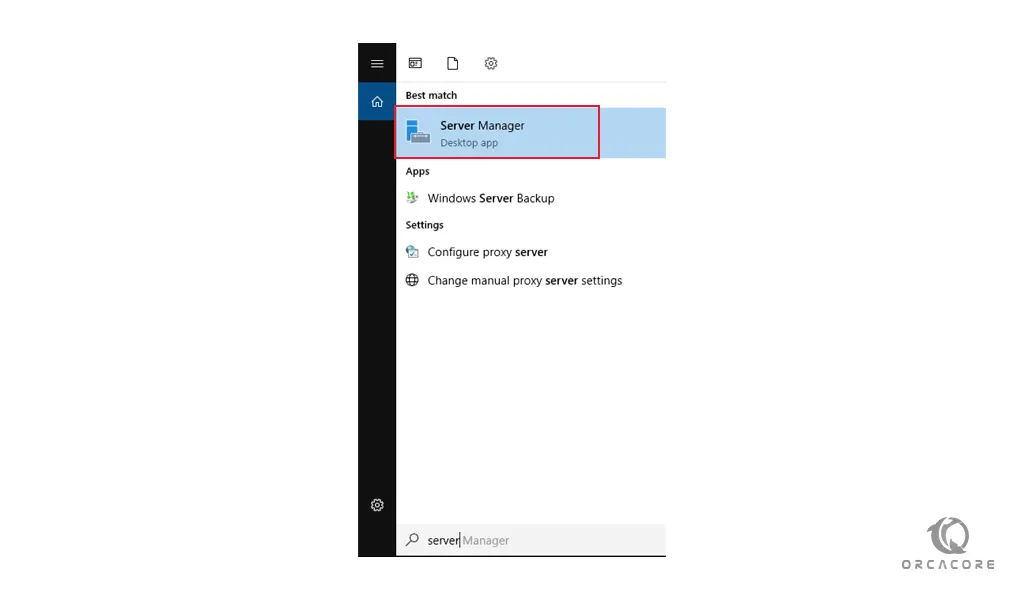
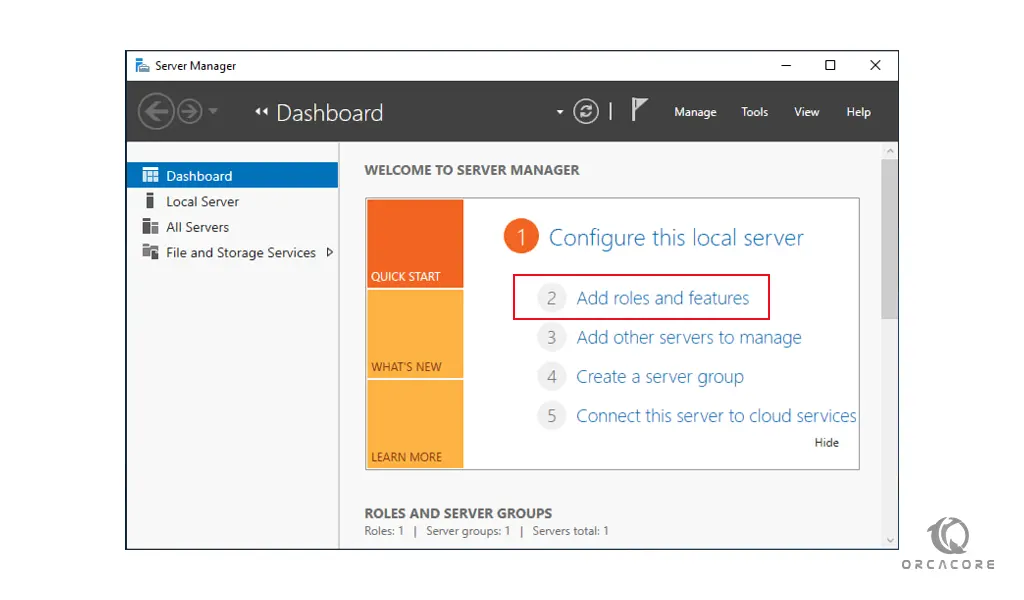
First, you must open your server manager so that you can start the installation process. Hit your “Windows” button and type in “Server Manager” and choose the app that brings itself up.
On your “Server Manager” window, click on “Add Roles and Features“.
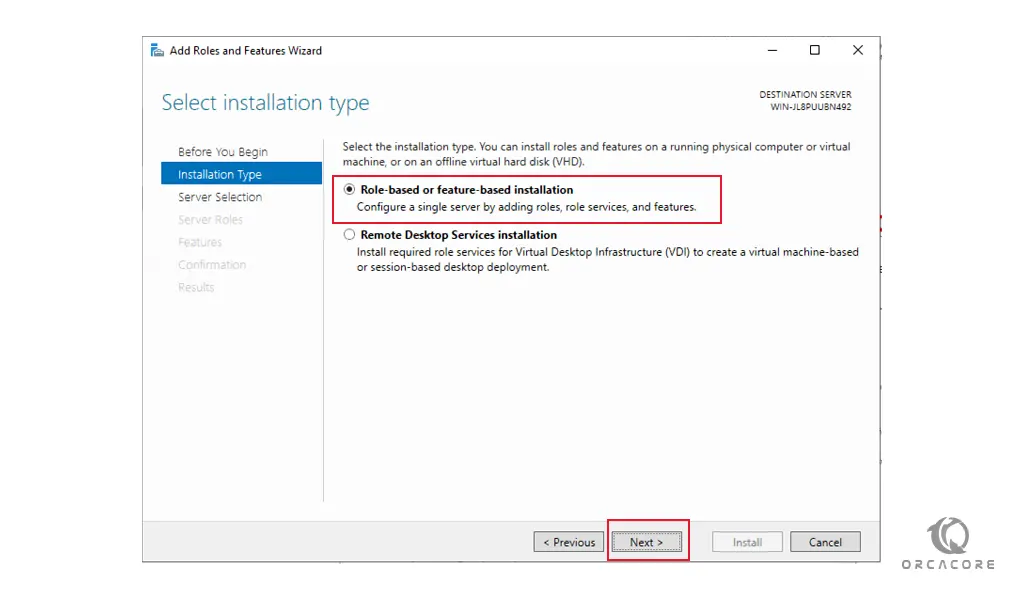
This will bring up a pop-up window. Click “Next” on that pop-up.
Then, from the installation type window, select “Role Based or Feature-based installation” and click Next.
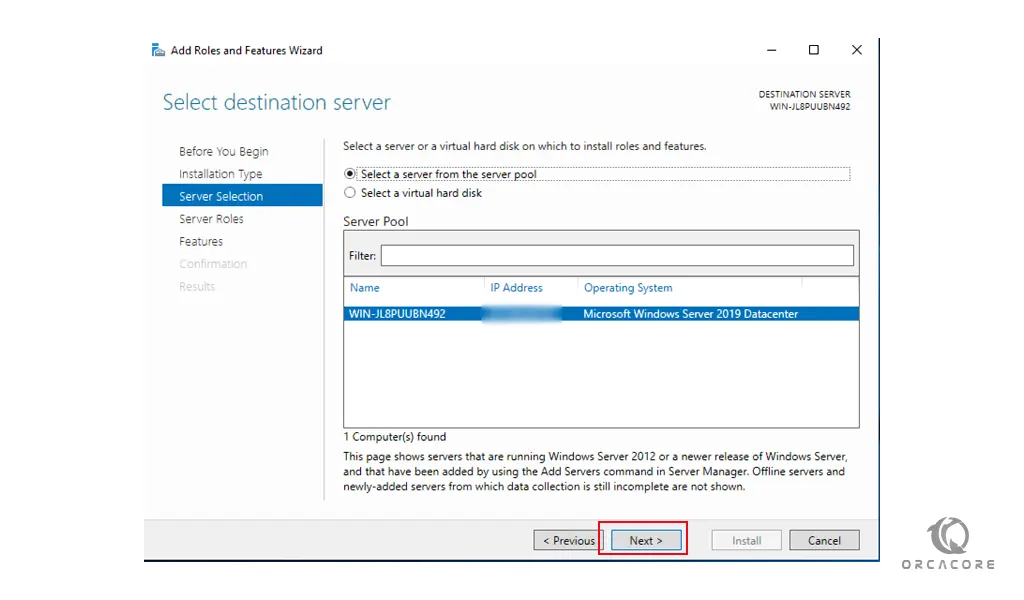
Next, choose the server you would wish to install the DHCP Server on and click Next.
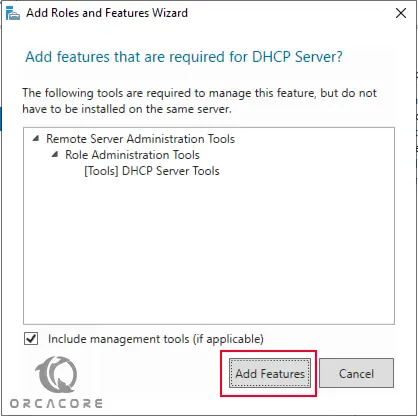
At this point, you will see the Select Server Roles window. Choose DHCP Server. another pop-up window will come up titled “Add features that are required for DHCP Server?“. Simply click on “Add Features“. Click on “Next” after that.
On the next page titled “DHCP Server” simply click on “Next“.
The next page is titled “Confirm installation selections“. Look at the list provided and confirm that DHCP Server and others are listed. After that, click “Install“.
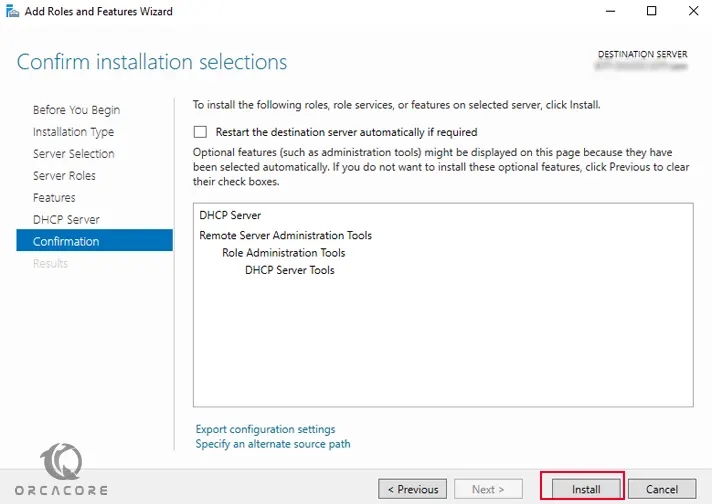
Once the installation is complete, close the wizard.
Authorize DHCP Server
At this point, you must authorize the DHCP server to start handing out IP addresses to other machines.
To do this, go to Server Manager > Tools, and select DHCP to open the DHCP Management Console.

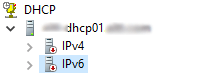
You can see that both IPv4 and IPv6 have a red down arrow, which means the DHCP server has not been yet authorized.
Now right-click on the DHCP Server name and click Authorize.
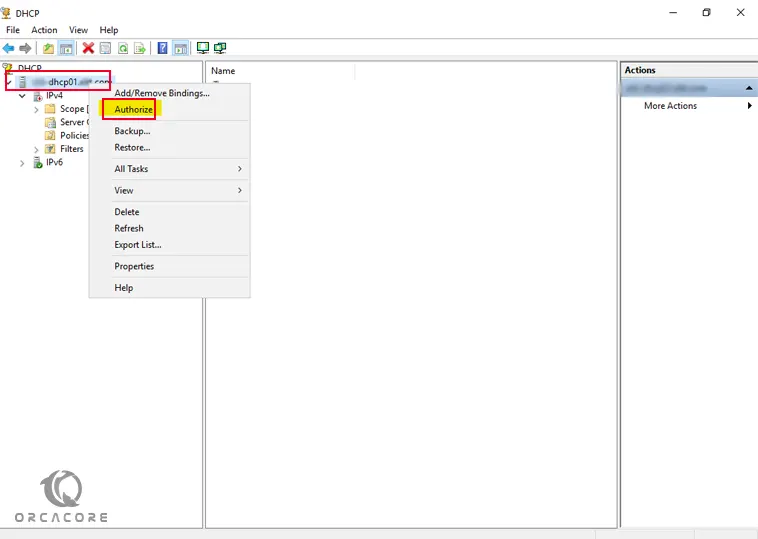
After a couple of seconds, the DHCP Server should be authorized on Windows server 2019 and the IPv4 and IPv6 icons should show a green checkmark.
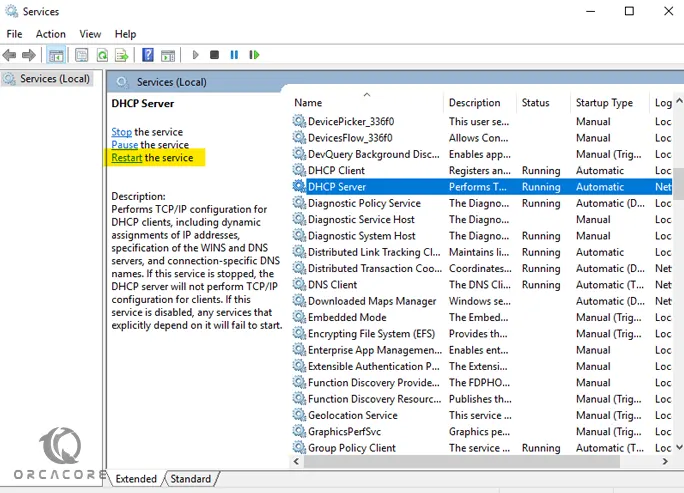
Note: Sometimes you might need to manually restart the DHCP Server service for the Authorization to complete.
How To Create a DHCP Scope
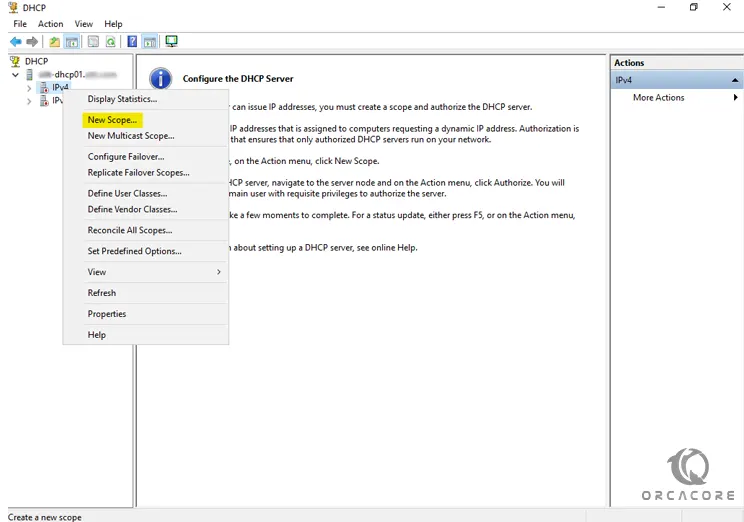
At this point, we want to show you how to create an IPV4 DHCP scope. This will be a simple /24 scope that will give us a maximum of 253 usable IP addresses. To do this, open your Server manager again and go to Tools and open the DHCP Management Console.
Right-click on IPv4 and select New Scope.
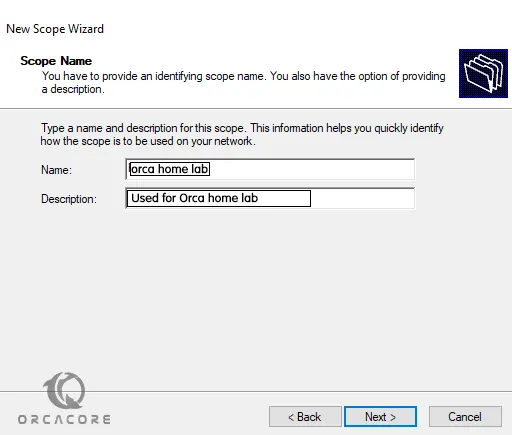
This will open the New Scope Wizard. Click Next to continue.
Then, you will see the Scope Name window. Enter a name and a description for your new scope and click Next.
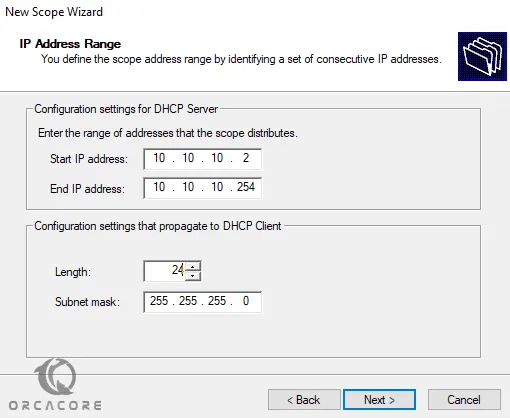
IP Address Range
At this point, you need to enter the Start and End IP addresses, this will be the IP range for the scope.
A length of 24 gives us a total of 253 usable IP addresses, with the range starting at X.X.X.1 and ending at X.X.X.254. We don’t start the range with .1 because the first IP is usually used by the Gateway, and the last IP (.255) is used for Broadcast. Click Next when ready.
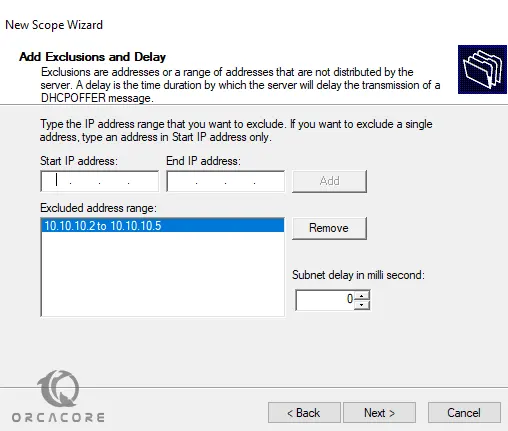
Then, add any IP addresses that will be excluded from the scope.
Adding Exclusions and Delay is optional. Click Next.
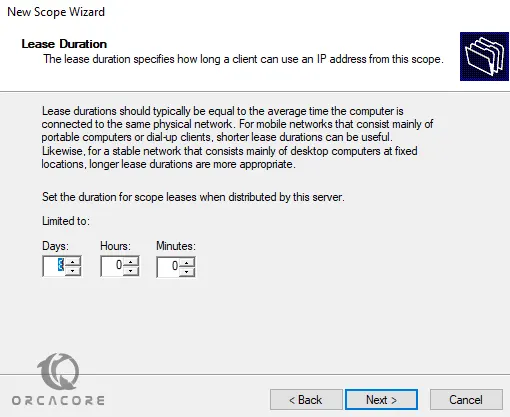
Next, you will see the Lease Duration window. This is the time that an IP address will be leased before it is renewed. Click Next.
At this step on the configure DHCP options, select the Yes, I want to configure these options now and click Next.
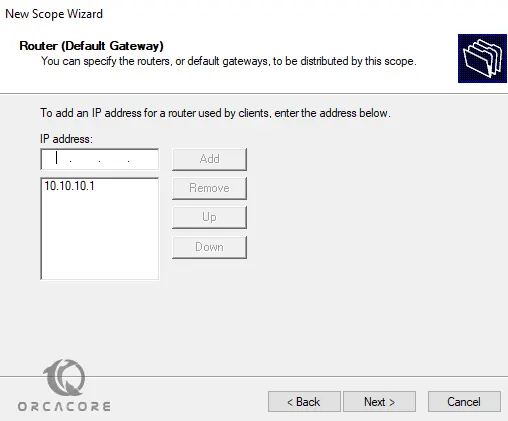
Then, enter the Router (Default Gateway) IP address and click Add. In most cases, the first IP in the IP range is used as the Gateway.
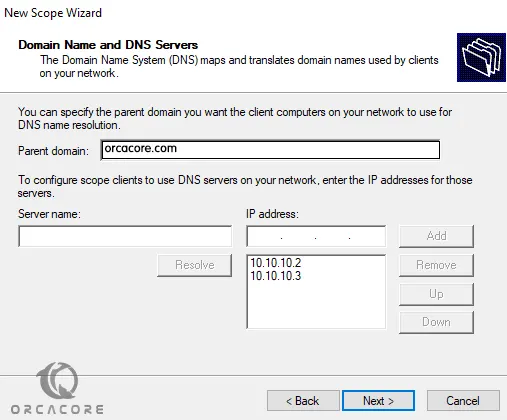
Note: If your DHCP is already joined to the Domain, the Parent domain and DNS servers will already be configured. If not, go ahead and manually add them. Click Next.
If you are configuring a WINS Server, go ahead and add it here. Otherwise, click Next.
- WINS server is a Microsoft Windows-based server running the Windows Internet Name Service (WINS) that can accept NetBIOS name registrations and queries.
When ready, select the Yes, I want to activate this scope now option and click Next.
Finally, select Finish to finalize the scope activation.
The DHCP Scope has now been created. Machines in the same network will now be able to reach the DHCP server and receive an IP address from it.
Conclusion
At this point, you learn to Install and Configure DHCP Server on Windows Server 2019. Also, you learn to authorize it and create a new scope.
Hope you enjoy it.
You may be interested in these articles:
Install and Configure MAMP Stack on Windows 10
Disable Ctrl+Alt+Delete logon on Windows Server
Remove Roles and Features Not Installed on Windows Server 2012