
Share your love
Install and Configure LibreNMS on Ubuntu 22.04
This tutorial intends to teach you to Install and Configure LibreNMS on Ubuntu 22.04. LibreNMS is a powerful open-source network monitoring solution that can be used to monitor devices and services on your network. It offers various features, including support for multiple protocols, performance monitoring, alerts, and more. LibreNMS is easy to install and configure, and it can be used on a variety of platforms.
You can now proceed to the guide steps below on the Orcacore website to complete LibreNMS setup on Ubuntu 22.04.
Table of Contents
Steps To Install and Configure LibreNMS on Ubuntu 22.04
To complete this guide, you must log in to your server as a non-root user with sudo privileges. To do this, you can follow this guide on Initial Server Setup with Ubuntu 22.04.
1. Install MariaDB for LibreNMS Setup
First, update your local package index with the following command:
sudo apt updateThen, use the following command to install MariaDB on Ubuntu 22.04:
sudo apt install mariadb-server -yWhen your installation is completed, secure your MariaDB by running the script below and setting a root password for it:
sudo mysql_secure_installationWhen you are done, you need to edit your MariaDB configuration file.
Configure MariaDB
Open the file with your favorite text editor, here we use vi:
sudo vi /etc/mysql/mariadb.conf.d/50-server.cnfFind the [mysqld] section and add the following lines to the section:
innodb_file_per_table=1
lower_case_table_names=0
When you are done, save and close the file.
Now restart your MariaDB service with the command below to apply the changes:
sudo systemctl restart mariadbCreate a Database for LibreNMS
At this point, you need to create a database and user for LibreNMS on Ubuntu 22.04.
First, log in to your MariaDB shell with the following command:
sudo mysql -u root -pFrom your MariaDB shell, you need to create a database for your LibreNMS. Here we named it librenms, you can replace it with your desired name.
MariaDB [(none)]> CREATE DATABASE librenms CHARACTER SET utf8mb4 COLLATE utf8mb4_unicode_ci;Also, you need to create a user for your LibreNMS database. Here we named it orca you can choose your name.
Remember to replace the password with a strong password.
MariaDB [(none)]> CREATE USER 'orca'@'localhost' IDENTIFIED BY 'securepassword';Here you need to grant all the privileges to the LibreNMS database with the command below:
MariaDB [(none)]> GRANT ALL PRIVILEGES ON librenms.* TO 'orca'@'localhost';Then, flush the privileges and exit from your MariaDB console:
MariaDB [(none)]> FLUSH PRIVILEGES;
MariaDB [(none)]> EXIT;
2. Install Nginx and PHP for LibreNMS
LibreNMS installation on Ubuntu 22.04 requires an Nginx web server, PHP, and some dependencies too.
To install them on Ubuntu 22.04, you can run the following command:
sudo apt install nginx-full nmap php-cli php-curl php-fpm php-gd php-json php-mbstring php-mysql php-snmp php-xml php-zip python3-dotenv python3-pip python3-pymysql python3-redis python3-setuptools python3-systemd rrdtool snmp snmpd whois acl curl composer fping git graphviz imagemagick mtr-tiny -yConfigure php.ini File
When your packages are installed, you need to edit the php.ini file to set your time zone on Ubuntu 22.04.
Open the files below with your favorite text editor; here we use vi:
# sudo vi /etc/php/8.1/fpm/php.ini
# sudo vi /etc/php/8.1/cli/php.ini
Find the date.timzone line and uncomment it by removing the “;” from the beginning of the line and setting it to UTC:
date.timezone = UTCWhen you are done, save and close the files.
3. Set up and Configure LibreNMS on Ubuntu 22.04
First of all, you need to create a user for LibreNMS on Ubuntu 22.04 with the command below:
sudo useradd librenms -d /opt/librenms -M -r -s /bin/bashThen, add the LibreNMS user to the www-data group with the following command:
sudo usermod -a -G librenms www-dataNow you can download the latest version of LibreNMS from Git to the /opt directory with the command below:
sudo git clone https://github.com/librenms/librenms.git /opt/librenmsNext, create a log file for LibreNMS with the following command:
sudo touch /opt/librenms/logs/librenms.logThen, copy the SNMP sample configuration file with the following command:
sudo cp /opt/librenms/snmpd.conf.example /etc/snmp/snmpd.confNext, edit the snmpd.conf file:
sudo vi /etc/snmp/snmpd.confFind the following line:
com2sec readonly default RANDOMSTRINGGOESHEREAnd, replaced it with the following line:
com2sec readonly default mysnmpserverkey Save and close the file.
Then, download the SNMP distro binary and copy it to your desired location:
# sudo curl -o distro https://raw.githubusercontent.com/librenms/librenms-agent/master/snmp/distro
# sudo chmod +x distro
# sudo mv distro /usr/bin/distro
Next, restart the SNMP service to apply the changes:
sudo systemctl restart snmpdNext, you will also need to copy the LibreNMS cron and logrotate files to the desired location on Ubuntu 22.04. You can copy them with the following command:
# sudo cp /opt/librenms/librenms.nonroot.cron /etc/cron.d/librenms
# sudo cp /opt/librenms/misc/librenms.logrotate /etc/logrotate.d/librenms
Next, change the directory to the librenms and install required dependencies using the following command:
# cd /opt/librenms
# ./scripts/composer_wrapper.php install --no-dev
Once all the dependencies are installed, change the ownership of the librenms directory and give necessary permissions with the following command:
# chown -R www-data:librenms /opt/librenms
# chmod -R 775 /opt/librenms
# setfacl -d -m g::rwx /opt/librenms/rrd /opt/librenms/logs /opt/librenms/bootstrap/cache/ /opt/librenms/storage/
# setfacl -R -m g::rwx /opt/librenms/rrd /opt/librenms/logs /opt/librenms/bootstrap/cache/ /opt/librenms/storage/
Once you are finished, you can proceed to the next step.
4. Configure Nginx as a reverse proxy for LibreNMS
At this point, you need to set Nginx as a reverse proxy for LibreNMS. You need to create a virtual host file for Librenms on Ubuntu 22.04 with the command below:
sudo vi /etc/nginx/conf.d/librenms.confAdd the following contents to the file:
Remember to replace the domain name with your own.
server {
 listen      80;
 server_name example.com;
 root        /opt/librenms/html;
 index       index.php;

 charset utf-8;
 gzip on;
 gzip_types text/css application/javascript text/javascript application/x-javascript image/svg+xml text/plain text/xsd text/xsl text/xml image/x-icon;
 location / {
  try_files $uri $uri/ /index.php?$query_string;
 }
 location /api/v0 {
  try_files $uri $uri/ /api_v0.php?$query_string;
 }
 location ~ \.php {
  include fastcgi.conf;
  fastcgi_split_path_info ^(.+\.php)(/.+)$;
  fastcgi_pass unix:/var/run/php/php8.1-fpm.sock;
 }
 location ~ /\.ht {
  deny all;
 }
}
When you are done, save and close the file.
Restart Nginx to apply the changes:
sudo systemctl restart nginx php8.1-fpm5. Access LibreNMS Dashboard
At this point, you can access the LibreNMS web installation by typing your domain name in your web browser:
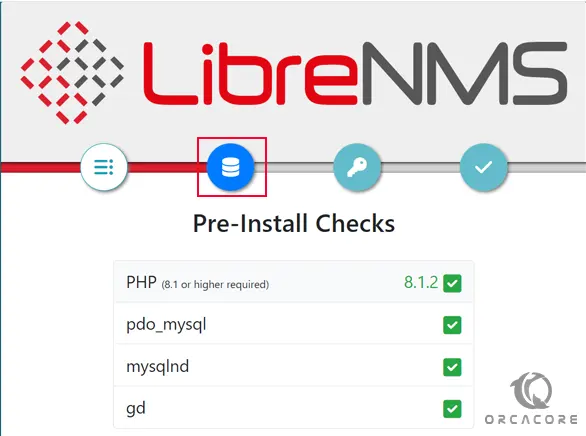
http://your-domain-nameYou will see the pre-installation of LibreNMS on Ubuntu 22.04, make sure that all checks are successful, then click on the database icon.
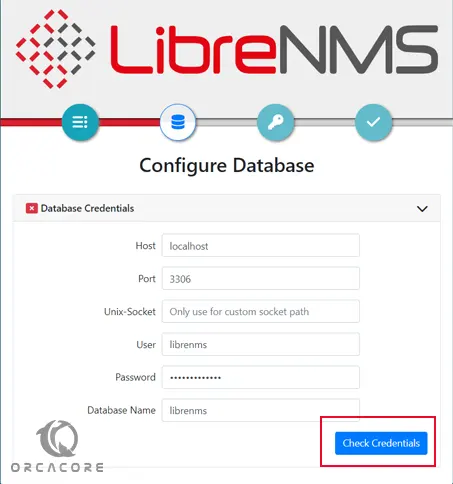
In the Database screen, enter your database credentials and click on the check credentials.
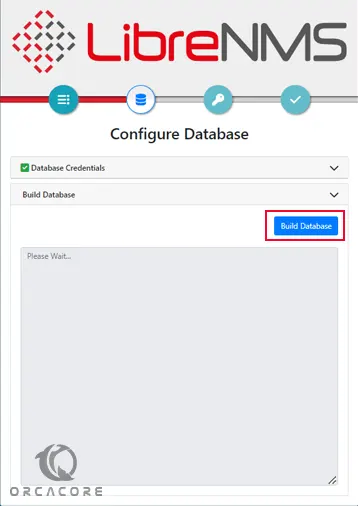
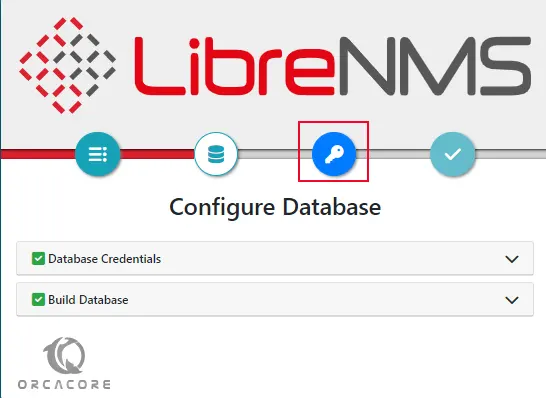
Once it’s successful, you should see the following page, and click on the Build Database button.
Then, you will see the following screen, you need to click on the key icon.
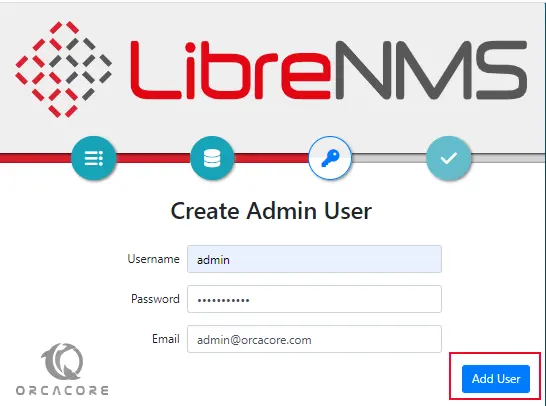
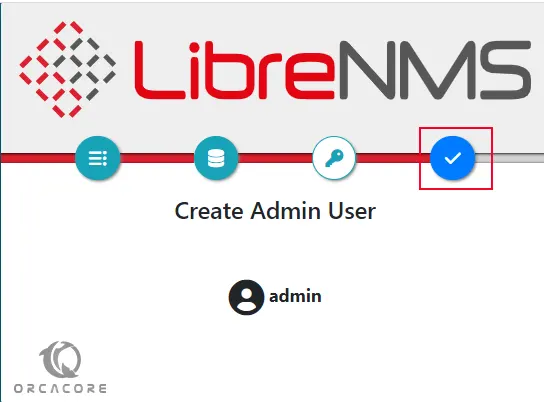
Now provide your admin username, email, and password, and click on the Add User button.
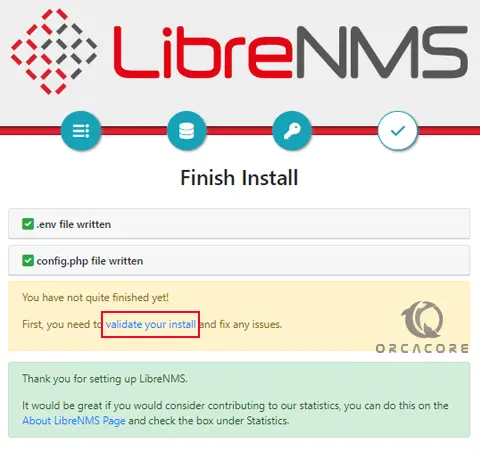
Next, click on the Finish installation button.
Next, click on “validate your install”.
You should see the LibreNMS login page. Provide your LibreNMS admin username and password, and click on the Login button.
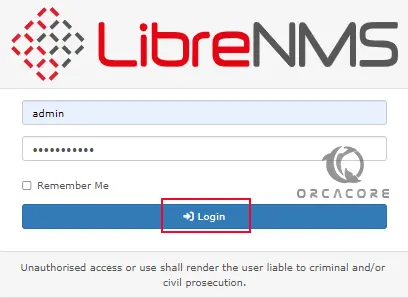
Now you will see your LibreNMS dashboard on Ubuntu 22.04.

That’s it, you are done.
Conclusion
At this point, you have learned to Install and Configure LibreNMS on Ubuntu 22.04. Installing LibreNMS on Ubuntu 22.04 is used to monitor network devices with automatic discovery and detailed metrics. It’s open-source, easy to set up, and supports alerts, APIs, and integrations.
Hope you enjoy it. Please subscribe to us on Facebook, Instagram, and YouTube.
You may also like these articles:
2 ways To Install Android Studio on Ubuntu 20.04
How To Use timedatectl Command in Linux

