Share your love
Install and Configure OpenNMS on Centos 7: Free Network Monitoring
This guide intends to teach you to Install and Configure OpenNMS on Centos 7. When we want to monitor unlimited devices in our network at a single instance, we can use OpenNMS. It’s an open-source and free network monitoring web application system that helps in detecting and monitoring services or nodes automatically in the network. More devices or nodes can also be added to OpenNMS easily.
Now follow the steps below on the Orcacore website to set up OpenNMS Horizon setup on Centos 7.
Table of Contents
Steps To Install and Configure OpenNMS on Centos 7
To complete the OpenNMS Monitoring setup on Centos 7, you must log in to your server as a non-root user with sudo privileges and set up a basic firewall. To do this, you can follow our guide on Initial Server Setup with Centos 7.
Also, you need to have PostgreSQL installed on your server. To do this, you can follow our guide on How To Install PostgreSQL 15 on Centos 7.
1. Install Java For OpenNMS Monitoring Setup
Because OpenNMS is written in Java, you must have Java installed on your server. First, run the system update:
sudo yum update -yThen, install the required packages by using the command below:
sudo yum install vim curl wget -yNow use the command below to install Java on Centos 7:
sudo yum install java-11-openjdk-devel -yVerify your Java installation by checking its version:
java -versionOutput
openjdk version "11.0.18" 2023-01-17 LTS
OpenJDK Runtime Environment (Red_Hat-11.0.18.0.10-1.el7_9) (build 11.0.18+10-LTS)
OpenJDK 64-Bit Server VM (Red_Hat-11.0.18.0.10-1.el7_9) (build 11.0.18+10-LTS, mixed mode, sharing)2. Set up OpenNMS Monitoring on Centos 7
The OpenNMS packages aren’t available in the default Centos 7 repository. So you need to add it manually.
Import OpenNMS GPG Key
At this point, you need to use the following command to import the OpenNMS GPG key:
sudo rpm --import https://yum.opennms.org/OPENNMS-GPG-KEYAdd OpenNMS Repository
Then, you need to add the OpenNMS repo to your server by using the command below:
sudo yum install https://yum.opennms.org/repofiles/opennms-repo-stable-rhel7.noarch.rpm -yInstall OpenNMS on Centos
Now you can easily use the command below to install OpenNMS:
sudo yum install opennms -yThis will install all the dependencies on your server.
3. Configure PostgreSQL for OpenNMS on Centos 7
When your dependencies and OpenNMS are installed on your server, you need to configure PostgreSQL.
First, you need to initialize the PostgreSQL by using the following command:
sudo /usr/pgsql-15/bin/postgresql-15-setup initdbOutput
Initializing database ... OKThen, start and enable the PostgreSQL service with the following commands:
# sudo systemctl enable postgresql-15
# sudo systemctl start postgresql-15
Verify your PostgreSQL is active and running on Centos 7:
sudo systemctl status postgresql-15Output
● postgresql-15.service - PostgreSQL 15 database server
Loaded: loaded (/usr/lib/systemd/system/postgresql-15.service; enabled; vendor preset: disabled)
Active: active (running) since Wed 2023-03-29 03:56:39 EDT; 10s ago
Docs: https://www.postgresql.org/docs/15/static/
Process: 9064 ExecStartPre=/usr/pgsql-15/bin/postgresql-15-check-db-dir ${PGDATA} (code=exited, status=0/SUCCESS)
Main PID: 9069 (postmaster)
CGroup: /system.slice/postgresql-15.service
...Next, switch to your PostgreSQL user:
sudo -i -u postgresCreate OpenNMS Database and User
At this point, use the following command to create an OpenNMS Monitoring user:
createuser -P opennmsEnter password for new role:
Enter it again: Then, create the OpenNMS database on Centos 7 by using the command below:
createdb -O opennms opennmsNext, protect the default user with a password:
psql -c "ALTER USER postgres WITH PASSWORD 'StrongPassword';"Output
ALTER ROLEExit the PostgreSQL shell:
-bash-4.2$ exitModify PostgreSQL Access Policy
At this point, you need to open the following file to modify the PostgreSQL access policy:
sudo vi /var/lib/pgsql/15/data/pg_hba.confFind the lines below and modify them by replacing ident with MD5:
# IPv4 local connections:
host    all             all             127.0.0.1/32            md5

# IPv6 local connections:
host    all             all             ::1/128                 md5
When you are done, save and close the file.
To apply the changes, restart PostgreSQL:
sudo systemctl restart postgresql-15Define database credentials in OpenNMS Config File
At this point, you need to define the database credentials in the OpenNMS Monitoring config file. Open the file with your favorite text editor, here we use vi:
sudo vi /opt/opennms/etc/opennms-datasources.xmlFind the lines below and define your database credentials:
<jdbc-data-source name="opennms"
                    database-name="opennms"
                    class-name="org.postgresql.Driver"
                    url="jdbc:postgresql://localhost:5432/opennms"
                    user-name="opennms"
                    password="opennms-user-password" />

<jdbc-data-source name="opennms-admin"
                    database-name="template1"
                    class-name="org.postgresql.Driver"
                    url="jdbc:postgresql://localhost:5432/template1"
                    user-name="postgres"
                    password="postgres-password" />
</datasource-configuration>
When you are done, save and close the file.
4. Manage OpenNMS Monitoring Service on Centos 7
First, you need to initialize OpenNMS by adding the Java settings:
sudo /opt/opennms/bin/runjava -sOutput
runjava: Looking for an appropriate JVM...
runjava: Checking for an appropriate JVM in JAVA_HOME...
runjava: Skipping... JAVA_HOME not set.
runjava: Checking JVM in the PATH: "/usr/lib/jvm/java-11-openjdk-11.0.18.0.10-1.el7_9.x86_64/bin/java"...
runjava: Found an appropriate JVM in the PATH: "/usr/lib/jvm/java-11-openjdk-11.0.18.0.10-1.el7_9.x86_64/bin/java"
runjava: Value of "/usr/lib/jvm/java-11-openjdk-11.0.18.0.10-1.el7_9.x86_64/bin/java" stored in configuration file.Next, initialize the database and detect system libraries in the /opt/opennms/etc/libraries.properties directory:
sudo /opt/opennms/bin/install -disAt this point, you can use the following commands to start and enable your OpenNMS service:
# sudo yum install chkconfig -y
# sudo systemctl enable --now opennms
Verify your OpenNMS service is active and running on Centos 7:
sudo systemctl status opennmsOutput
Loaded: loaded (/usr/lib/systemd/system/opennms.service; enabled; vendor preset: disabled)
Active: active (running) since Wed 2023-03-29 04:07:14 EDT; 4s ago
Process: 10624 ExecStartPost=/bin/sleep 3 (code=exited, status=0/SUCCESS)
Process: 9636 ExecStart=/opt/opennms/bin/opennms -s start (code=exited, status=0/SUCCESS)
Main PID: 10618 (java)
CGroup: /system.slice/opennms.service
├─10617 bash /opt/opennms/bin/opennms -s start
└─10618 /usr/lib/jvm/java-11-openjdk-11.0.18.0.10-1.el7_9.x86_64/b..5. Configure Firewall For OpenNMS
Here we assumed that you have enabled firewalld. By default, OpenNMS is listening on port 8980. You have to allow this port through the firewall using the following command:
sudo firewall-cmd --permanent --add-port=8980/tcpReload the firewall to apply the changes:
sudo firewall-cmd --reloadIf your SELinux is enabled on your server, you have to allow the port through SELinux:
sudo semanage port -a -t http_port_t -p tcp 89806. Access OpenNMS Web Interface
At this point, you can access OpenNMS Horizon through the Web interface on Centos 7 by typing your server’s IP address in your web browser followed by 8980/opennms:
http://server-ip-address:8980/opennmsYou will see the OpenNMS horizon login screen. Enter admin as the username and password and click Login.

Then, you should see the OpenNMS dashboard on Centos 7.
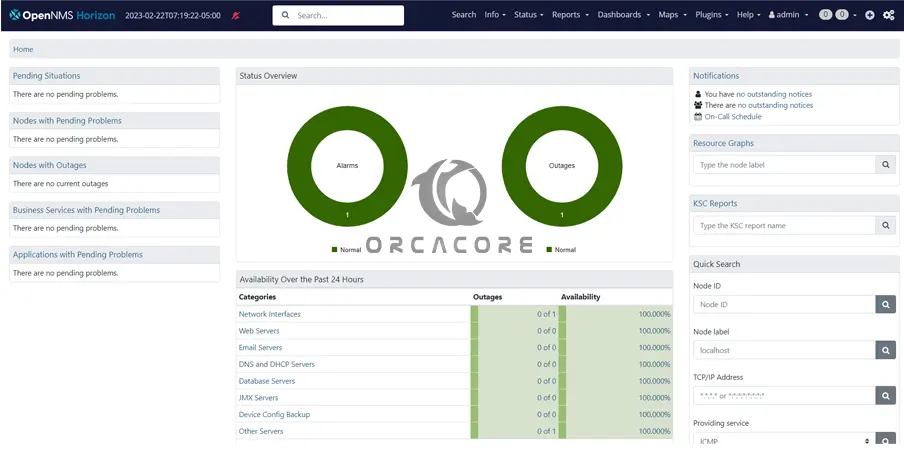
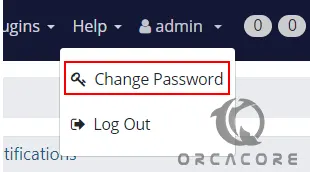
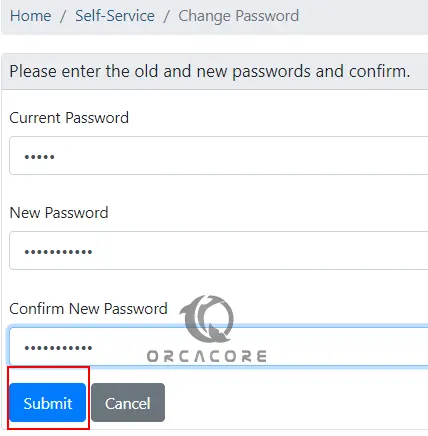
You can now change the password to a preferred one by navigating to admin → Change Password.
7. How To Monitor Systems with OpenNMS
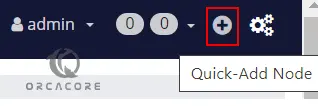
To be able to monitor systems, you need to add them to OpenNMS. Begin by clicking on the “+“ icon as shown below.
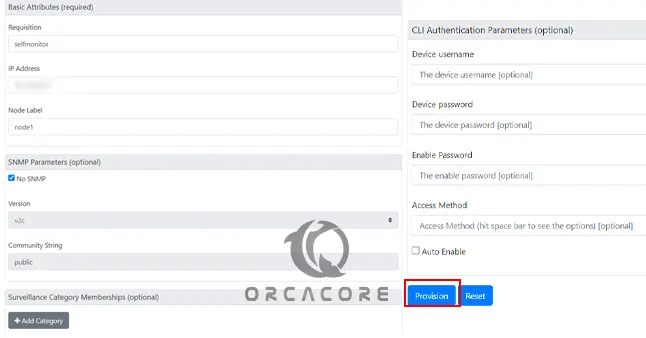
Enter the required details such as requisition, IP Address, and Node Label, and click Provision.
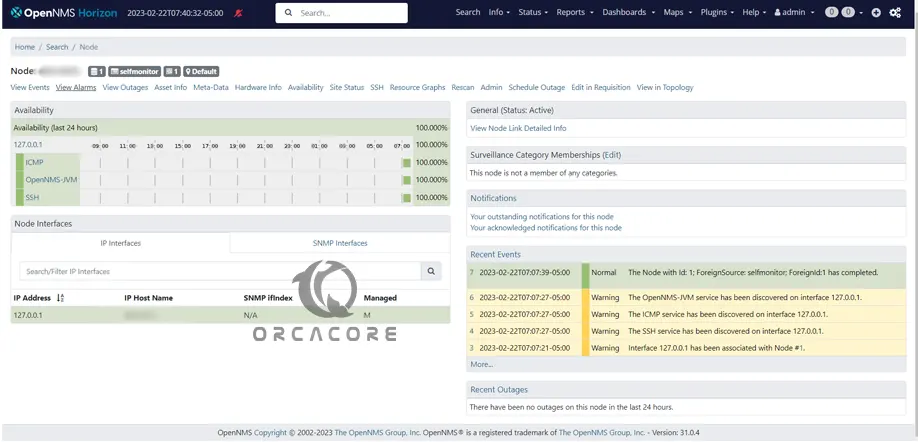
After the node has been added, it will appear under Info → Nodes.
You can now view graphs and create alerts for the device.
For more information, you can visit OpenNMS Documentation.
Conclusion
At this point, you have learned to Install and Configure OpenNMS Monitoring on Centos 7.
Hope you enjoy using it. You may also like these articles:
How To Upgrade Linux Kernel on Centos 7
How To Upgrade PHP Version on Centos 7
Centos set java_home permanently