Share your love
Install and Configure WAMP on Windows Server 2019
This guide from the Windows Tutorials intends to teach you How To Install and Configure WAMP on Windows Server 2019.
WAMP is an acronym that stands for Windows, Apache, MySQL, and PHP. It’s a software stack that means installing WAMP installs Apache, MySQL, and PHP on your operating system (Windows in the case of WAMP). Even though you can install them separately, they are usually bundled up, and for a good reason too.
Install and Configure WAMP on Windows Server 2019
To install the WAMP server on your Windows Server, follow the steps below.
Set up WAMP on Windows Server 2019
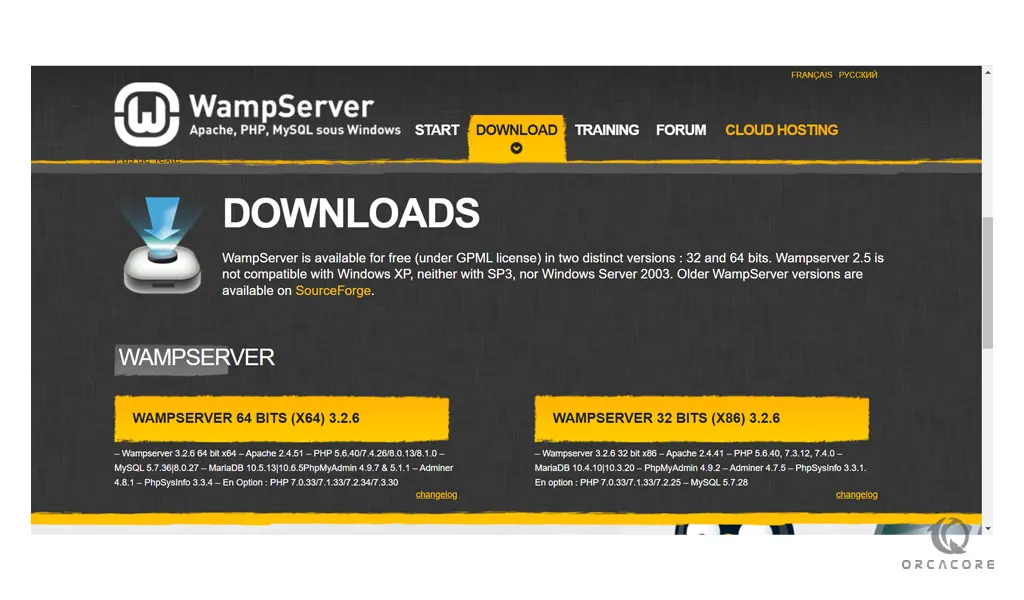
First, you need to visit the WAPM Server Downloads page and download the correct version according to your system.
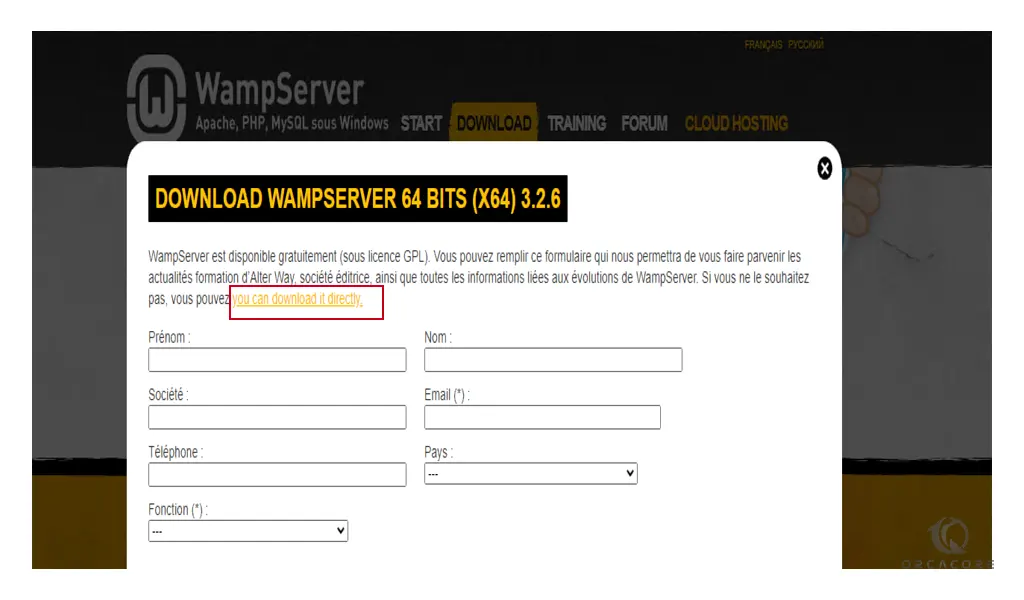
You will see a window in which you must click on “you can download it directly” as shown below.
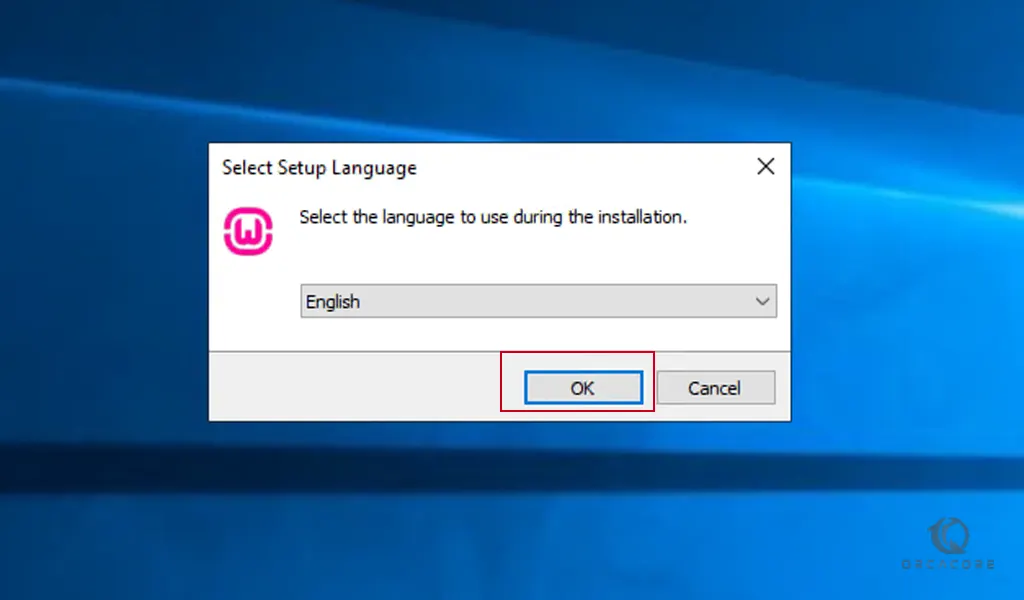
Once your download is completed, double-click the downloaded file. Then select the language you want and click Ok.
In the next step, you must check “I accept the agreement” and click Next.
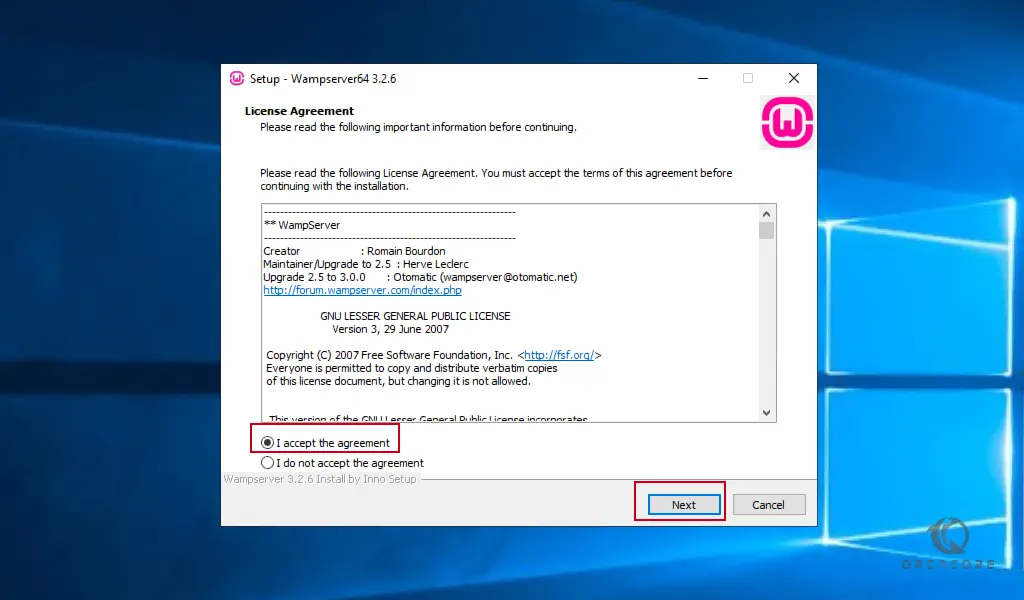
Next, read the important information and click Next.
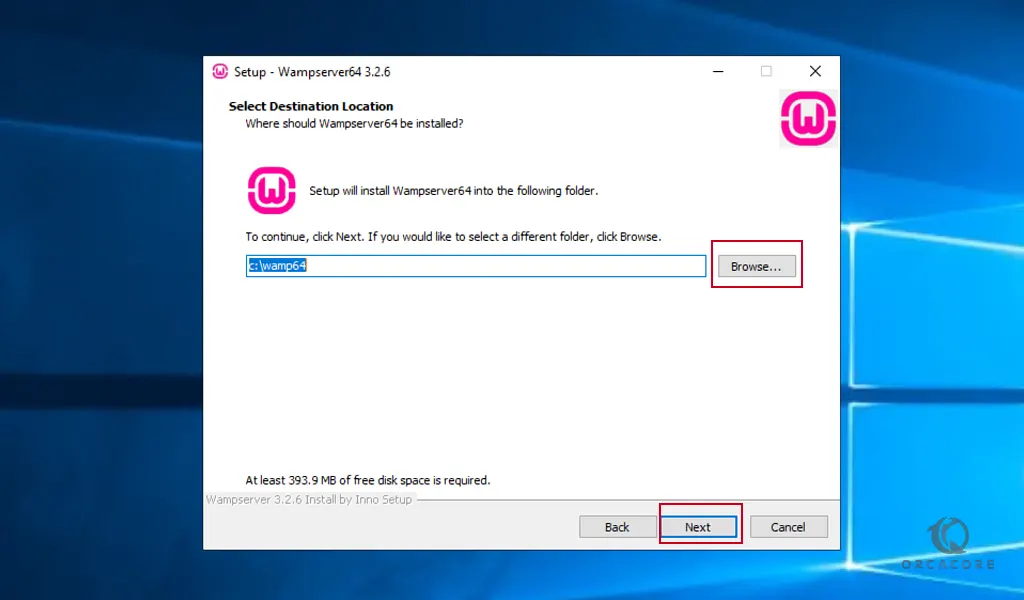
Now you need to specify the location where you want the wamp to be installed and click Next.
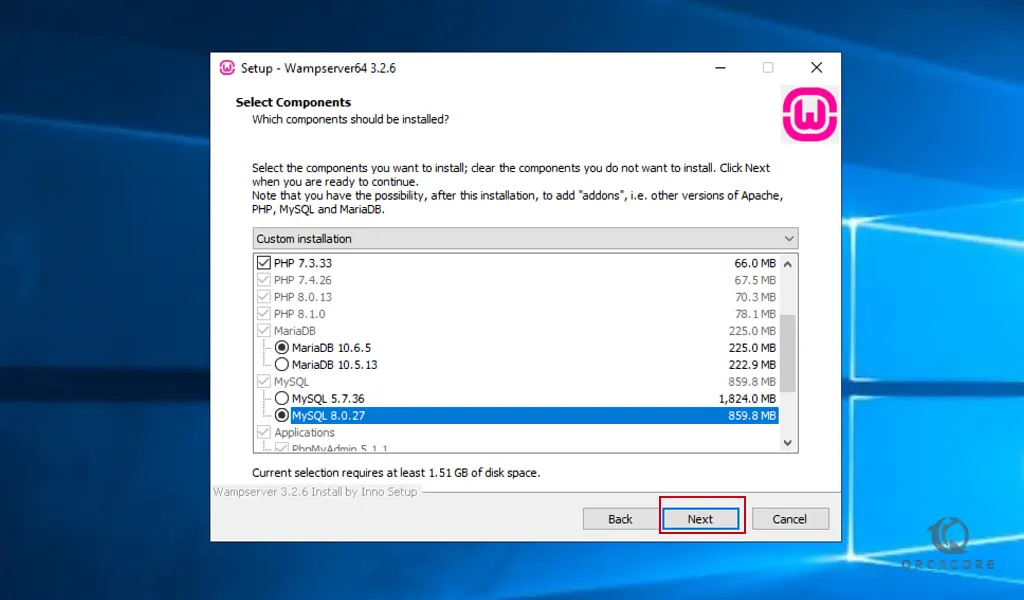
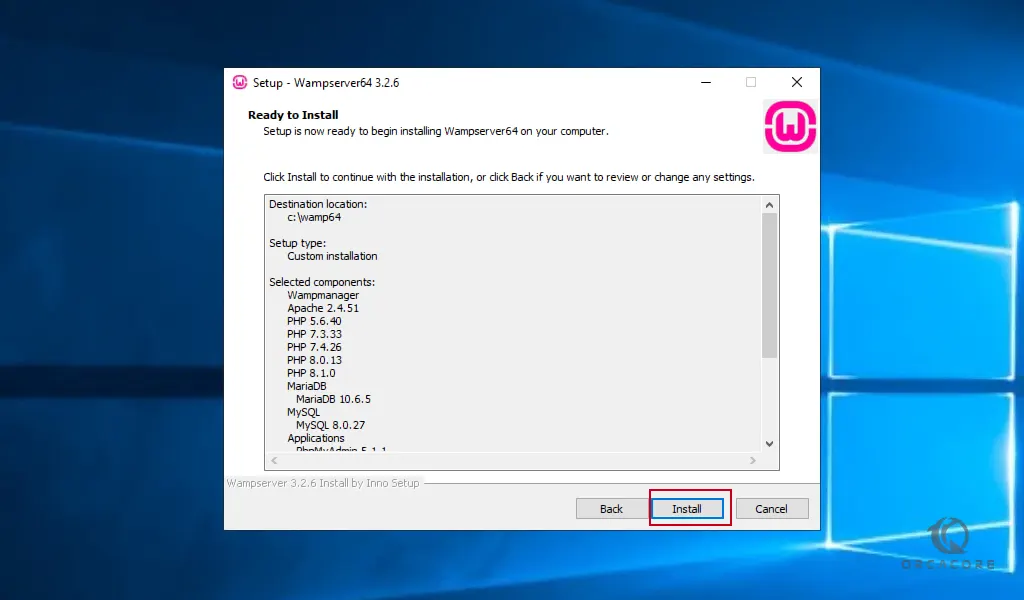
At this point, you must select the latest components and click Next.
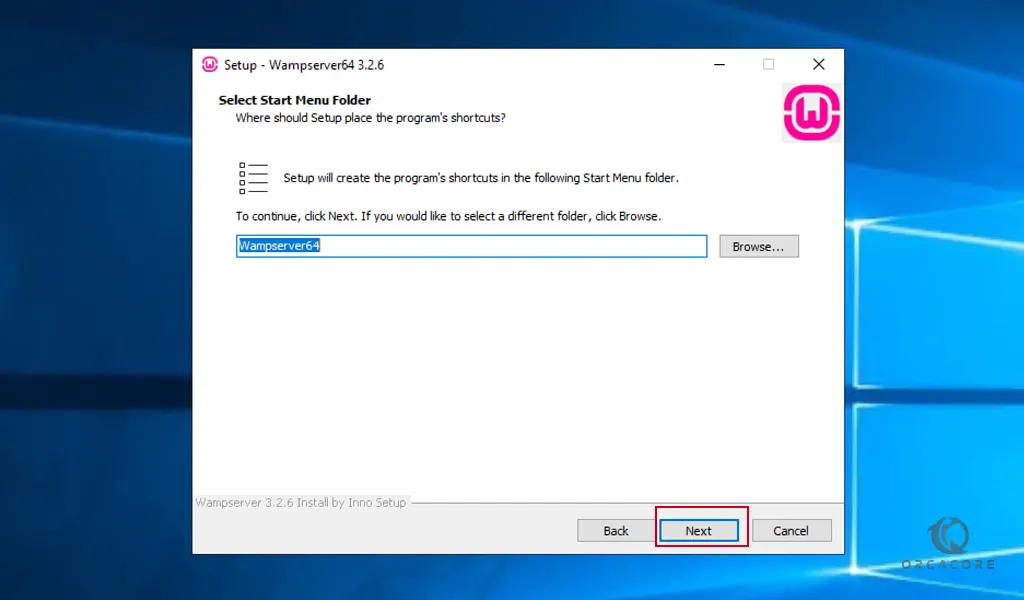
In the next step, you need to specify the folder of the Wamp start menu. Then click Next.
Now select the Install button to install the WAMPSERVER64.
After completing the process, you will be required to select your default browser. The default file browser will be your Internet Explorer, but you can change it to Chrome, Opera, Safari, or Mozilla.
Your default browser must have a corresponding .exe file. For instance, chrome.exe, opera.exe, safari.exe, firefox.exe. Select no to continue.

Also, you will be required to select your default text editor. Select no to leave it as default.
Read the setup – Wampserver information and click next.
Finally, by clicking on the Finish, the installation of Wamp on Windows Server 2019 will be completed.

How To Launch WAMP Server
At this point, you double-click on the Wampserver shortcut from your desktop to Launch Wamp Server.
You must be able to see a WAMP server icon on the computer tray of your Windows PC taskbar. You must see the green icon to know that the WAMP server is working correctly.
The orange icon is an indication of a problem that one of the services and A red icon indicates an issue with Apache and MySQL.
Conclusion
At this point, you learn to Install and Configure WAMP on Windows Server 2019.
Hope you enjoy using it.