
Share your love
Install Latest Apache Solr on Debian 12 Bookworm: Free Enterprise-search Platform
In this guide, we want to teach you to Install Latest Apache Solr on Debian 12 Bookworm. Apache Solr is a free and open-source search engine that is based on the Apache Lucene library. Also, you can use it as a document-based NoSQL database with transactional support that can be used for storage purposes and even a key-value store.
Table of Contents
How To Install Latest Apache Solr on Debian 12 Bookworm?
To Install Latest Apache Solr on Debian 12 Bookworm, you must have access to your server as a non-root user with sudo privileges. For this purpose, you can visit this guide on Initial Server Setup with Debian 12 Bookworm.
Also, you must have Java JDK installed on your server. To do this, you can visit this guide on How To Install Java with Apt on Debian 12 Bookworm.
Then, proceed to the following steps to Install Latest Apache Solr on Debian 12 Bookworm.
Step 1 – Verify Java Installation For Apache Solr
Here we assumed that you have installed JDK on your server. To verify it, check the Java version with the following command:
java -versionDebian 12 ships with the default Java 17:
Output
openjdk version "17.0.7" 2023-04-18
OpenJDK Runtime Environment (build 17.0.7+7-Debian-1deb12u1)
OpenJDK 64-Bit Server VM (build 17.0.7+7-Debian-1deb12u1, mixed mode, sharing)
Step 2 – Download and Extract Solr Binary Package on Debian 12
At this point, you must visit the Solr Downloads page and use the following wget command to download the latest binary package:
The latest release of Apache Solr at the current time is Solr 9.2.1.
sudo wget https://dlcdn.apache.org/solr/solr/9.2.1/solr-9.2.1.tgzNow you need to extract your downloaded file with the following command:
sudo tar xzf solr-9.2.1.tgzStep 3 – Install Solr on Debian 12 Bookworm
Now you can start your Apache Solr installation. To do this, run the command below:
bash solr-9.2.1/bin/install_solr_service.sh solr-9.2.1.tgzWhen your installation is completed, you should see the following output:
Output
Service solr installed.
Customize Solr startup configuration in /etc/default/solr.in.sh
● solr.service - LSB: Controls Apache Solr as a Service
     Loaded: loaded (/etc/init.d/solr; generated)
     Active: active (exited) since Tue 2023-07-18 08:29:35 EDT; 5s ago
       Docs: man:systemd-sysv-generator(8)
    Process: 9580 ExecStart=/etc/init.d/solr start (code=exited, status=0/SUCCESS)
        CPU: 18ms
...
Step 4 – How To Manage Apache Solr Service?
You can use the following command to start your Solr service on Debian 12:
sudo systemctl start solrTo enable Solr to start at boot you can run the following command:
/lib/systemd/systemd-sysv-install enable solrYou can check your Apache Solr status with the command below:
sudo systemctl status solrStep 5 – Create a New Solr Collection
Also, you can create a new Solr collection to test the Apache Solr functionality with the following command:
su - solr -c "/opt/solr/bin/solr create -c newcollection -n data_driven_schema_configs"In your output you will see:
Output
Created new core 'newcollection'
Step 6 – Configure Apache Solr on Debian 12
The default Apache Solr runs on localhost only. To allow the Solr server publically accessible over networks, edit the /etc/default/solr.in.sh configuration file.
sudo vi /etc/default/solr.in.sh Search for the SOLR_JETTY_HOST variable. Uncomment it by removing the starting hash (#) symbol. Set the value to “0.0.0.0”.
SOLR_JETTY_HOST="0.0.0.0"When you are done, save and close the file.
Restart the Solr service to apply changes.
sudo systemctl restart solr Check the Apache Solr listening host address.
sudo ss -tupln | grep 8983 Output
tcp LISTEN 0 50 *:8983 *:* users:(("java",pid=7009,fd=136))Step 7 – How To Access Apache Solr Web Interface?
At this point, you have learned to Install Latest Apache Solr on Debian 12 Bookworm. Now you can access to Solr web interface by typing your server’s IP address in your web browser followed by 8983:
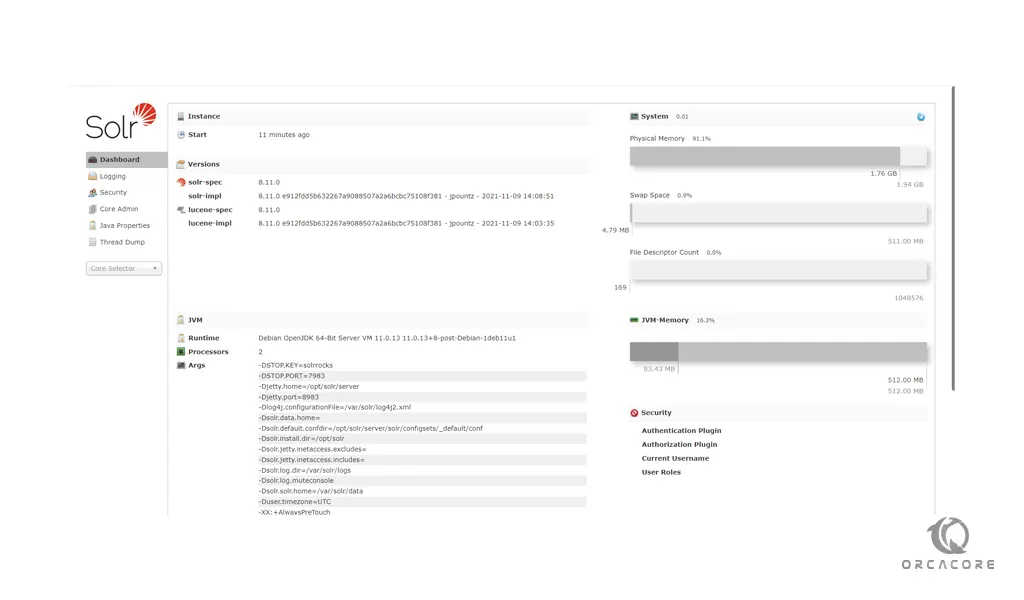
http://your-server-ip:8983You will see the Apache Solr dashboard screen:
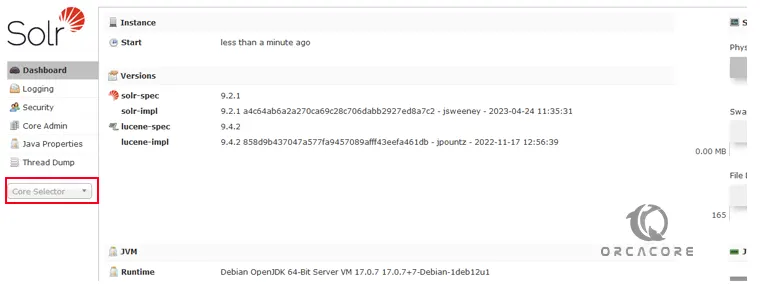
From the core selector on the left side, you can choose my collection to view the statics of your collection created in the previous step.
Conclusion
At this point, you have learned to Install Latest Apache Solr on Debian 12 Bookworm and Access it via Web Interface. Hope you enjoy it.
You may also interested in these articles:
Install and Use Podman on Debian 12 Bookworm
4 Ways to Find Which Process Listening on a Port on Debian 11


