Share your love
Install MySQL Workbench on Ubuntu 22.04 with Easy Steps

In this tutorial, we want to show you to Install MySQL Workbench on Ubuntu 22.04. MySQL Workbench is a unified visual database designing or graphical user interface tool used for working with database architects, developers, and Database Administrators. It is developed and maintained by Oracle. It provides SQL development, data modeling, data migration, and comprehensive administration tools for server configuration, user administration, backup, and many more.
We can use this Server Administration for creating new physical data models, E-R diagrams, and SQL development (run queries, etc.). It is available for all major operating systems like Mac OS, Windows, and Linux. MySQL Workbench fully supports MySQL Server version v5.6 and higher.
You can now proceed to the following guide steps on the Orcacore website to set up MySQL workbench on Ubuntu 22.04.
Table of Contents
Steps To Install MySQL Workbench on Ubuntu 22.04
To complete this guide, you must log in to your server as a non-root user with sudo privileges. To do this, you can follow our guide the Initial Server Setup with Ubuntu 22.04.
1. Install MySQL Deb Package on Ubuntu 22.04
First, you need to install MySQL Deb Package on your server. To do this, you need to download the MySQL Deb package from the MySQL Downloads page:
sudo wget https://dev.mysql.com/get/mysql-apt-config_0.8.24-1_all.debThen, you need to install the package with the following command:
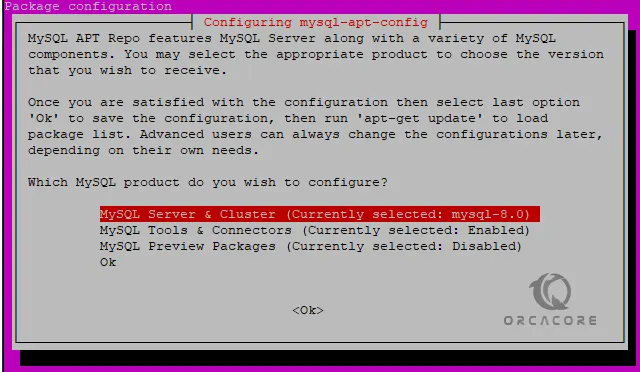
sudo apt install ./mysql-apt-config_*_all.debYou will get the option to select what you want to add via the repository. You need to choose MySQL Server & Cluster, press the TAB button to select OK, and hit the Enter key.
Next, you need to choose the available version of MySQL on Ubuntu 22.04, here in our case, it was MySQL 8.0.
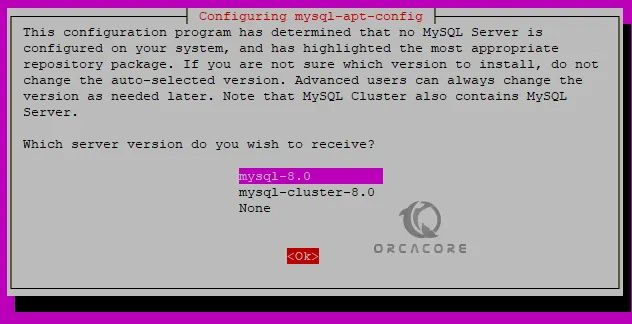
Again Select OK and then use the TAB to move to OK and hit the Enter key.
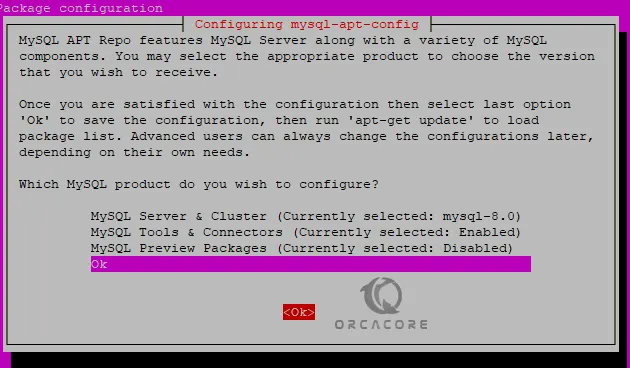
This will automatically configure the latest Debian repository of the Database on your Ubuntu 22.04.
Note: If you want to add any additional tools using its repository or want to reconfigure it run the command below:
sudo dpkg-reconfigure mysql-apt-configUpdate your local package index with the following command:
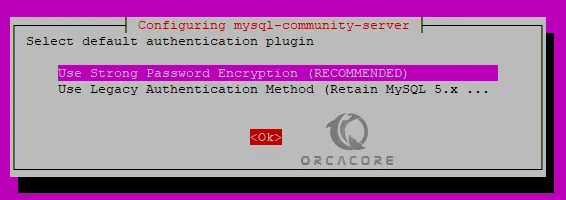
sudo apt updateThen, install MySQL on Ubuntu 22.04 with the following command:
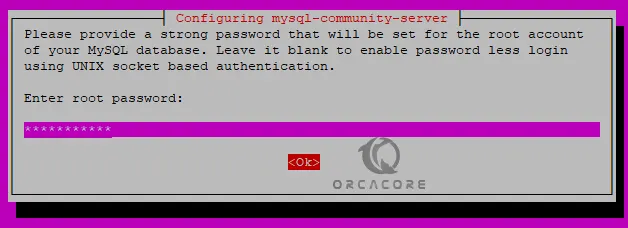
sudo apt install mysql-serverYou need to enter the password that you want to use with the MySQL server and then select the Strong authentication method:
Manage MySQL Service
Now you can start and enable your MySQL service on Ubuntu 22.04 with the command below:
sudo systemctl enable --now mysqlVerify that your MySQL service is active and running on your server with the following command:
sudo systemctl status mysqlOutput
● mysql.service - MySQL Community Server
Loaded: loaded (/lib/systemd/system/mysql.service; enabled; vendor preset:>
Active: active (running) since Mon 2023-01-23 13:19:04 UTC; 55s ago
Docs: man:mysqld(8)
http://dev.mysql.com/doc/refman/en/using-systemd.html
Main PID: 3873 (mysqld)
Status: "Server is operational"
Tasks: 39 (limit: 4575)
Memory: 364.3M
CPU: 2.307s
CGroup: /system.slice/mysql.service
└─3873 /usr/sbin/mysqld
...To see your MySQL version, you can run the command below:
mysql --versionOutput
mysql Ver 8.0.32 for Linux on x86_64 (MySQL Community Server - GPL)2. Secure MySQL Installation Ubuntu 22.04
At this point, you secure your MySQL by running the MySQL secure script:
sudo mysql_secure_installationYou will be asked to enter the root password. Also, you will be asked to set a valid password component. And you will be asked if you want to change your root password. Answer them as you wish from their types y to continue.
At this point, you can access your MySQL shell with the following command:
sudo mysql -u root -pEnter password:
Welcome to the MySQL monitor. Commands end with ; or \g.
Your MySQL connection id is 10
Server version: 8.0.32 MySQL Community Server - GPL
Copyright (c) 2000, 2023, Oracle and/or its affiliates.
Oracle is a registered trademark of Oracle Corporation and/or its
affiliates. Other names may be trademarks of their respective
owners.
Type 'help;' or '\h' for help. Type '\c' to clear the current input statement.
mysql>3. Install MySQL Workbench Ubuntu 22.04
Now, it’s time to install MySQL workbench. To do that, execute the following command to install MySQL Workbench Ubuntu 22.04:
sudo aptitude install mysql-workbench-communityLaunch MySQL Workbench
Once the installation is complete, you will finally launch the MySQL
Workbench on your system. You can launch it using the terminal by typing
the following command:
mysql-workbenchOr, you can move to the “Applications” menu and search for the MySQL workbench application and open it.
Congratulations! You have successfully installed the MySQL Workbench Ubuntu 22.04 system.
Conclusion
At this point, you have learned to Install MySQL Workbench on Ubuntu 22.04. MySQL Workbench Ubuntu 22.04 is a graphical tool used for designing, managing, and administering MySQL databases. It is widely used by database administrators, developers, and data architects.
Hope you enjoy using it. You may also interested in these articles:
Install Nessus Scanner on Ubuntu 22.04
Fix APT Error pkgproblemresolver Held Broken Packages