Share your love
Install Nessus Scanner on Ubuntu 22.04

In this guide on the Orcacore website, we want to teach you How To Install Nessus Scanner on Ubuntu 22.04. Also, you will learn to Create the First Scan with Nessus on Ubuntu 22.04.
Nessus is an open-source network vulnerability scanner that uses the Common Vulnerabilities and Exposures architecture for easy cross-linking between compliant security tools. It employs the Nessus Attack Scripting Language (NASL), a simple language that describes individual threats and potential attacks.
Nessus has a modular architecture consisting of centralized servers that conduct scanning and remote clients that allow for administrator interaction. Administrators can include NASL descriptions of all suspected vulnerabilities to develop customized scans.
Table of Contents
Steps To Install and Configure Nessus Scanner on Ubuntu 22.04
To complete this guide, you must log in to your server as a non-root user with sudo privileges and set up a basic firewall. To do this, you can follow our guide on Initial Server Setup with Ubuntu 22.04.
1. Install Nessus Security Scanner on Ubuntu 22.04
First, you need to update your local package index with the following command:
sudo apt update
Download Nessus Installer
Then, you need to visit the Nessus Downloads page and download the latest installer with the following command:
curl --request GET \
  --url 'https://www.tenable.com/downloads/api/v2/pages/nessus/files/Nessus-10.4.1-ubuntu1404_amd64.deb' \
  --output 'Nessus-10.4.1-ubuntu1404_amd64.deb'
When your download is completed, run the following command to install the Nessus security scanner on your server:
sudo dpkg -i Nessus-10.4.1-ubuntu1404_amd64.debYou will get the following output:
Output
 - You can start Nessus Scanner by typing /bin/systemctl start nessusd.service
 - Then go to https://hostname:8834/ to configure your scanner
Manage Nessus Scanner Service
At this point, you need to start and enable your Nessus service by using the following commands:
# sudo /bin/systemctl start nessusd.service
# sudo systemctl enable nessusd
Verify your Nessus scanner is active and running on Ubuntu 22.04:
sudo systemctl status nessusdOutput
● nessusd.service - The Nessus Vulnerability Scanner
Loaded: loaded (/lib/systemd/system/nessusd.service; enabled; vendor prese>
Active: active (running) since Mon 2022-11-14 09:42:33 UTC; 41s ago
Main PID: 2693 (nessus-service)
Tasks: 13 (limit: 4575)
Memory: 48.5M
CPU: 48.661s
CGroup: /system.slice/nessusd.service
├─2693 /opt/nessus/sbin/nessus-service -q
└─2694 nessusd -q
...Configure Firewall For Nessus
Here we assumed that you have enabled the UFW firewall. Now you need to allow Nessus port through the firewall. To do this, run the command below:
sudo ufw allow 8834/tcpReload the firewall to apply the new rules:
sudo ufw reload2. Access Nessus Scanner Dashboard
At this point, you can access your Nessus security scanner web interface by typing your server’s IP address in your web browser followed by 8834:
https://server-ip:8834
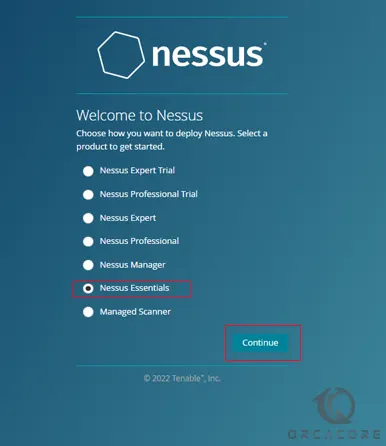
You will see the Nessus Scanner welcome page. At this point, you need to choose how you want to deploy Nessus. Select a product to get started.
Here we choose Nessus Essentials – The free version for educators, students, and hobbyists.
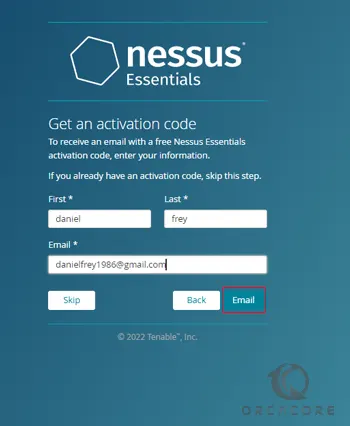
Then, you need to enter your information to register and get an activation code from Nessus on Ubuntu 22.04.
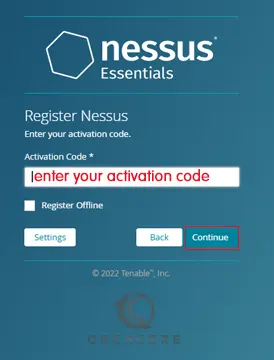
After that, you need to enter the Nessus activation code that you have received and click continue.
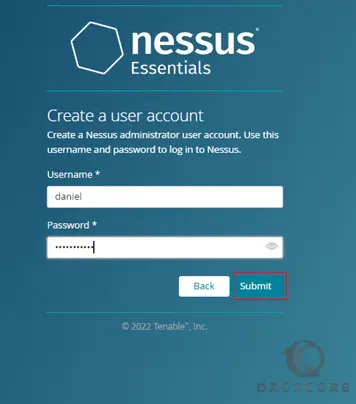
Next, you need to create a Nessus admin user on Ubuntu 22.04 and click submit.
At this point, you need to wait while Nessus prepares the files to scan your assets. When it is completed, you will see your Nessus scanner Dashboard.

Now that you have your Nessus scanner, let’s create your first scan.
3. Create First Scan with Nessus on Ubuntu 22.04
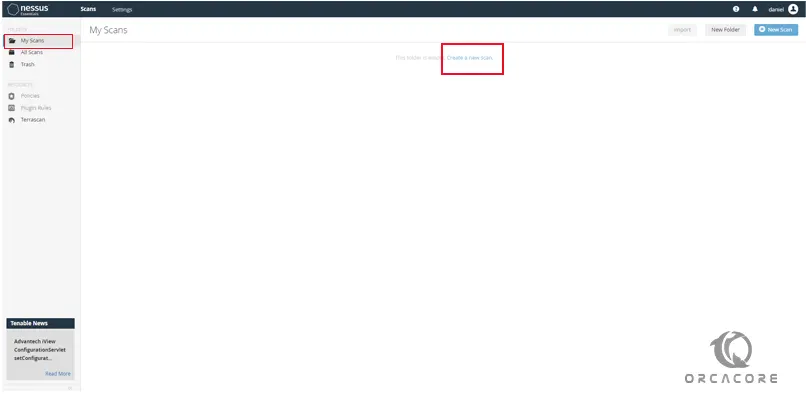
At this point, we want to show you how to scan your Ubuntu system for vulnerabilities via the Nessus web dashboard. From your Nessus dashboard, click on My Scans and click Create a new scan.
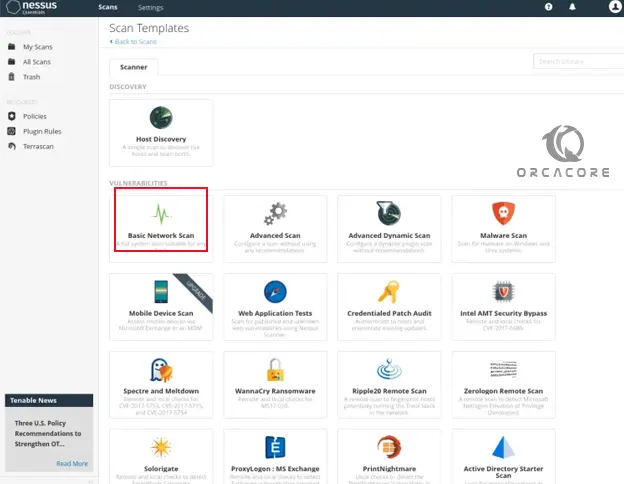
Next, select the scan templates for your new scan. Here we use the template ‘Basic Network Scan‘.
At this point, you need to enter a name for your scan, the description, the folder for storing the scan, and the target server. Then, click Save to save the new scan.
From your ‘My Scan’ page, you will see the new scan that you just created. Click the start button to start the scan. That’s it you are done.
4. Set up the Nessus command line on Ubuntu 22.04
At this point, you can set up the Nessus command line to work with your scanner from the command line.
First, you need to add a new bin PATH to your Ubuntu system:
echo 'export PATH="$PATH:/opt/nessus/bin:/opt/nessus/sbin"' >> ~/.bashrcThen, reload the ~/.bashrc configuration:
source ~/.bashrcYou can now run the nessuscli command to verify your configuration. You should see the nessuscli binary file is available on the ‘/opt/nessus/sbin‘ directory, and also you will see the detailed help menu for the nessuscli command.
# which nessuscli
# nessuscli help
Output
Usage: nessuscli <command> [<options>]
Usage: nessuscli <command> help

Bug Reporting Commands:
   bug-report-generator
   bug-report-generator --quiet [--full] [--scrub]

User Commands:
   rmuser [username]
   chpasswd [username]
   adduser [username]
   lsuser

Dump Commands:
   dump --plugins

Fetch Commands:
   fetch --register <serial>
   fetch --register-offline <license.file>
   fetch --check
   fetch --code-in-use
   fetch --challenge
   fetch --security-center
   fetch --scanner-health-stats

Node Commands:
   node link --key=<key> --host=<host> --port=<port>
   node unlink
   node status

Fix Commands:
   fix [--secure] --list
   fix [--secure] --set <name=value>
   fix [--secure] --get <name>
   fix [--secure] --delete <name>
   fix --show
   fix --show <name>
   fix --list-interfaces
   fix --reset

Certificate Commands:
   import-certs
   mkcert-client
   mkcert [-q]

Backup Tool:
   backup --create <backup file filename>
   backup --restore <backup file path>

Software Update Commands:
   update
   update --all
   update --plugins-only
   update <plugin archive>
Conclusion
At this point, you have learned to Install and Configure the Nessus scanner on Ubuntu 22.04. Nessus on Ubuntu 22.04 is used for vulnerability scanning and network security assessment to identify potential security risks in systems and networks.
Hope you enjoy it. You may also like these articles:
How To Set up Nessus Scanner on Debian 11