Share your love
Best Guide To Install Netdata on Ubuntu 20.04

In this guide on the Orcacore website, we want to teach you How To Install Netdata on Ubuntu 20.04. NetData is a Linux-based software that helps to diagnose anomalies and slowdowns in your system with insightful analysis, metrics, and engaging visualizations. It covers an array of fields where data is provided like RAM, CPU, IP Address, network performance across various bandwidths, softness, entropy, and disks.
Also, it enables you to see monitoring, Nginx, IP Networking, and even monitors net data along with programming in MySQL.
NetData can be installed on any platform and detects hundreds of metrics in real time through fully functional visualizations. It can monitor your health in real-time and moreover it is flexible and easy to integrate with hundreds of metrics.
Table of Contents
Steps To Install and Configure Netdata on Ubuntu 20.04
To complete this guide, you must log in to your server as a non-root user with sudo privileges and set up a basic firewall. To do this, you can follow our guide on Initial Server Setup with Ubutnu 20.04.
Here we will install Netdata on UBuntu 20.04 by using an automated script called kickstart script. Let’s see how you can do it.
1. Install Netdata on Ubuntu 20.04
First of all, you can see information about Netdata on your server. To do this, run the command below:
apt show netdataIn your output you will see:

The output provides Netdata information such as the latest version, origin, installation size, and a description of the package.
2. Run the kickstart Script on Ubuntu 20.04
To install Netdata, you can simply run the script below:
bash <(curl -Ss https://my-netdata.io/kickstart.sh)When your installation is completed, proceed to the next step.
Start and Enable Netdata on Ubutnu 20.04
At this point, you need to start and enable Netdata to start on boot. To do this, use the following commands:
# sudo systemctl start netdata
# sudo systemctl enable netdata
Verify your Netdata service is active and running on Ubuntu 20.04:
sudo systemctl status netdata
Configure Firewall For Netdata
At this point, we assumed that you have enabled UFW firewall. By default, the Netdata listening port is 1999. So you need to open it through the firewall.
To do this, run the command below:
sudo ufw allow 19999/tcpTo apply the new rules, reload the firewall:
sudo ufw reload3. Access Netdata Dashboard
At this point, you can access the Netdata dashboard on Ubuntu 20.04 by typing your server’s IP address in your web browser followed by 19999:
http://YOUR_SERVER_IP_ADDRESS:19999You will see your system overview on the Netdata dashboard:
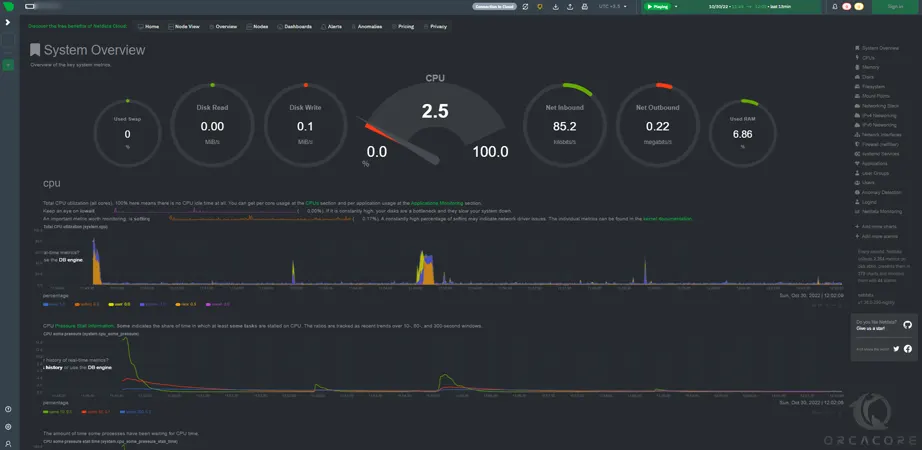
With Netdata users can detect low-latency visualizations to detect any possible anomalies after comparison with metrics. The dedicated database of NetData doesn’t require resources to detect. It just collects, stores and processes data to let you visualize in low-latency and high-power resolutions followed by streaming of data and a final archive.
Conclusion
At this point, you have learned to Install and Configure Netdata on Ubuntu 20.04. Using Netdata on Ubuntu 20.04 provides real-time system monitoring with detailed performance insights. It helps track CPU, memory, disk, and network usage efficiently, ensuring better system health and troubleshooting.
Hope you enjoy using it. Please subscribe to us on Facebook, Instagram, and YouTube.
You may also like these articles:
Install and Configure Netdata on Ubuntu 22.04