Share your love
Install and Configure Netdata on Ubuntu 22.04

In this article, we intend to teach you How To Install and Configure Netdata on Ubuntu 22.04.
Netdata is an extremely optimized Linux utility that provides real-time (per second) performance monitoring for Linux systems, applications, SNMP devices, etc. and shows full interactive charts that absolutely render all collected values over the web browser to analyze them.
Install and Configure Netdata on Ubuntu 22.04
To install Netdata, you need to log in to your server as a non-root user with sudo privileges and set up a basic firewall. To do this, you can follow our guide the Initial Server Setup with Ubuntu 22.04.
Set up Netdata on Ubuntu 22.04
By default, Netdata packages are available in the default Ubuntu repository.
First, update your local package index with the following command:
sudo apt update
Then, you can install Netdata by using the command below:
sudo apt install netdata -y
When your Netdata installation is completed, start your service with the command below:
sudo systemctl start netdata
If you want to Netdata start at boot, you can run the following command:
sudo systemctl enable netdata
Now check that your Netdata is active and running on Ubuntu 22.04 with the following command:
sudo systemctl status netdata
In your output you will see:
Output
● netdata.service - netdata - Real-time performance monitoring
Loaded: loaded (/lib/systemd/system/netdata.service; enabled; vendor prese>
Active: active (running) since Wed 2022-06-08 10:00:28 CEST; 39s ago
Docs: man:netdata
file:///usr/share/doc/netdata/html/index.html
https://github.com/netdata/netdata
Main PID: 1862 (netdata)
Tasks: 18 (limit: 2282)
Memory: 27.4M
CGroup: /system.slice/netdata.service
├─1862 /usr/sbin/netdata -D
├─2095 /usr/lib/netdata/plugins.d/nfacct.plugin 1
├─2104 bash /usr/lib/netdata/plugins.d/tc-qos-helper.sh 1
└─2108 /usr/lib/netdata/plugins.d/apps.plugin 1
Configure Netdata on Ubuntu 22.04
Now that you have Netdata installed on your Ubuntu 22.04, you need to make a configuration change.
Netdata is running on port 19999, you need to make Netdata accessible on your server’s IP address.
At this point, you need to open the Netdata configuration file on Ubuntu 22.04 with your favorite text editor, here we use vi:
sudo vi /etc/netdata/netdata.conf
In the global section, find the bind socket to IP directive and change it to your server’s IP address:
[global]
        run as user = netdata
        web files owner = root
        web files group = root
        # Netdata is not designed to be exposed to potentially hostile
        # networks. See https://github.com/netdata/netdata/issues/164
        bind socket to IP = your-server's-IP-address
When you are done, save and close the file.
To apply the changes, restart Netdata on Ubuntu 22.04 with the following command:
sudo systemctl restart netdata
Here we assumed that you have enabled UFW firewall from the requirements.
Now you need to allow traffic on port 19999 through the firewall:
sudo ufw allow 19999/tcp
Reload the firewall to apply the new rules:
sudo ufw reload
Access Netdata Dashboard
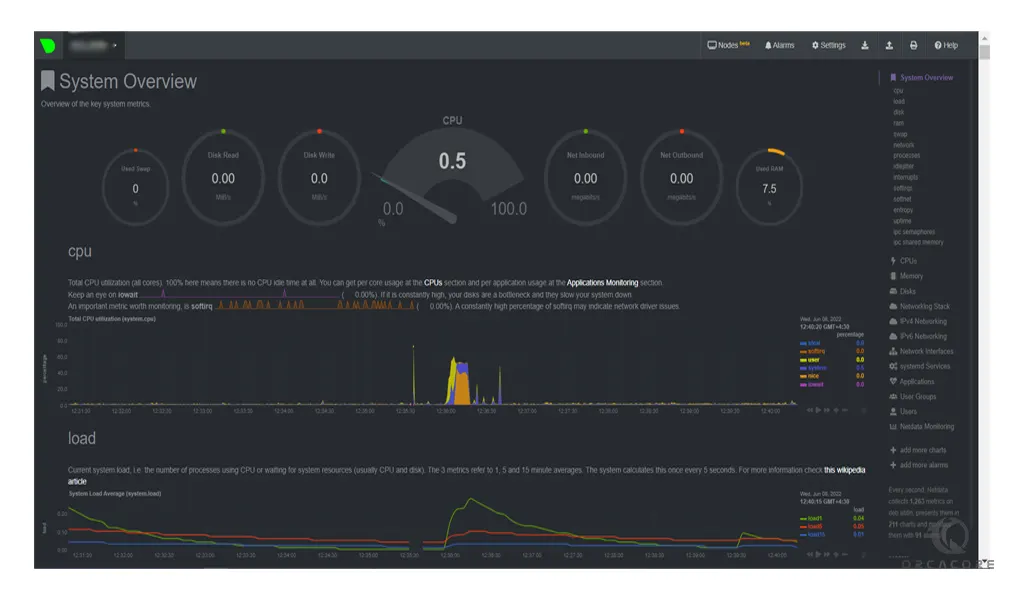
At this point, you can access the Netdata dashboard on Ubuntu 22.04 by typing your server’s IP address in your web browser followed by 19999:
http://YOUR_SERVER_IP_ADDRESS:19999
You will see your system overview on the Netdata dashboard:

For more information, you can visit the Netdata Documentation page.
Conclusion
At this point, you learn to Install and Configure Netdata on Ubuntu 22.04.
I hope you enjoy it.
Also, You may be interested in these articles:


