Share your love
Monitor Network Traffic on Ubuntu 22.04 with sniffnet
This tutorial intends to teach you to Install and Use Sniffnet on Ubuntu 22.04 to monitor network traffic with sniffnet. sniffnet is a network monitoring tool that is written in Rust. With sniffnet, you can track all the internet traffic through your system, offering some helpful features.
Sniffnet features include:
- selecting network adapters to inspect, applying filters to traffic (such as IP versions, transport protocols, and application protocols)
- viewing real-time reports and charts about traffic intensity, and obtaining details about domain names and network providers of hosts exchanging traffic
You can follow this guide to start your sniffnet installation on Ubuntu 22.04 server and monitor your network traffic.
How To Monitor Network Traffic on Ubuntu 22.04 with sniffnet?
To complete this guide, you must have access to your server as a root or non-root user with sudo privileges. For this purpose, you can visit this guide on Initial Server Setup with Ubuntu 22.04.
Now follow the steps below to start your sniffnet installation.
Step 1 – How To Install sniffnet on Ubuntu 22.04?
First, you must run the system update and upgrade by using the command below:
apt update && apt upgrade -yThen, run the following command to install the dependencies for sniffnet:
apt install libpcap-dev -yNow you must visit the GitHub sniffnet Release page and download the latest Deb version by using the wget command in your Linux terminal:
wget https://github.com/GyulyVGC/sniffnet/releases/download/v1.2.1/Sniffnet_LinuxDEB_amd64.debWhen your download is completed, install the sniffnet deb package on Ubuntu 22.04 with the command below:
dpkg -i Sniffnet_LinuxDEB_amd64.debNote: If you are a non-root user, set rights to set capabilities to inspect a network adapter with the following command:
sudo setcap cap_net_raw,cap_net_admin=eip <your/Sniffnet/executable/path>Step 2 – How To Access sniffnet Network Traffic Monitoring Tool?
At this point, you can easily launch your sniffnet from the Ubuntu 22.04 terminal:
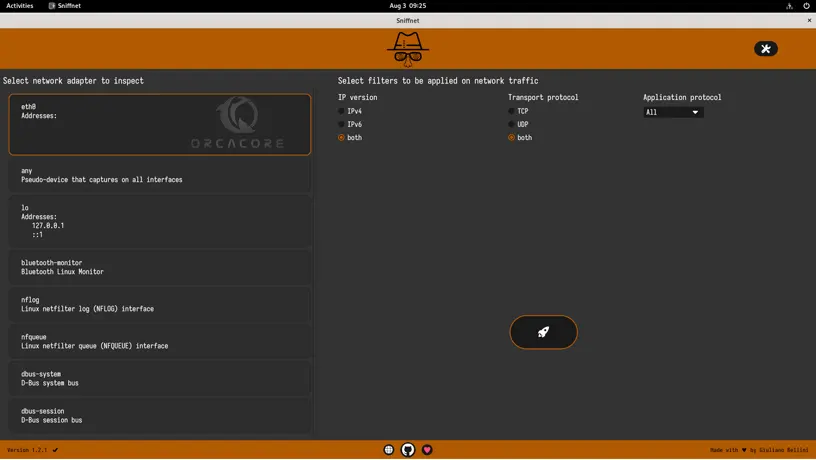
sniffnetThen, you must see the sniffnet dashboard:
Step 3 – Start Monitoring Network Traffic on Ubuntu 22.04 with sniffnet
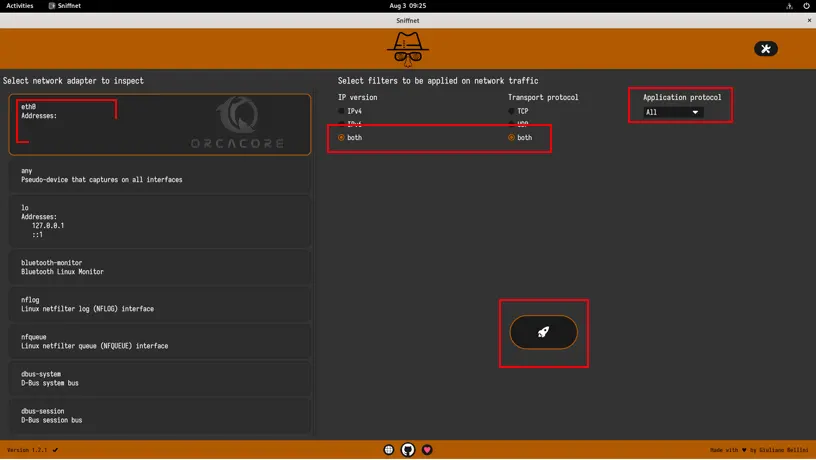
When you first launch Sniffnet, you must select the network adapter, filters, and application protocol.
Here we select eth0, both filters and all application protocols. Then, click on the rocket button to get started.
It will show you all the current network connections, as well as a handy traffic rate graph for you to analyze the flow of traffic.
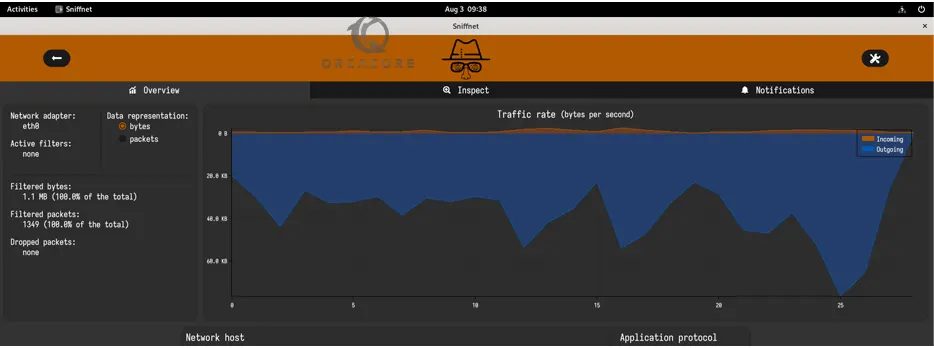
To get more details about your network connections with sniffnet on Ubuntu 22.04, you can click on the ‘Inspect‘ tab.

You will get a list with all the important info, such as the IP address, number of packets, amount of data, the originating country, and more.
Note: If you want to see a full text-based report, simply click the “Arrow file icon” next to the IP addresses box.
Also, you can simply click on any IP address listed, you can access detailed information about that specific connection.
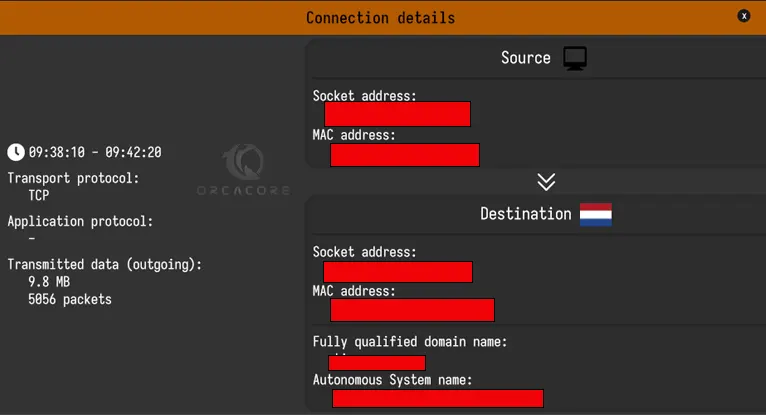
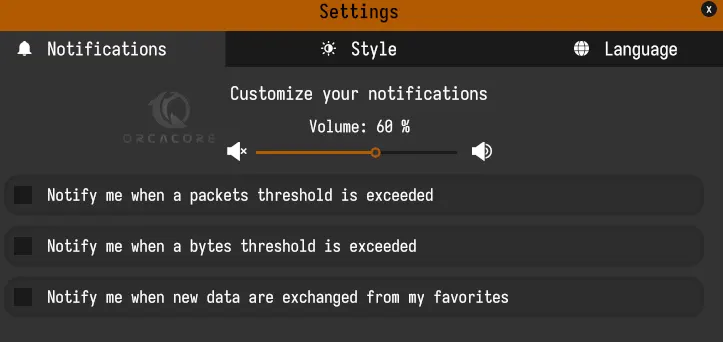
From Sniffnet’s Settings section, you can enable/disable notifications, choose a theme for the sniffnet interface, and select your preferred language.
To access the Settings section, click on the “Settings” icon in the top right corner.
Conclusion
At this point, you have learned to Install and Use Sniffnet on Ubuntu 22.04 to monitor network traffic. As you saw, you can do many kinds of stuff with sniffnet such as Network Connections in Real-time, Display Network Connections Reports, and Inspect Individual Network Connections.
Hope you enjoy using it. You may be interested in these articles too:


