Share your love
Install Portainer on Rocky Linux 8 – Best Docker GUI Tool

In this guide, you will learn to Install Portainer on Rocky Linux 8. Portainer is a GUI tool to easily manage containers in Docker, Docker Swarm, Azure ACI, and Kubernetes, be it on-prem or in the cloud.
Portainer is itself deployed as a Docker image and is very lightweight. It’s made up of two core elements: the Portainer server and the Portainer agent. The agent communicates with the server to provide access to the node’s resources.
You can install Portainer on Linux or Windows, and it even supports installation on Windows Subsystem for Linux (WSL). Under the hood, Portainer utilizes the Docker CLI to offer you a good level of abstraction.
Steps To Install Portainer on Rocky Linux 8
To Install Portainer on Rocky Linux 8, you need some requirements. Let’s see what are.
Requirements
You must log in to your server as a root or non-root user with sudo privileges. To do this, you can follow this guide on Initial Server Setup with Rocky Linux 8.
Then, you must have Docker installed on your server. To do this, you can follow our guide on Install and Use Docker on Rocky Linux 8.
Also, you must have Docker Compose installed on your server. For this purpose, you can visit this guide on Install Docker Compose on Rocky Linux 8.
When you are done, follow the steps below.
Set up Portainer on Rocky Linux 8
At this point, you can start to install Portainer container management on your server.
Create Docker Volume For Portainer
First, you need to create a volume to store Portainer data. Docker volumes are file systems mounted on Docker containers to preserve data generated by the running container. To do this, run the command below:
docker volume create dataThen, verify it by using the command below:
docker volume lsOutput
DRIVER VOLUME NAME
local dataDownload and Run Portainer Docker Image
Now you can use the following command to download and run the Portainer docker image:
docker run -d -p 8000:8000 -p 9000:9000 --name=portainer --restart=always -v /var/run/docker.sock:/var/run/docker.sock -v data:/data portainer/portainerOutput
latest: Pulling from portainer/portainer
772227786281: Pull complete
96fd13befc87: Pull complete
0bad1d247b5b: Pull complete
b5d1b01b1d39: Pull complete
Digest: sha256:47b064434edf437badf7337e516e07f64477485c8ecc663ddabbe824b20c672d
Status: Downloaded newer image for portainer/portainer:latest
aa302024c0d4368876b431288a596815f27c51bcfff1de3a41e13c1d29d6ebc3
Check Portainer Status
Next, check your Portainer status with the following command:
docker psOutput
CONTAINER ID IMAGE COMMAND CREATED STATUS PORTS NAMES
aa302024c0d4 portainer/portainer "/portainer" 25 seconds ago Up 23 seconds 0.0.0.0:8000->8000/tcp, :::8000->8000/tcp, 0.0.0.0:9000->9000/tcp, :::9000->9000/tcp, 9443/tcp portainer
Access Portainer Web Interface on Rocky Linux 8
At this point, your Portainer is running on port 9000. You can access it through the web interface by typing your server’s IP address in your web browser followed by 9000:
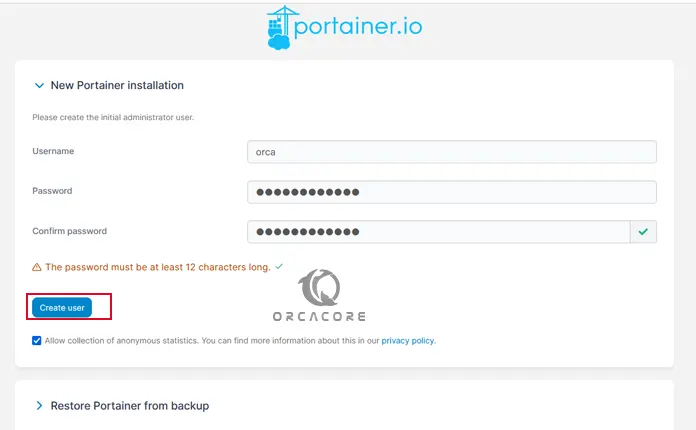
http://your-server-ip:9000In the first screen, you should create the initial administrator user.

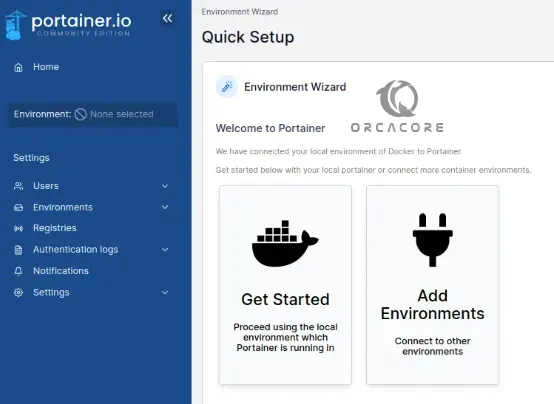
Then, you will see your Portainer dashboard.

The Dashboard page gives you a glance at your operational environment with important statistics. You can click on each of the components in the dashboard to get more info regarding a specific component.
You can easily get a summary of how much disk space your containers are consuming and which ones are healthy or not. Also, you can get a good overview of network interfaces and IP addresses of your Docker containers.
Apart from the Docker information, you can also get PC RAM capacity. You won’t find any Docker command that gives you such a comprehensive summary within a single page. And this is where Portainer shines.
Conclusion
At this point, you have learned to Install the Portainer Docker GUI Tool on Rocky Linux 8.
For more guides and articles, you can visit the orcacore blog page.


