Share your love
7 Easy Steps To Install Syncthing on Ubuntu 22.04
In this guide, we want to teach you to Install Syncthing on Ubuntu 22.04 and Access the GUI dashboard via the Web Interface. Syncthing is an open-source file synchronization application. With Syncthing, you can easily make file synchronization across multiple devices securely. Also, it allows your devices to communicate directly with each other over the internet or a local network. The most eye-catching Syncthing features include:
- Decentralized Synchronization
- Security
- Real-Time Sync
- Cross-Platform Compatibility
- Web Interface
- Versioning and File Restoration
- Open Source and Community-Drivenv
Now you can proceed to the following steps on the Orcacore website to Install Syncthing on Ubuntu 22.04.
Table of Contents
7 Easy Steps To Install Syncthing on Ubuntu 22.04
Before you start your Syncthing Setup on Ubuntu 22.04, you must log in to your server as a non-root user with sudo privileges and set up a basic firewall. For this purpose, you can check the Ubuntu 22.04 Initial Setup Guide.
Then, follow the steps below to Install Syncthing on Ubuntu 22.04.
Step 1 – Run System Update and Install Required Packages For Syncthing
First, you must run the system by using the command below:
sudo apt updateThen, run the command below to install the required packages for Syncthing setup:
sudo apt install software-properties-common apt-transport-https wget curl -y
Step 2 – Add Syncthing Package Repository on Ubuntu 22.04
At this point, you can easily add the Syncthing APT package repository on your Ubuntu server. To do this, add the Syncthing GPG key with the following curl command:
# sudo mkdir -p /etc/apt/keyrings
# sudo curl -L -o /etc/apt/keyrings/syncthing-archive-keyring.gpg https://syncthing.net/release-key.gpg
Then, add the Syncthing stable repository on Ubuntu 22.04 with the following command:
echo "deb [signed-by=/etc/apt/keyrings/syncthing-archive-keyring.gpg] https://apt.syncthing.net/ syncthing stable" | sudo tee /etc/apt/sources.list.d/syncthing.listStep 3 – Quick Synthing Installation on Ubuntu 22.04
At this point, you can update your packages and use the following command to install Syncthing:
# sudo apt update
# sudo apt install syncthing -y
Once your installation is completed, you can verify it by checking the Syncthing version:
syncthing --version
Step 4 – Manually Start and Enable Syncthing Service
Now you must start and enable your Syncthing service on Ubuntu by using the following commands:
# sudo systemctl enable syncthing@username.service
# sudo systemctl start syncthing@username.serviceNote: Remember to replace the username with your actual user.
Then, verify your Syncthing is active and running with the following command:
sudo systemctl status syncthing@username.serviceExample Output:

Step 5 – Allow Syncthing Traffic Through UFW Firewall Rules
Syncthing communicates over the network on TCP port 22000. So you must allow port 22000 and the GUI traffic through the UFW firewall on Ubuntu 22.04 with the following command:
# sudo ufw allow 22000/tcp
# sudo ufw allow syncthing-gui
Then, reload the firewall to apply the new rules:
sudo ufw reloadStep 6 – Run Syncthing on a Local IP Address on Ubuntu 22.04
By default, Syncthing is running on localhost. If you want to run Syncthing on a local IP address, you must make some changes in the ~/.local/state/syncthing/config.xml file. Open the file with your desired text editor like Vi editor or Nano editor:
sudo vi ~/.local/state/syncthing/config.xml
Note: You can find your config files path by using the command below:
syncthing -pathsAt the file, look for the <gui enabled…> section. It will look like this:

Then, you must change the ‘tls‘ value to ‘true‘ and change the default localhost to your local IP address. It will look like this:

When you are done, save and close the file. Next, restart the Syncthing service to apply the changes:
sudo systemctl restart syncthing@username.serviceStep 7 – Access Syncthing GUI via the Web Interface
At this point, you can easily access your Syncthing GUI dashboard by typing your server’s IP address in your web browser followed by 8384:
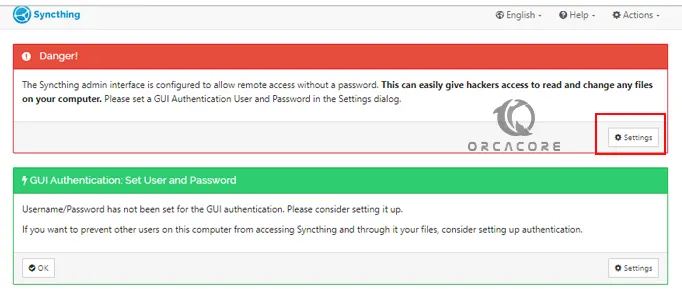
https://your-server-ip:8384You will see the following screen. First, you must set a GUI Authentication User and Password. From the Danger message click on Settings.
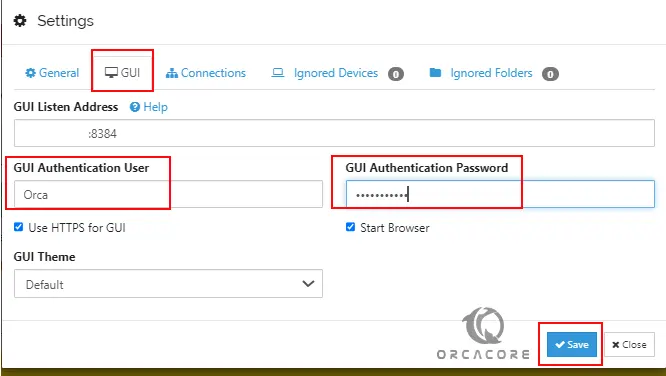
From the settings, click on the GUI tab, set username and password, and click save.
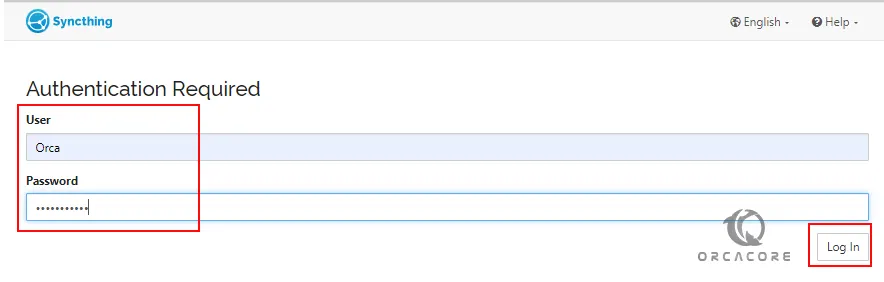
Next, you will see the Authentication screen. Enter the username and password, and click Log in.
Now you have set up your Syncthing and you will see your dashboard on Ubuntu 22.04.

Now you can configure Syncthing on your other device and start to connect them and file synchronization. You can easily add your remote device on Syncthing.
For more information, you can visit the official documentation page.
Conclusion
Syncthing is popular among users who are looking for privacy. It allows for the synchronization of data without storing it on third-party servers. It’s also a good choice for those who want to set up their own file-sharing and synchronization system without relying on commercial cloud services.
At this point, you have learned to 7 Easy Steps To Install Syncthing on Ubuntu 22.04 and access the GUI dashboard. Hope you enjoy using it.
Also, you may like to read the following articles:
Set up Apache CouchDB on RHEL 9 / AlmaLinux 9