Share your love
Best Steps To Set up Apache CouchDB on RHEL 9 / AlmaLinux 9

In this guide, you will learn to Install and Set up Apache CouchDB on RHEL 9 / AlmaLinux 9. Apache CouchDB is an open-source NoSQL document database. It is designed for the Web, scalability, and ease of use. Also, it has strong community support. The essential features of CouchDB include:
- Document-oriented database
- RESTful API
- JSON Data Format
- MapReduce for Complex Queries
- Replication and Synchronization
Now you can follow the rest of the article on the Orcacore website to Set up Apache CouchDB on RHEL 9 / AlmaLinux 9.
Table of Contents
Steps To Set up Apache CouchDB on RHEL 9 / AlmaLinux 9
Before you Set up Apache CouchDB on RHEL 9 / AlmaLinux 9, you must log in to your server as a non-root user with sudo privileges and set up a basic firewall. In this guide, we use AlmaLinux 9, you can check the AlmaLinux 9 Initial Setup Guide.
Step 1 – Add CouchDB Package Repository on RHEL 9
First, you must install the yum-utils package on your server with the following command:
sudo dnf install yum-utils -yThen, enable CRB (PowerTools) and Epel repo with the following commands:
sudo dnf config-manager --set-enabled crb
sudo dnf install epel-release -y
Now use the following command to enable the CouchDB repo on RHEL 9:
sudo dnf config-manager --add-repo https://couchdb.apache.org/repo/couchdb.repoStep 2 – Install ApacheCouchDB on RHEL 9
Once you added your package repository, you can use the following commands to install CouchDB on your RHEL 9:
# sudo dnf update -y
# sudo dnf install mozjs78 -y
# sudo dnf install couchdb -y
Step 3 – Start and Enable Apache CouchDB Service
Once your installation is completed, you need to start and enable CouchDB on RHEL 9 by using the commands below:
# sudo systemctl start couchdb
# sudo systemctl enable couchdb
Then, verify your CouchDB service is active and running:
sudo systemctl status couchdb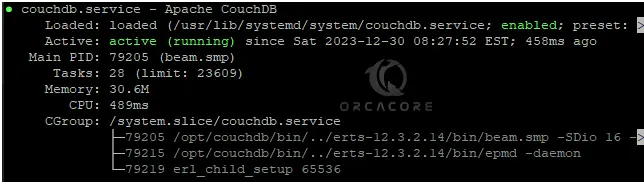
Step 4 – CouchDB Configuration on RHEL 9
In this step, we want to configure CouchDB in a Standalone mode. It is a single-mode configuration. To do this, open the CouchDB config file with your desired text editor like Vi editor or Nano Editor:
sudo vi /opt/couchdb/etc/local.iniIn the file, look for the [chttpd] section. Then, uncomment the port and bind_address directives.
Note: The default value for standalone mode is 127.0.0.1. You can change it to 0.0.0.0 which listens to all interfaces. Or, you can change it to a specific IP address.
[chttpd]
port = 5984
bind_address = 127.0.0.1
Next, find the [admins] section. From there, uncomment the admin directive and set a password for the admin user.
[admins]
admin = mypassword
When you are done, save and close the file.
Restart your CouchDB service on RHEL 9 to apply the changes:
sudo systemctl restart couchdbStep 5 – Configure Firewall Rules for Apache CouchDB
At this point, you must allow CouchDB port 5984 through your firewall rules. To do this, you can run the following command:
sudo firewall-cmd --zone=public --permanent --add-port=5984/tcpTo apply the new rules, reload the firewall:
sudo firewall-cmd --reloadStep 6 – Connect to CouchDB Web Interface on RHEL 9
At this point, you can verify that your CouchDB service is working correctly. To do this, you can use the following curl command:
curl http://127.0.0.1:5984/Example Output:

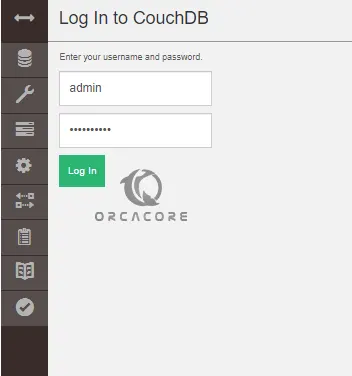
Or from your web browser, you can access CouchDB’s Fauxton web UI, you can follow the URL below:
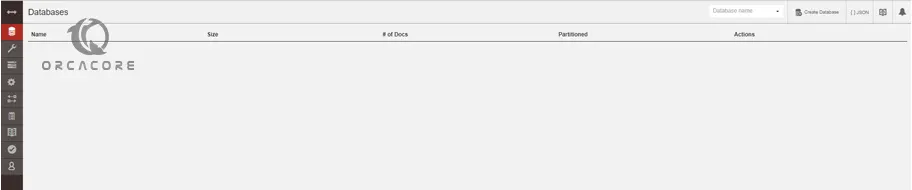
http://server-ip:5984/_utils/You will see the CouchDB login screen. Enter the Admin credentials you have defined in the configuration step and click Log in.
Then, you will see your CouchDB’s Fauxton web UI.
For more information, you can visit the official Docs page.
Conclusion
CouchDB is a great option for developers because of its scalability, flexibility, ease of use, and great community support. You can easily set up Apache CouchDB on RHEL 9 like AlmaLinux 9 and Rocky Linux 9 by adding the official package repository, and access your CouchDB dashboard and start using it.
Hope you enjoy it. Also, you may interested in these articles:
MS SQL Server Setup with Docker on RHEL 9
Fix Error Failed to mount /sysroot in AlmaLinux
Fix dnf update Error: Transaction test error
FAQs
What is Apache CouchDB?
Apache CouchDB is a NoSQL database that stores data in a JSON-based document format and uses a RESTful HTTP API for access.
Where is CouchDB’s configuration file located?
The main configuration file is at: /opt/couchdb/etc/local.ini
How do I enable CouchDB’s Fauxton web UI?
Fauxton is enabled by default. Access it via:http://your-server-ip:5984/_utils/