Share your love
Easy Way To Install TeamViewer on AlmaLinux 9
This tutorial intends to teach you to Install TeamViewer on AlmaLinux 9 or RHEL 9. TeamViewer is a remote application software that enables you to share your desktop screens between two computers.
TeamViewer supports Windows, macOS, Linux distributions, iOS, and Android. You can follow the steps below on the Orcacore website to Install TeamViewer on AlmaLinux 9.
Table of Contents
Steps To Install TeamViewer on AlmaLinux 9
To install TeamViewer on AlmaLinux 9, you must have access to your server as a non-root user with sudo privileges. For this purpose, you can visit this guide on Initial Server Setup with AlmaLinux 9.
Step 1 – Download TeamViewer RPM Linux Binary Packge
First, you need to update your local package index by using the following command:
sudo dnf update -yThen, install the Epel repository with the command below:
sudo dnf install epel-release -yBecause the TeamViewer package isn’t available in the almaLinux repository, so you need to add it to your server. To do this, you can use the following command:
sudo wget https://download.teamviewer.com/download/linux/teamviewer.x86_64.rpmStep 2 – Install TemViewer on RHEL / AlmaLinux 9
When you are finished downloading the TeamViewer RPM package, you can Install TeamViewer on AlmaLinux 9 by using the command below:
sudo dnf install ./teamviewer.x86_64.rpm -yStep 3 – Run TeamViewer on RHEL / AlmaLinux 9
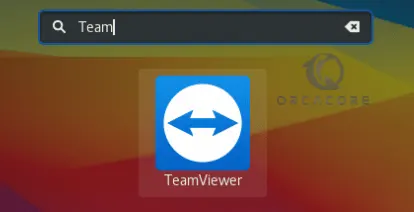
At this point, you can access your TeamViewer app on AlmaLinux 9. To do this, from your application manager search for the TeamViewer and click on its icon.
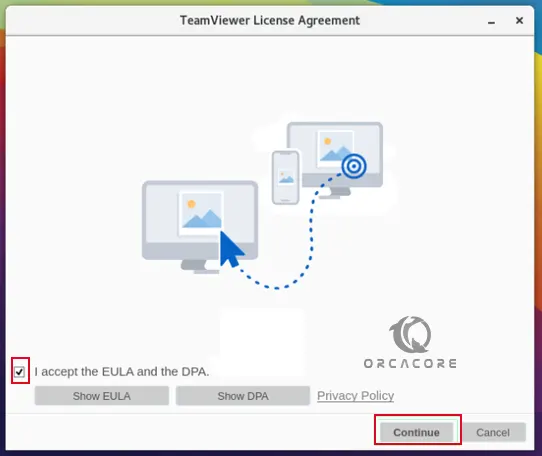
Then, accept the license agreement and click continue.
Now you should see your TeamViewer app. From there you can share your ID and Password with other users to connect to your PC or connect to other users as well.

Step 4 – Practical uses of TeamViewer on AlmaLinux 9
As we said, TeamViewer is commonly used for technical support, remote meetings, file sharing, and accessing computers securely.
Here are some practical uses of TeamViewer on AlmaLinux 9:
- Remote Desktop Access: TeamViewer allows you to access your AlmaLinux 9 desktop from anywhere, whether you’re using another Linux system, Windows, macOS, or even a smartphone.
- Remote Technical Support: If you’re providing technical support, TeamViewer enables you to connect to a client’s AlmaLinux 9 system quickly.
- File Sharing and Transfer: TeamViewer makes file sharing between devices simple.
- Collaboration and Meetings: TeamViewer allows users to hold virtual meetings and collaborate in real time. Whether you’re hosting a remote team meeting, presenting a project, or working on shared tasks, you can use TeamViewer to connect with others and share your AlmaLinux screen for effective communication.
- Remote Server Management: For server administrators, TeamViewer is a valuable tool to manage AlmaLinux 9 servers remotely.
- Access AlmaLinux 9 from Mobile Devices: One of the most convenient features of TeamViewer is its ability to connect to your AlmaLinux system from mobile devices. Whether you’re on the go or away from your computer, you can use the TeamViewer mobile app to control and manage your system from a smartphone or tablet.
- Cross-Platform Compatibility: TeamViewer supports multiple platforms, making it easy to connect your AlmaLinux system with devices running Windows, macOS, or Android.
- Secure Remote Access: TeamViewer provides end-to-end encryption, ensuring that your connections and data transfers are secure.
Step 5 – Start TeamViewer on Remote Linux through SSH
At this point, we want to show you how to launch Teamviewer remotely through SSH on AlmaLinux 9. To do this, follow the steps below:
First, from your Linux terminal, locate your TeamViewer installation path with the command below:
sudo whereis teamviewerOutput
teamviewer: /usr/bin/teamviewer /etc/teamviewerThen, use the command below to get the TeamViewer information such as version, ID, and status:
sudo /usr/bin/teamviewer --info Output
TeamViewer 15.42.4 (RPM)
TeamViewer ID:
teamviewerd status ● teamviewerd.service - TeamViewer remote control
Active: active (running) Note: If you don’t remember the password to connect to Teamviewer, you can reset it by using this command:
sudo /usr/bin/teamviewer –passwd newpasswordNote: If your TemViewer status is not active, you can run the commands below to start and enable your service:
# sudo systemctl enable teamviewerd.service
# sudo systemctl start teamviewerd.service
Next, you need to check those new connections are opened to the TeamViewer server with the following command:
sudo netstat -ntap | grep teamviewerNow close your ssh session to your home computer otherwise you won’t be able to connect to Teamviewer remotely. Once closed the ssh session try to connect to your home PC remotely using any other device you have.
When you are finished, close the TeamViewer session and reconnect to your home computer again with ssh.
Conclusion
At this point, you have learned to install TeamViewer on AlmaLinux 9 / RHEL 9. Also, you have learned to run your application and start to use it. For an optional step, you have learned to launch Teamviewer remotely through SSH.
Hope you enjoy it. You may be interested in these articles:
WineHQ Installation in Ubuntu 22.04