Share your love
Install and Use Webmin on Rocky Linux 9: Best Administration Tool
This guide intends to teach you to Install and Use Webmin on Rocky Linux 9. Webmin is a web-based administration tool for the Linux operating system. It allows you to manage your server from a Web interface. In this guide on the Orcacore website, you will learn to install Webmin on Rocky Linux 9 by adding its repository and accessing the Webmin console through a web browser.
Table of Contents
How To Install and Use Webmin on Rocky Linux 9?
To complete the Webmin Rocky Linux setup, you must access your server as a root user and set up a basic firewall. For this purpose, you can visit this guide on Initial Server Setup with Rocky Linux 9.
Now follow the steps below to complete the Webmin Rocky Linux setup.
Step 1 – Import Webmin GPG Key
Webmin packages aren’t available in the default Rocky Linux 9 repository. Here you need to import the Webmin GPG key to your server by using the command below:
# wget https://download.webmin.com/jcameron-key.asc
# rpm --import jcameron-key.asc
Step 2 – Add Webmin Repository on Rocky Linux 9
At this point, you need to add the Webmin repo by creating a Yum repository file. To do this, run the following command:
cat << EOF > /etc/yum.repos.d/webmin.repo
[Webmin]
name=Webmin Distribution Neutral
#baseurl=https://download.webmin.com/download/yum
mirrorlist=https://download.webmin.com/download/yum/mirrorlist
enabled=1
gpgkey=https://download.webmin.com/jcameron-key.asc
gpgcheck=1
EOF
When you are done, run the system update with the following command:
dnf update -yStep 3 – Webmin Installation on Rocky Linux 9
Now you can easily run the command below to install Webmin. Also, you must install Perl because Webmin is based on Perl.
dnf install perl webmin -yNote: During the installation, all dependencies should be resolved automatically.
Step 4 – Check Webmin Status
Webmin must be started and enabled by default. Verify that your Webmin service is active and running on Rocky Linux 9 y using the following command:
systemctl status webminOutput
● webmin.service - Webmin server daemon
Loaded: loaded (/usr/lib/systemd/system/webmin.service; enabled; vendor pr>
Active: active (running) since Sat 2023-04-03 03:46:20 EST; 6s ago
Process: 71258 ExecStart=/usr/libexec/webmin/miniserv.pl /etc/webmin/minise>
Main PID: 71259 (miniserv.pl)
Tasks: 4 (limit: 23609)
Memory: 54.3M
CPU: 4.520s
CGroup: /system.slice/webmin.service
...Step 5 – Configure Firewall for Webmin
By default, Webmin listens on port 100000. You can check it using the following command:
ss -antpl | grep 10000You should see the following output:
Output
LISTEN 0      4096         0.0.0.0:10000      0.0.0.0:*    users:(("miniserv.pl",pid=71259,fd=5))
Now you need to allow Webmin port 10000 through the Rocky Linux firewall with the following command:
firewall-cmd --add-port=10000/tcp --permanentTo apply the new rules, reload the firewall:
firewall-cmd --reloadStep 6 – How To Access Webmin Console?
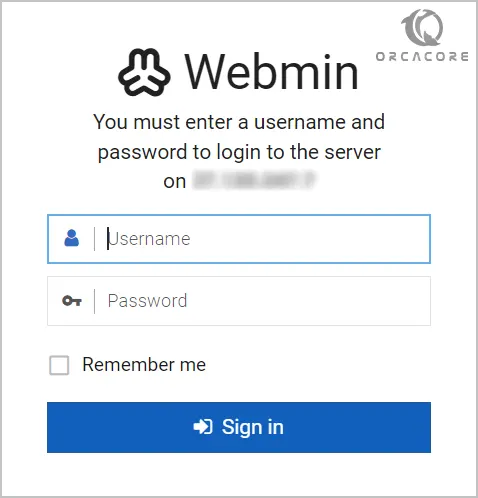
Now that you have installed Webmin on your Rocky Linux 9, you can access your Webmin dashboard through a web interface. To do this, type your server’s IP address in your web browser followed by 10000:
https://server-ip:10000You will see your Webmin login screen. Provide your root username, and password, and click on the Sign in button.
You should see the Webmin dashboard:
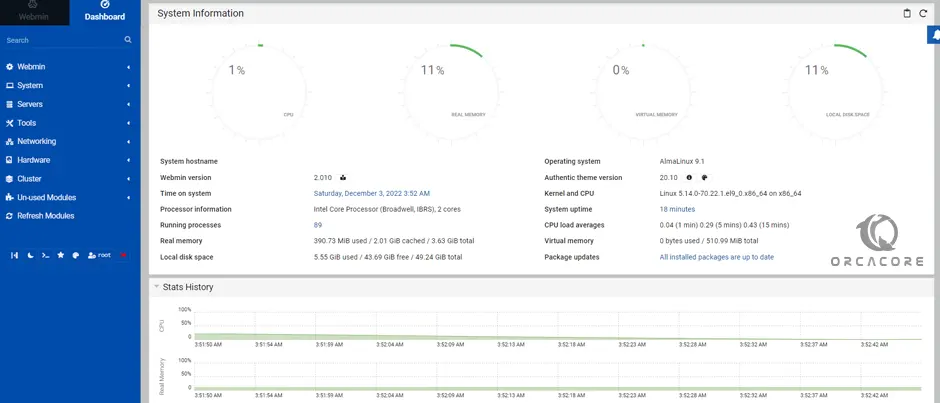
From here, you can manage and configure your server.
Step 7 – How To Use Webmin Console?
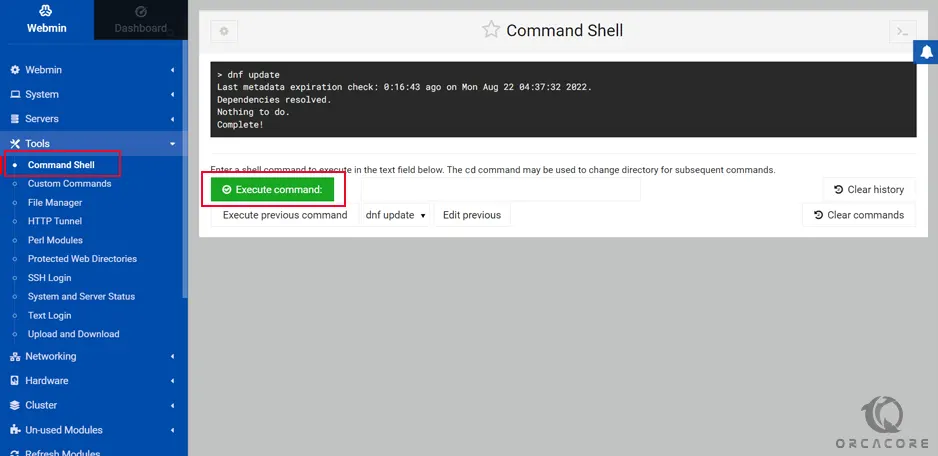
At this point, we want to show you a basic usage of Webmin. From your dashboard, on the left side, click on Tools => Command Shell. You can access your Linux terminal and run your commands.
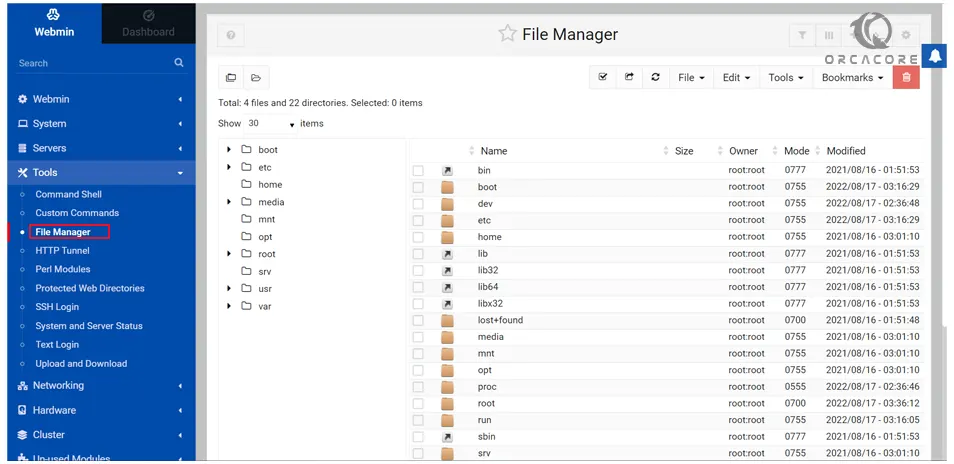
You can easily create a file or directory and manage your file system. To do this, Click on Tools => File Manager.
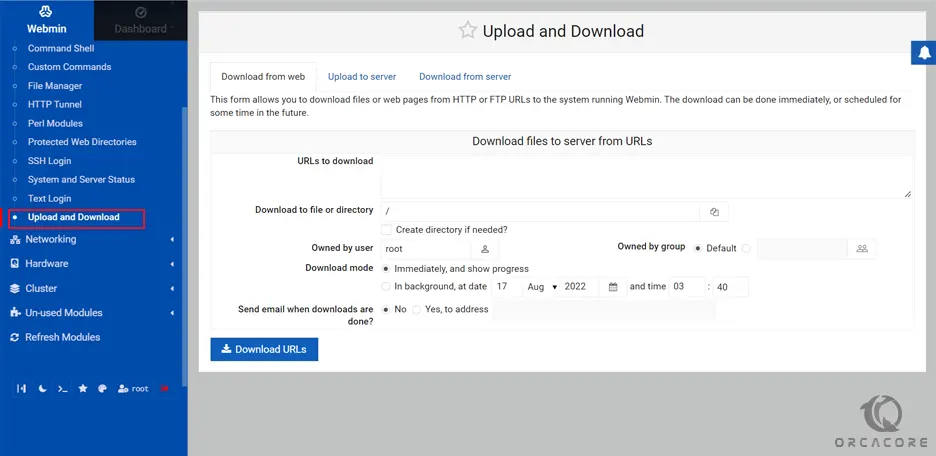
To upload and download any file to your Rocky Linux 9 server, Click on Tools => Upload and Download from your Webmin dashboard.
Click on the Networking => Network Configuration. You should see the network configuration. From there, you can set up a static IP address, default gateway, hostname, and DNS.

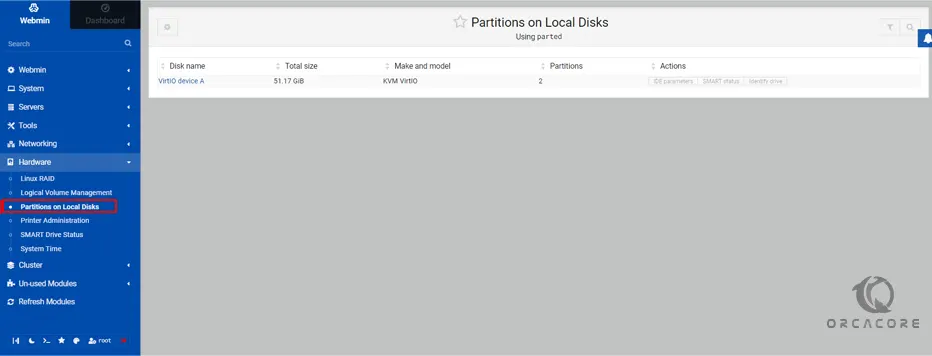
Also, you can create and edit your hard disk partitions. Click on Hardware => Partitions and Local Disks.
For more information, you can visit the Webmin Documentation page.
Conclusion
At this point, you have learned to install and access the Webmin console on Rocky Linux 9 by adding a repo file. By using this administration tool, you can easily configure your server users, services, applications, etc. Also, you can modify your open-source services such as Apache, PHP, etc.
Hope you enjoy it. You may also interested in these articles: