Share your love
Comprehensive Guide To Install Etherpad on AlmaLinux 9
In this guide, you will learn to Install and Use Etherpad on AlmaLinux 9. Etherpad is an online web-based editor that allows you to edit a text document and monitor all edits in real time. It is an alternative to Google Docs and it is a simple and easy-to-use editor.
You can now proceed to the following guide steps provided by the Orcacore team to Install Etherpad on AlmaLinux 9.
Table of Contents
Complete Guide To Install and Use Etherpad on AlmaLinux 9
This tutorial will show a complete guide setup for Etherpad installation and usage on AlmaLinux and RHEL. To set up the Etherpad editor, you need some requirements. Let’s see what we need.
Requirements
First, you must have access to your server as a non-root user with sudo privileges. For this purpose, you can follow this guide on Initial Server Setup with AlmaLinux 9.
Then, you must install MariaDB on your server. To do this, you can check this guide on Install MariaDB 10.11 on AlmaLinux 9.
Because we want to install Nginx as a reverse proxy for Etherpad, you must install it on your server. To do this, you can check the installation part of this guide on Install Nginx Web Server on AlmaLinux 9.
As Etherpad is written in Node.js, you must have Node.js installed on your server. To install Node.js LTS, you can visit this guide on Install Node.js on AlmaLinux 9.
Also, you need a valid domain name that is pointed to your server’s IP address.
When you are done, follow the steps below to Install Etherpad on AlmaLinux 9.
Step 1 – Install AlmaLinux 9 Dependencies for Etherpad
First, you need to install the development tools on your server. To do this, you can run the command below:
sudo dnf group install "Development Tools" -yThen, run the command below to install other dependencies:
sudo dnf install gzip git python3-devel openssl-devel pkg-config -yStep 2 – Create Etherpad Database User on AlmaLinux 9
Now you need to log in to your MariaDB shell by using the command below:
sudo mariadb -u root -pFrom your MariaDB shell, run the command below to create an Etherpad database on AlmaLinux 9:
MariaDB [(none)]> CREATE DATABASE etherpaddb;Create an Etherpad database user with a strong password and grant all privileges to it by using the command below:
MariaDB [(none)]> GRANT ALL PRIVILEGES ON etherpaddb.* TO etherpaduser@localhost IDENTIFIED BY 'password';Finally, flush the privileges and exit from the MariaDB console:
MariaDB [(none)]> FLUSH PRIVILEGES;
MariaDB [(none)]> EXIT;
Step 3 – Install Etherpad on AlmaLinux 9 / RHEL 9
Before starting to Install Etherpad on AlmaLinux 9, it is recommended to run Etherpad with a different user. To do this, you can create the user with the command below:
sudo adduser --home /opt/etherpad --shell /bin/bash etherpadThen, set the correct permissions for your Etherpad directory with the following command:
sudo install -d -m 755 -o etherpad -g etherpad /opt/etherpadNext, switch to your Etherpad user and use the following git command to clone the Etherpad from GitHub in the latest version:
# su - etherpad
# git clone --branch master https://github.com/ether/etherpad-lite.git
At this point, switch to your downloaded directory and run and install Etherpad on AlmaLinux 9 by using the following command:
# cd etherpad-lite
# bin/run.sh
When it is completed, you will get the following output:
Output
...
[2023-06-10 07:01:07.237] [WARN] console - Etherpad is running in Development mode. This mode is slower for users and less secure than production mode. You should set the NODE_ENV environment variable to production by using: export NODE_ENV=production
[2023-06-10 07:01:07.238] [INFO] server - Etherpad is running
To stop the server, press CTRL C.
Step 4 – Define Database and Admin Setting for Etherpad
At this point, you need to edit the settings.json file and define your database and admin settings. Open the file with your favorite text editor, we use the vi editor:
vi settings.jsonFind the following lines and remove them:
"dbType" : "dirty",
  "dbSettings" : {
                   "filename" : "var/dirty.db"
                 },
Then, change the following MySQL settings with your database credentials:
  "dbType" : "mysql",
  "dbSettings" : {
    "user":     "etherpaduser",
    "host":     "localhost",
    "port":     3306,
    "password": "password",
    "database": "etherpaddb",
    "charset":  "utf8mb4"
  },
Find the line trustProxy and set it to true:
"trustProxy": true,Finally, define a password for the admin user as shown below:
  "users": {
    "admin": {
      "password": "adminpassword",
      "is_admin": true
    },
When you are done, save and close the file.
Next, install the required dependencies with the following command:
./bin/installDeps.shWhen it is completed, you can exit from your Etherpad user:
exitStep 5 – Create a Systemd Unit File for Etherpad
To manage your Etherpad service, you need to create a systemd unit file. To do this, you can run the following command:
sudo vi /etc/systemd/system/etherpad.serviceAdd the following content to the file:
[Unit]
Description=Etherpad-lite, the collaborative editor.
After=syslog.target network.target

[Service]
Type=simple
User=etherpad
Group=etherpad
WorkingDirectory=/opt/etherpad/etherpad-lite
Environment=NODE_ENV=production

ExecStart=/usr/bin/node /opt/etherpad/etherpad-lite/src/node/server.js

Restart=always

[Install]
WantedBy=multi-user.target
When you are done, save and close the file.
Reload the system daemon with the following command:
sudo systemctl daemon-reloadThen, start and enable your Etherpad service with the commands below:
# sudo systemctl start etherpad
# sudo systemctl enable etherpad
Verify your Etherpad service is active and running on AlmaLinux 9:
sudo systemctl status etherpadOutput
● etherpad.service - Etherpad-lite, the collaborative editor.
Loaded: loaded (/etc/systemd/system/etherpad.service; enabled; preset: dis>
Active: active (running) since Sat 2023-06-10 07:12:04 EDT; 29s ago
Main PID: 105098 (node)
Tasks: 13 (limit: 23609)
Memory: 140.5M
CPU: 10.954s
CGroup: /system.slice/etherpad.service
└─105098 /usr/bin/node /opt/etherpad/etherpad-lite/src/node/server>
...Step 6 – Configure Nginx as a Reverse Proxy for Etherpad
At this point, you have learned to Install Etherpad on AlmaLinux 9. Now you need to configure Nginx for Etherpad as a reverse proxy on AlmaLinux 9.
Use the following command to create a Nginx virtual host file:
sudo vi /etc/nginx/conf.d/etherpad.confAdd the following content to the file:
upstream etherpad {
   server localhost:9001;
   keepalive 32;
}

server {
   listen 80;
   server_name examle.com;

   location / {
       client_max_body_size 50M;
       proxy_set_header X-Real-IP $remote_addr;
       proxy_http_version 1.1;
       proxy_pass http://etherpad;
   }
}
When you are done, save and close the file.
Check your Nginx for syntax errors:
nginx -tOutput
nginx: the configuration file /etc/nginx/nginx.conf syntax is ok
nginx: configuration file /etc/nginx/nginx.conf test is successfulThen, restart Nginx to apply the changes:
sudo systemctl restart nginxStep 7 – Configure Firewall For Etherpad
At this step of Install Etherpad on AlmaLinux 9, you need to open HTTP and HTTPS, and 9001 ports on your server. To do this, run the commands below:
# sudo firewall-cmd --add-service={http,https} --permanent
# sudo firewall-cmd --permanent --add-port=9001/tcp
Reload the firewall to apply the changes:
sudo firewall-cmd --reloadStep 8 – How To Access Etherpad Dashboard on AlmaLinux 9?
At this step of Install Etherpad on AlmaLinux 9, you can access your Etherpad web interface by typing your domain name in your web browser followed by 9001:
http://your-domain:9001You will see the following page. Provide your page name and click OK:

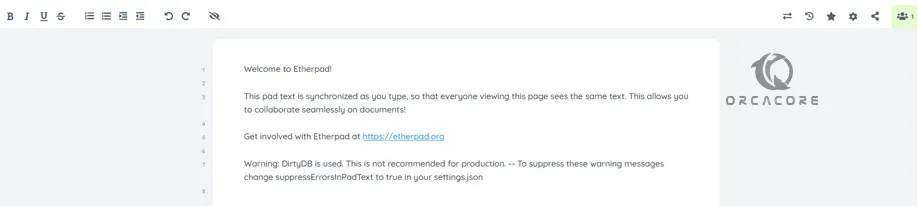
Then, you will see the Etherpad dashboard as shown below:
Step 9 – How To Use Etherpad Editor?
At this point, you have learned to Install Etherpad on AlmaLinux 9. To start using Etherpad, we begin with single-author writing.
Single Writing with Etherpad
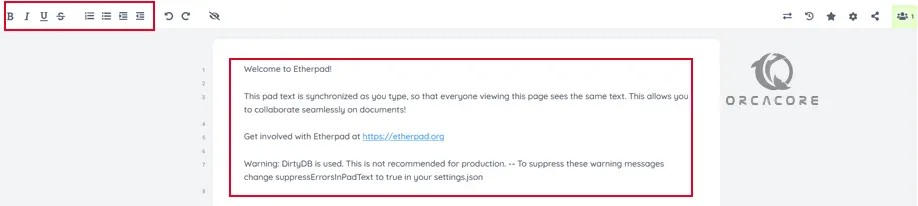
You can easily remove the Welcome text that you have seen in the dashboard and start your writing. As you can see in the top left side of the Etherpad dashboard, you can format the text using the provided buttons. These are in order: Bold, Italic, Underline, Strikethough, Numbered list, Unordered list, Indent, Outdent, Undo, and Redo.
Multiple Writing with Etherpad
With Etherpad, other people easily can join the pad and start to type their text. And it will appear in a different color. With this option, you can track who has written what.
It is a good idea for you to link your name with your color. To do this, click on the icon of the head and shoulders at the top right of your page. Type a name, select your color, and press enter.

As more users start to edit the document they will appear in this list. This allows you to see who has written which text.
Invite others to collaborate with you on Etherpad
To invite others to collaborate with you on your pad, you can click on the share Icon to show options for sharing the pad.
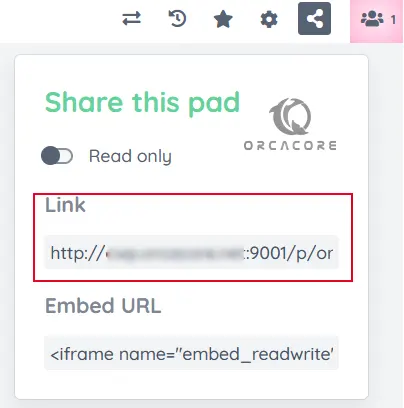
Then, copy the link and share it with other people to join you in the writing of the document you have just started.
Chat with other writers on Etherpad
One of the amazing features of Etherpad is that you can communicate in real time with other writers remotely.
To activate the chat, click on the chat icon at the bottom of the right side.
For more information, you can visit the Etherpad official site.
Step 10 (Optional) – How To Secure Etherpad Installation with Let’s Encrypt?
If you want to increase the security of Install Etherpad on AlmaLinux 9, you can generate SSL certificates from Let’s Encrypt. To do this, you can check this guide on Secure Nginx with Let’s Encrypt on AlmaLinux 9.
When you are done with getting your SSL certificates, you can now access your Etherpad by using HTTPS.
https://domain-name:9001Conclusion
At this point, you have learned to Install Etherpad on AlmaLinux 9. Also, you have learned to how work with your Etherpad editor and secure your installation by generating the SSL certificates.
Hope you enjoy it. You may also interested in these articles:
Install Mattermost on AlmaLinux 9