Share your love
Open Port on Windows Firewall with 3 Easy Steps

This tutorial intends to teach you How To Open Port on Windows Firewall. To open a port through the firewall on your Windows system, you need to create an inbound and/or outbound rule.
Inbound means someone else from outside of your computer initiates the connection to your computer, so the traffic starts flowing inward to your machine. For example, your server gets requests from people.
Outbound means you initiate the connection and the traffic starts flowing outward of your computer to the destination you intended. For example, you connect to a server.
Now follow the guide steps below on the Orcacore website to open the Firewall port Windows 10/11.
Table of Contents
Steps To Open Port on Windows Firewall
To complete this guide, log in to your Windows Client and follow the steps below.
1. Open a Specific Port for Inbound Traffic
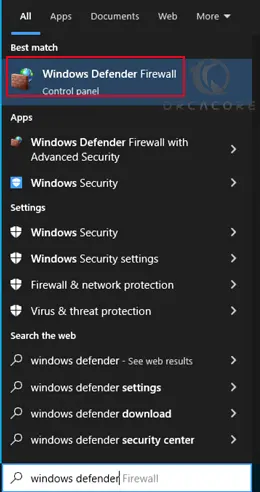
First, you need to search for the Windows Defender Firewall from your search bar and click on it.
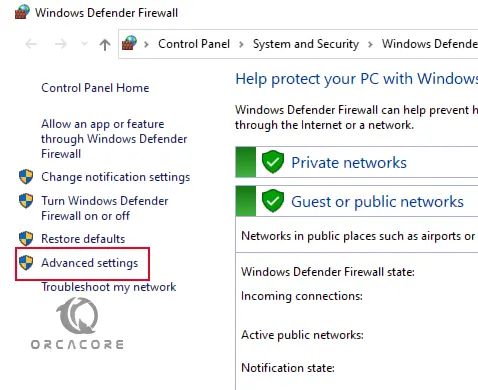
From the Windows Defender firewall click Advanced Settings.
Then, click the Inbound Rules option.

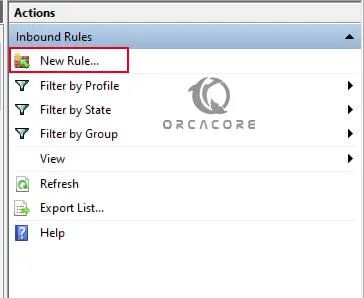
On the right sidebar, click New Rule. This will open a new window for you.
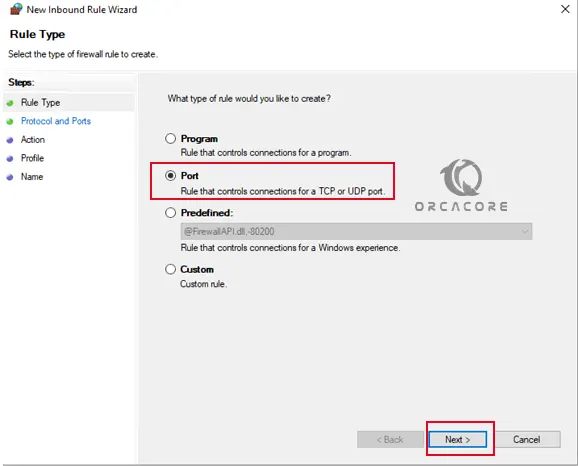
Then, choose the Port option and click Next.
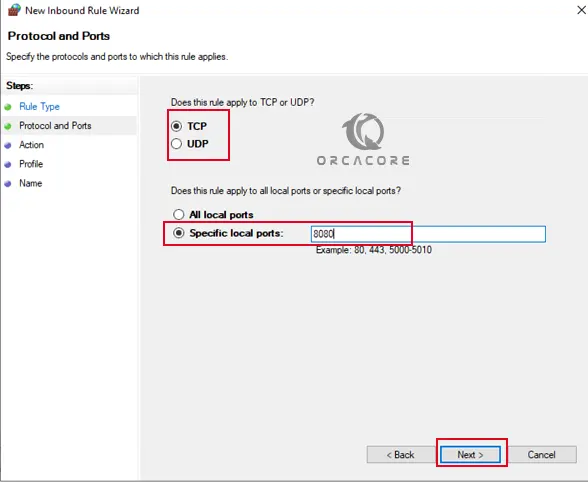
Next, you need to choose a TCP or UDP port depending on your needs. Here we choose TCP. And select the Specific local ports option and type the port number you want to open. Click Next.
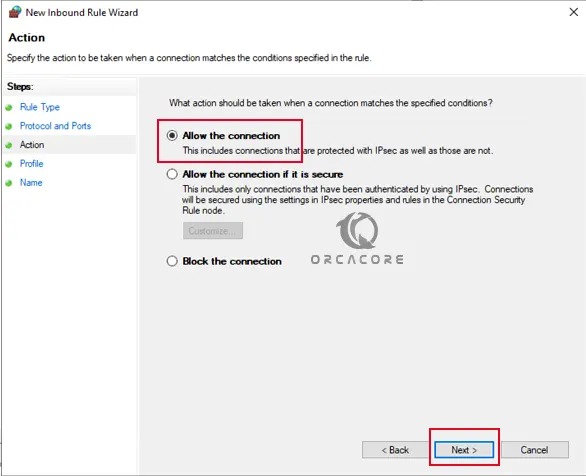
On the Action window, select Allow the connection and click Next.
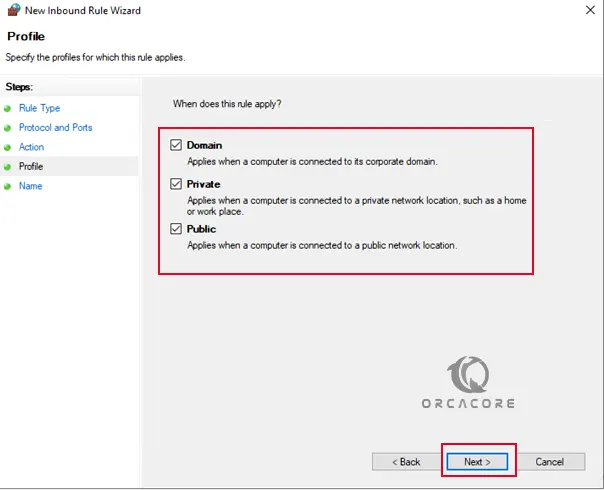
Then, select the network types you want the rule to apply and click Next.
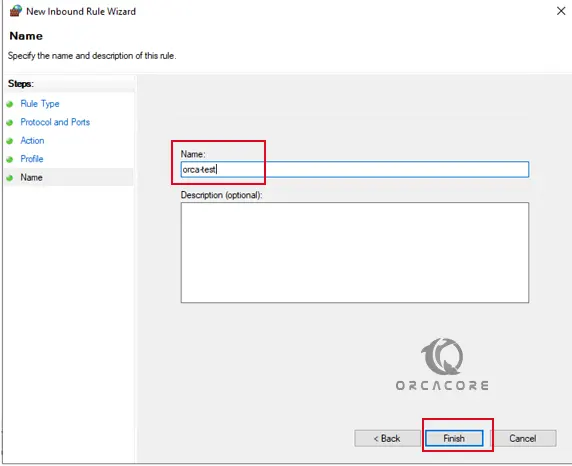
Finally, give a name for your rule and click Finish.
From the inbounds rule window, you should see your newly configured rule.
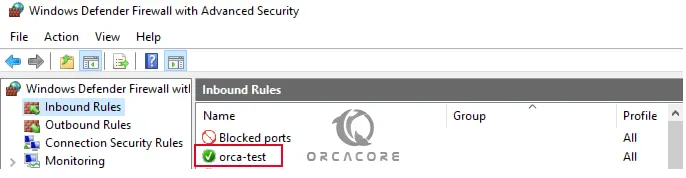
At this point, you’ve opened a port in Windows Firewall for inbound traffic.
2. Open a Specific Port for Outbound Traffic
To open a specific port for outbound traffic, you should do the same steps as the inbound traffic. You just choose Outbound Rules from the advanced settings and do the same steps.
First, you need to search for the Windows Defender Firewall from your search bar and click on it.
From the Windows Defender firewall click Advanced Settings.
Then, click the Outbound Rules option.
On the right sidebar, click New Rule. This will open a new window for you.
Then, choose the Port option and click Next.
Next, you need to choose a TCP or UDP port depending on your needs. Here we choose TCP. Select the Specific local ports option and type the port number you want to open. Click Next.
On the Action window, select Allow the connection and click Next.
Then, select the network types you want the rule to apply and click Next.
Finally, give a name for your rule and click Finish.
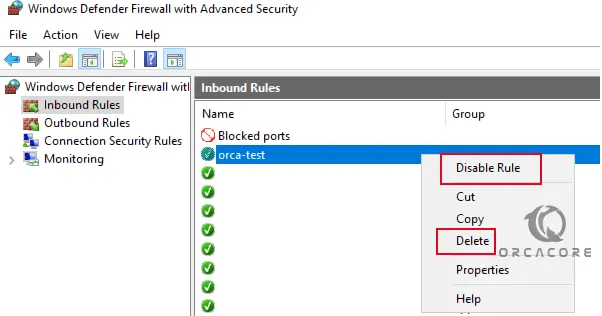
3. Disable and Delete Open Port on Windows Firewall
If you decide to disable or delete your firewall rule, you can follow the steps below.
First, you need to search for the Windows Defender Firewall from your search bar and click on it.
From the Windows Defender firewall click Advanced Settings.
Then, choose your desired traffic inbound or outbound rule. Find the desired rule and right-click on the rule and select the Disable Rule option or Delete option.
That’s it, you are done with opening firewall port windows.
Conclusion
At this point, you have learned to Open a Specific Port (Inbound or Outbound) on Windows Firewall.
Hope you enjoy it. Also, you may like to read the following articles: