Share your love
Secure Nginx Web Server Let’s Encrypt on Debian 12
In this guide, we want to teach you how to Secure Nginx Web Server Let’s Encrypt on Debian 12 Bookworm. Let’s Encrypt is a certificate authority that provides SSL/TLS certificates. You can use certbot to generate SSL certificates for your Nginx web server on Debian 12. Now follow the steps below on the Orcacore website to Secure Nginx Web Server Let’s Encrypt on Debian 12.
Table of Contents
How To Secure Nginx Web Server Let’s Encrypt on Debian 12 Bookworm?
To Secure Nginx Web Server Let’s Encrypt on Debian 12, you need some requirements. Let’s see what we need.
Requirements for Nginx Let’s Encrypt
You must have access to your server as a non-root user with sudo privileges and set up a basic firewall. To do this, you can follow this guide on Initial Server Setup with Debian 12 Bookworm.
Also, you must install Nginx and create an Nginx server block. For this purpose, you can visit this guide on How To Install nginx Web Server on Debian 12.
Now follow the steps below to Secure Nginx Web Server Let’s Encrypt on Debian 12.
Step 1 – Certbot Installation on Debian 12
To Secure Nginx Web Server Let’s Encrypt on Debian 12, we use Certob to get our SSL certificate for Nginx. We use the snap package manager to install Certbot.
First, run the system update with the following command:
sudo apt updateThen, install Snap on Debian 12 by using the command below:
sudo apt install snapd -yAfter this, you need to install some dependencies on your server that are needed for any snap you install, including the Certbot snap.
Now use the snap command to install the core snap:
sudo snap install coreOutput
core 16-2.58.3 from Canonical✓ installedThen, refresh the core snap with the following command:
sudo snap refresh coreAt this point, you can install the certbot snap with the following command:
sudo snap install --classic certbotOutput
certbot 2.6.0 from Certbot Project (certbot-eff✓) installedThis installation process will install the certbot executable in the /snap/bin/ directory.
You need to create a symbolic link to this file in the /usr/bin/ directory to make sure that you can run the certbot command on your system:
sudo ln -s /snap/bin/certbot /usr/bin/certbotStep 2 – Check Nginx Web Server Configuration on Debian 12
Certbot needs to find the correct Nginx server block in your Nginx configuration to automatically configure SSL.
You need to open the server block file for your domain with your favorite text editor to check the server name that matches the domain you request a certificate for:
sudo vi /etc/nginx/sites-available/example.comFind the server_name line and make sure that it is pointing to your domain name.
...
server_name example.com www.example.com;
...
Then save and close your file.
Now verify the syntax of your configuration edits with the following command:
sudo nginx -t
In your output, you should see:
Output

nginx: the configuration file /etc/nginx/nginx.conf syntax is ok
nginx: configuration file /etc/nginx/nginx.conf test is successfulNote: If you get an error, open the file again and check for any typos or missing characters.
Then, reload the Nginx for a new configuration with the following command:
sudo systemctl reload nginxAt this point, certbot can find the correct server block and update it. Proceed to the next steps to Secure Nginx Web Server Let’s Encrypt on Debian 12.
Step 3 – Configure Firewall For Nginx
Also, you need to update the firewall to allow HTTPS traffic. We assumed that you are done with the requirements for the setting up ufw firewall.
See the current settings with the following command:
sudo ufw statusTo allow HTTPS traffic run the command below and after that delete the “Nginx HTTP” profile:
# sudo ufw allow 'Nginx Full'
# sudo ufw delete allow 'Nginx HTTP'
Now check the ufw status:
sudo ufw statusOutput
Status: active
To Action From
-- ------ ----
OpenSSH ALLOW Anywhere
Nginx Full ALLOW Anywhere
OpenSSH (v6) ALLOW Anywhere (v6)
Nginx Full (v6) ALLOW Anywhere (v6)Now you can get an SSL certificate with Let’s Encrypt on Debian 12 (Secure Nginx Web Server Let’s Encrypt on Debian 12).
Step 4 – Generate SSL Certificates for Nginx from Let’s Encrypt on Debian 12
The Nginx plugin will take care of reconfiguring Nginx and reloading the config whenever necessary.
Certbot Nginx Debian 12
At this step of Secure Nginx Web Server Let’s Encrypt on Debian 12, you can use this plugin to get your SSL certificate with Let’s Encrypt. To do this, run the command below:
sudo certbot --nginx -d example.comYou will be asked some questions. The first is to enter your email address. From here you can press y and enter to continue.
If that’s successful, the configuration will be updated automatically and Nginx will reload to pick up the new settings.
In your output, you will see:
Output
Successfully received certificate.
Certificate is saved at: /etc/letsencrypt/live/example.com/fullchain.pem
Key is saved at:         /etc/letsencrypt/live/example.com/privkey.pem
This certificate expires on 2023-09-16.
These files will be updated when the certificate renews.
Certbot has set up a scheduled task to automatically renew this certificate in the background.

Deploying certificate
Successfully deployed certificate for example.com to /etc/nginx/sites-enabled/example.com
Congratulations! You have successfully enabled HTTPS on https://example.com

- - - - - - - - - - - - - - - - - - - - - - - - - - - - - - - - - - - - - - - -
If you like Certbot, please consider supporting our work by:
 * Donating to ISRG / Let's Encrypt:   https://letsencrypt.org/donate
 * Donating to EFF:                    https://eff.org/donate-le
- - - - - - - - - - - - - - - - - - - - - - - - - - - - - - - - - - - - - - - -
You can reload your website by using https://example.com and you should see the lock icon in your browser.
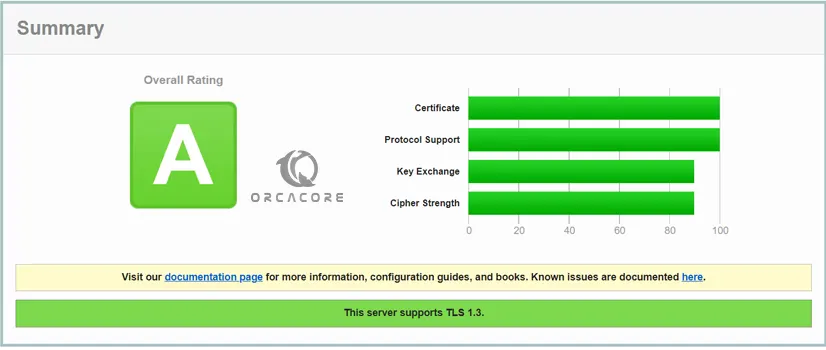
Also, you can test your server by using the SSL Labs Server Test. You will get an A grade from there.
Set up Auto Renewal SSL Certificates
Let’s Encrypt certificates are only valid for 90 days. You can run a script to /etc/cron.d. This will run twice a day and will automatically renew any certificate that’s within thirty days of expiration.
Run the command below to test the renewal process:
sudo certbot renew --dry-runIn your output, you will see:
Output
Saving debug log to /var/log/letsencrypt/letsencrypt.log

- - - - - - - - - - - - - - - - - - - - - - - - - - - - - - - - - - - - - - - -
Processing /etc/letsencrypt/renewal/example.com.conf
- - - - - - - - - - - - - - - - - - - - - - - - - - - - - - - - - - - - - - - -
Account registered.
Simulating renewal of an existing certificate for example.com

- - - - - - - - - - - - - - - - - - - - - - - - - - - - - - - - - - - - - - - -
Congratulations, all simulated renewals succeeded:
  /etc/letsencrypt/live/example.com/fullchain.pem (success)
- - - - - - - - - - - - - - - - - - - - - - - - - - - - - - - - - - - - - - - -
Conclusion
At this point, you have learned to Secure Nginx Web Server Let’s Encrypt on Debian 12 by installing certbot and generating SSL certificates. Also, you have learned to set up the auto-renewal process for your SSL certificates.
Hope you enjoy it. Please subscribe to us on Facebook, Instagram, and Twitter.