Share your love
How To Set up Caddy Web Server on Ubuntu 20.04

In this article, we want to teach you How To Set up or Install Caddy Web Server on Ubuntu 20.04.
Caddy is a powerful, enterprise-ready, open-source web server with automatic HTTPS written in Go.
How To Set up Caddy Web Server on Ubuntu 20.04
Before you start to set up Caddy on your server, you need to log in to your server as a root or non-root user with sudo privileges and set up a basic firewall. To do this, you can follow our article the Initial Server Setup with Ubuntu 20.04.
Also, you need a domain name that is pointed to your server’s IP address.
Now follow the steps below to install the Caddy web server on Ubuntu 20.04.
Steps To Install Caddy on Ubuntu 20.04
By default, Caddy is not available in the default Ubuntu repository.
Add Caddy Repository on Ubuntu 20.04
So you need to add the Caddy repository on Ubuntu 20.04 with the commands below:
# sudo apt install -y debian-keyring debian-archive-keyring apt-transport-https
# curl -1sLf 'https://dl.cloudsmith.io/public/caddy/stable/gpg.key' | sudo tee /etc/apt/trusted.gpg.d/caddy-stable.asc
# curl -1sLf 'https://dl.cloudsmith.io/public/caddy/stable/debian.deb.txt' | sudo tee /etc/apt/sources.list.d/caddy-stable.list
Then, update your local package index with the following command:
sudo apt update
Install Caddy on Ubuntu
Now use the command below to install Caddy on Ubuntu 20.04:
sudo apt install caddy
Here you can verify your Caddy installation with the following command:
sudo systemctl status caddy
In your output you will see:
Output
caddy.service - Caddy
Loaded: loaded (/lib/systemd/system/caddy.service; enabled; vendor preset:>
Active: active (running) since Sun 2022-02-13 11:07:46 CET; 27s ago
Docs: https://caddyserver.com/docs/
Main PID: 3308 (caddy)
Tasks: 8 (limit: 2282)
Memory: 7.1M
CGroup: /system.slice/caddy.service
└─3308 /usr/bin/caddy run --environ --config /etc/caddy/Caddyfile
Configure Firewall For Caddy
Caddy serves websites using HTTP and HTTPS protocols, so you need to allow access to ports 80, and 443.
sudo ufw allow proto tcp from any to any port 80,443Now you can type your server’s IP address in your web browser to see that your Caddy web server is installed on your server correctly.
http://server-IP-address
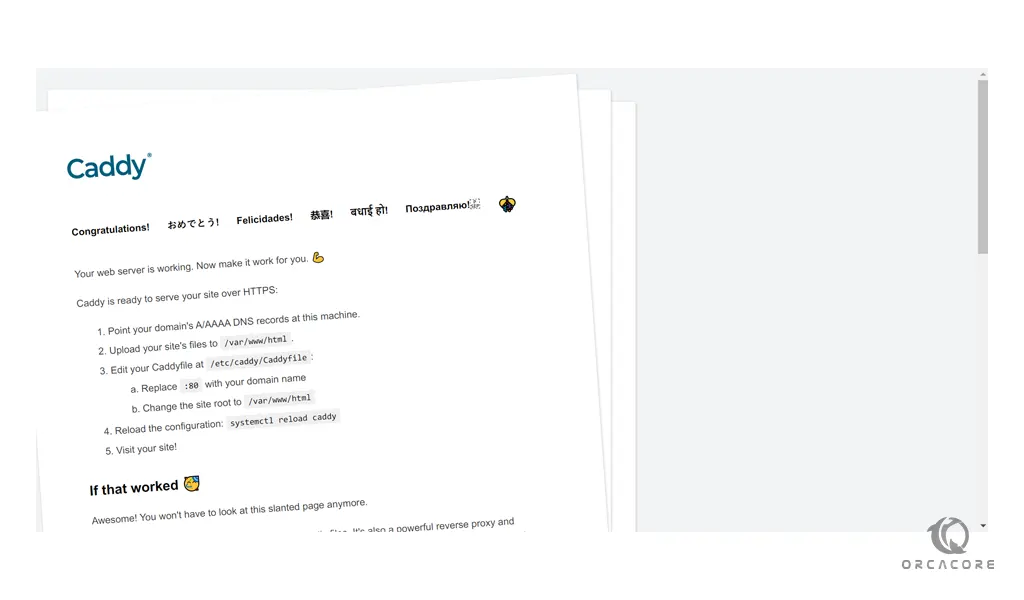
You will see the following page:

Enable PHP for Caddy Web server on Ubuntu 20.04
It is normal for a web server to have PHP support, at least.
First, install PHP and the required packages on Ubuntu 20.04 with the command below:
sudo apt install php-fpm php-mysql php-curl php-gd php-mbstring php-common php-xml php-xmlrpc -y
Next, you need to edit the PHP-FPM configuration file. Open the file with your favorite text editor, here we use vi:
sudo vi /etc/php/7.4/fpm/pool.d/www.conf
In the file, find the lines below and change them to Caddy as shown below:
user = caddy
group = caddy
listen.owner = caddy
listen.group = caddy
When you are done, save and close the file.
To apply the changes, restart the PHP-FPM service:
sudo systemctl restart php7.4-fpm
Edit Caddy Configuration File on Ubuntu
Here you need to make some configuration changes to the Caddy web server main configuration file. Open the file with your favorite text editor, here we use vi:
sudo vi /etc/caddy/Caddyfile
By default, the file is very basic. Most of the file is commented. Comment the few lines that are not by adding the # at the beginning of the lines and adding the following content to the file. Just remember to replace the domain with your domain name.
your-domain-name:80 {
    root * /usr/share/caddy/
    encode gzip zstd
    php_fastcgi unix//run/php/php7.4-fpm.sock
}
When you are done, save and close the file.
To apply the changes, restart the Caddy web server with the command below:
sudo systemctl restart caddy
Create a Sample PHP File For Caddy
Then, create a sample PHP file for Caddy with the following command:
sudo vi /usr/share/caddy/info.php
Add the following content to the file:
<?php

phpinfo();
?>
When you are done, save and close the file.
Here you can access the Caddy website by typing your domain name in your web browser followed by info.php:
http://your-domain-name/info.php
When you have finished reading your PHP info, it’s better to remove your PHP file for more security.
sudo rm -rf /usr/share/caddy/info.php
You can always rebuild your file every time you need it.
Conclusion
At this point, you learn to Set up Caddy Web Server on Ubuntu 20.04.
Hope you enjoy it.
Also, you can check the orcacore website to see more guides and articles.
You may be interested in these articles:


