Share your love
Set up Clang LLVM on Debian 12

In this guide, you will learn to Set up Clang LLVM on Debian 12 and Create a test program with it to see if it is working correctly. Clang LLVM is a compiler infrastructure project that includes several components, including the Clang C/C++ compiler front end and the LLVM compiler back end. Together, they form a powerful toolchain for compiling code written in various programming languages into machine code that can be executed on a computer.
At this point, you can follow the rest of the article to start your Clang LLVM setup on Debian 12.
Step-by-Step Guide To Set up Clang LLVM on Debian 12
Before you start your installation, you must access your server as a non-root user with sudo privileges. For this purpose, you can check the Initial Server setup on Debian 12.
Then, follow the steps below to complete this guide.
Step 1 – Install Clang From Debian 12 APT Repository
As you may know, the Clang package is available in the default Debian 12 repository. First, run the system update with the command below:
sudo apt updateThen, use the following command to install Clang:
sudo apt install clang -yVerify your Clang installation by checking its version:
clang --version

Now you can proceed to the next step to get the latest version of Clang by using the LLVM script.
Step 2 – Get Clang with LLCM Script on Debian 12
First, install some required packages with the command below:
sudo apt install lsb-release wget software-properties-common gnupg
At this point, you can use the following wget command to get the latest LLVM APT repository script:
sudo wget https://apt.llvm.org/llvm.sh
Then, make your downloaded file executable with the following command:
sudo chmod +x llvm.sh
Now you can use the following command to install your desired Clang version. At the current time, the latest version of Clang is 18. To install it, you can run:
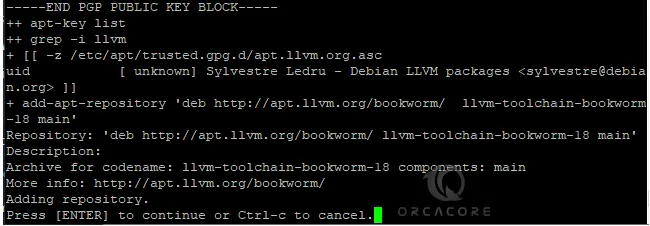
# sudo ./llvm.sh 18
Press Enter to continue your installation.

Once your installation is completed, check your Clang version:
clang --version
You will see that your Clang version is still the default Clang 14. To set the default version to the latest, proceed to the next step.
Step 3 – Set Latest Clang Version As the Default Compiler on Debian 12
To set your latest version as the default compiler, you can easily use the following commands:
# sudo update-alternatives --install /usr/bin/clang++ clang++ /usr/bin/clang++-18 100
# sudo update-alternatives --install /usr/bin/clang clang /usr/bin/clang-18 100Note: In the above commands, you can replace the version number with your specific version. The number 100 is the priority we have set for Clang.
If you want to use Clang instead gcc on Debian 12, you can run the command below:
sudo update-alternatives --config ccNow if you check your Clang version, you should see that it is set to your specific version:
clang --version
Step 4 – Test your Clang LLVM Installation
At this point, you can use Clang to compile your C and C++ codes. To see if it is working correctly, we created a sample Hello World project. Open a new C file with your desired text editor like Vi editor or Nano editor:
sudo vi hello.cAdd the following sample code to the file:
#include <stdio.h>

int main() {
printf("Hello, World!\n");
return 0;
}
When you are done, save and close the file.
Then, you can use Clang compiler to compile your test program:
sudo clang hello.c -o hello
Now run the program with the following command:
sudo ./helloIn your output, you should see:
Output
Hello, World!
To get more information, you can visit the official documentation.
Conclusion
Set up Clang LLVM on Debian 12 provides developers with a powerful compiler for building, optimizing, and analyzing code written in different programming languages. By following the installation process, users can simply integrate Clang’s front-end compiler and LLVM’s back-end optimization framework into their development workflow.
Hope you enjoy it. Also, you may like to read the following articles:
AppArmor Configuration on Debian 12 Bookworm


