Share your love
How To Set up Ntopng on Centos 7

In this article, we want to teach you How To Set up Ntopng on Centos 7.
Ntopng is computer software for monitoring traffic on a computer network. It is designed to be a high-performance, low-resource replacement for Ntop. The name is derived from Ntop next generation.
Ntopng is open-source software released under the GNU General Public License (GPLv3) for software. Source code versions are available for the operating systems: Unix, Linux, BSD, Mac OS X, and Windows. Binary versions are available for CentOS, Ubuntu, and OS X.
Ntopng’s engine is written in the programming language C++. The optional web interface is written in Lua.
Ntopng relies on the Redis key-value server rather than a traditional database, takes advantage of nDPI for protocol detection, supports geolocation of hosts, and is able to display real-time flow analysis for connected hosts.
How To Set up Ntopng on Centos 7
Before you start to set up Ntopng on Centos 7, you need to log in to your server as a non-root user with sudo privileges. To do this, you can follow our article the Initial Server Setup with Centos 7.
Also, you need to set up a basic firewall. To do this, you can follow How To Set up Firewall with firewalld on Centos 7.
Now you can follow the steps below to complete this guide.
Install Ntopng on Centos 7
First, you need to add the Ntopng repository on your Centos 7 with the curl command:
curl https://packages.ntop.org/centos/ntop.repo > /etc/yum.repos.d/ntop.repo
Then, you need to install the Epel repository on your server with the following command:
sudo yum install epel-release
Now you need to be sure zeromq3 is not installed on your server. To do this, run the following command:
sudo yum erase zeromq3
Update your local package index with the command below:
#sudo yum clean all
#sudo yum update
At this point, you can install Ntopng and the required packages with the following command:
sudo yum install pfring-dkms n2disk nprobe ntopng cento
When your installation is completed, you can start and enable your Ntopng service to start on boot with the following commands:
# sudo systemctl start ntopng.service
# sudo systemctl enable ntopng.service
At this point, verify that your Ntopng service is active and running on Centos 7 with the command below:
sudo systemctl status ntopng.service
Output
ntopng.service - ntopng high-speed web-based traffic monitoring and analysis tool
Loaded: loaded (/usr/lib/systemd/system/ntopng.service; enabled; vendor preset: disabled)
Active: active (running) since Mon 2022-03-07 03:31:06 EST; 13s ago
Main PID: 2843 (2/flow_checks)
CGroup: /system.slice/ntopng.service
└─2843 /usr/bin/ntopng /run/ntopng.conf
At this point, you need to configure the Centos 7 firewall to allow traffic on Ntopng port 3000. To do this, run the command below:
sudo firewall-cmd --zone=public --permanent --add-port=3000/tcpReload the firewall to apply the changes:
sudo firewall-cmd --reload
Access Ntopng Web Interface
At this point, you can access the Ntop web interface by typing your server’s IP address in your web browser followed by 3000:
http://your-server-ip:3000
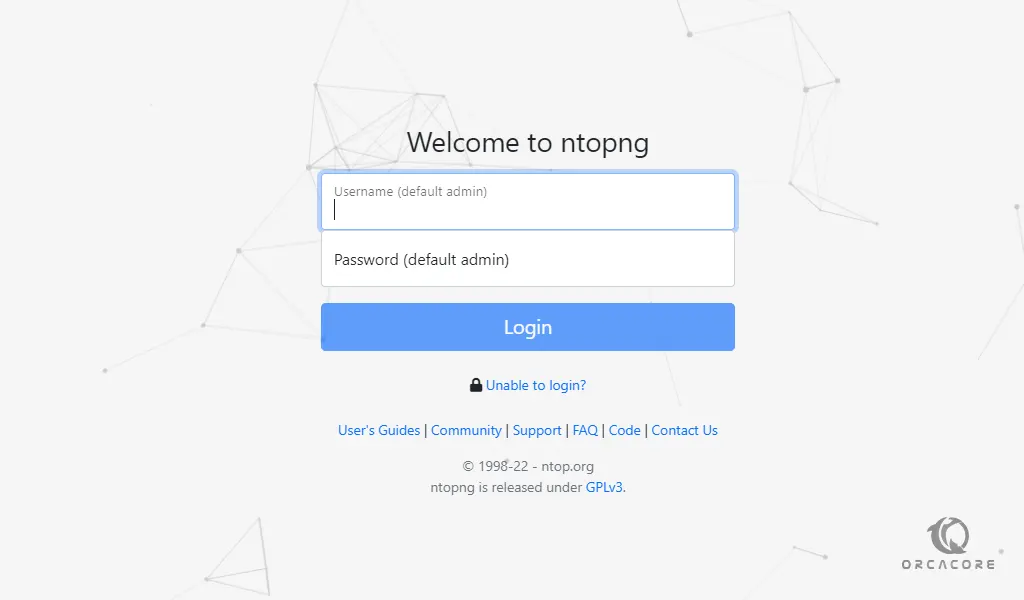
You will see the Ntopng login screen. Enter Admin as username and password and click login.
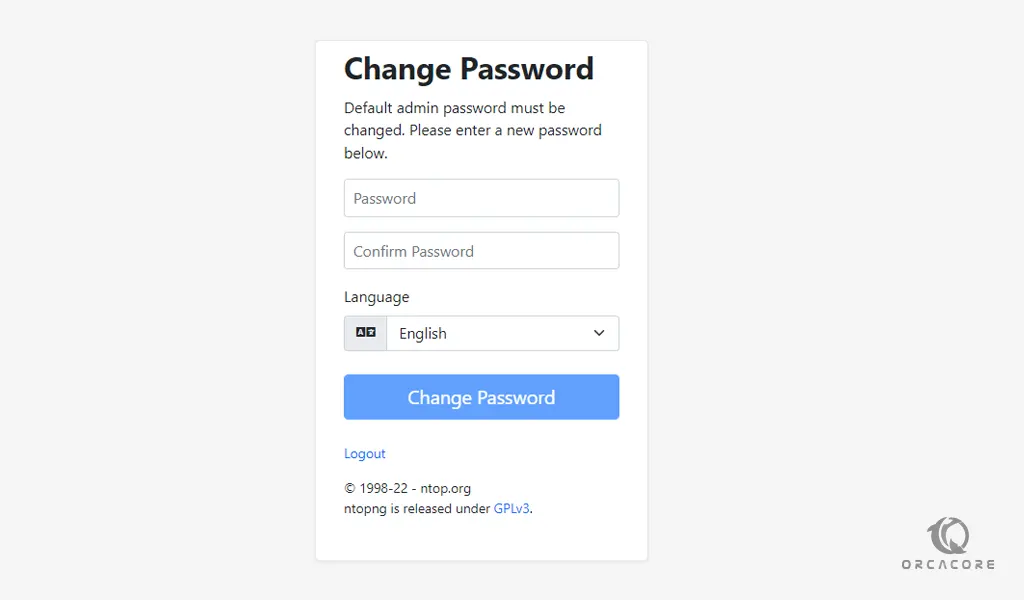
Then, you need to change the default admin password. When you have changed it click change password.
Now you will see your Ntopng dashboard.

For more information, you can visit the Ntopng documentation page.
Conclusion
At this point, you learn to Set up Ntopng on Centos 7.
Hope you enjoy it.
Also, you may be interested in these articles: