Share your love
Set up PowerDNS on Ubuntu 22.04: Best DNS-Related Software
In this guide on the Orcacore website, we intend to teach you How To Set up PowerDNS on Ubuntu 22.04. Also, you will learn to set up PowerAdmin on Ubuntu 22.04.
PowerDNS or pdns is an open-source (GPL) software. It provides software to create authoritative DNS, Recursive DNS, DNS loading balancer, Debugging tools, and APIs to provision zones and records. A complete suite of DNS-related software that you can use for your company.
Benefits of PowerDNS:
- Instant startup when hosting many domains
- Use of multi-core (32+ cores) processors
- Low memory requirement
- DNSSEC
- High performance
- Support different scripts
- Support different types of databases
- IPv6 support
Table of Contents
Set up PowerDNS and PowerDNS Admin on Ubuntu 22.04
To complete this guide, log in to your server as a non-root user with sudo privileges. To do this, you can follow our guide on Initial Server Setup with Ubuntu 22.04.
1. Install MariaDB For PowerDNS
In this guide, we use MariaDB as backend storage for PowerDNS zone files.
First, update your local package index with the following command:
sudo apt updateThen, use the following command to install the required packages and dependencies:
sudo apt install software-properties-common gnupg2 curl git -yNow use the following command to install MariaDB on Ubuntu 22.04:
sudo apt install mariadb-server mariadb-client -yStart and enable your MariaDB service:
# sudo systemctl start mariadb
# sudo systemctl enable mariadb
Create PowerDNS Database and User
At this point, you need to log in to your MariaDB shell by using the command below:
sudo mysql -u rootThen, from your MariaDB shell run the command below to create a PowerDNS database, here we named it powerdb:
MariaDB [(none)]> CREATE DATABASE powerdb;Next, create a PowerDNS user and grant all the privileges to it. Here we named it poweruser, remember to choose a strong password for:
MariaDB [(none)]> GRANT ALL ON powerdb.* TO 'poweruser'@'%' IDENTIFIED BY 'password';Finally, flush the privileges and exit from the MariaDB shell:
MariaDB [(none)]> FLUSH PRIVILEGES;
MariaDB [(none)]> EXIT
2. Disable systemd-resolved Service on Ubuntu 22.04
systemd-resolved is a system service that provides network name resolution to local applications. It implements a caching and validating DNS/DNSSEC stub resolver, as well as an LLMNR and MulticastDNS resolver and responder.
At this point, you need to disable and stop the systemd-resolved service by using the commands below:
# sudo systemctl stop systemd-resolved
# sudo systemctl disable systemd-resolved
Then, you need to remove the symbolic link for the /etc/resolv.conf file by using the command below:
# ls -lh /etc/resolv.conf
-rw-r--r-- 1 root root 102 Mar 16 08:10 /etc/resolv.conf
# sudo unlink /etc/resolv.conf
Next, use the following command to update the /etc/resolv.conf:
echo "nameserver 8.8.8.8" | sudo tee /etc/resolv.conf3. Set up PowerDNS on Ubuntu 22.04
At this point, we will install PowerDNS from the APT repository.
To do this, you can use the command below:
sudo apt install pdns-server pdns-backend-mysql -yWhen your installation is completed, you can configure your PowerDNS database.
4. Configure PowerDNS Database on Ubuntu 22.04
At this point, you need to import the PowerDNS database schema. To do this run the command below with the PowerDNS user and database that you have created before:
mysql -u poweruser -p powerdb < /usr/share/pdns-backend-mysql/schema/schema.mysql.sqlAfter the schema has been imported, you need to configure the PowerDNS connection details to the database. To do this, create and open a file with your favorite text editor, here we use the vi editor:
sudo vi /etc/powerdns/pdns.d/pdns.local.gmysql.conf Add the following lines to the file with your PowerDNS database values:
# MySQL Configuration
# Launch gmysql backend
launch+=gmysql
# gmysql parameters
gmysql-host=127.0.0.1
gmysql-port=3306
gmysql-dbname=powerdb
gmysql-user=poweruser
gmysql-password=password
gmysql-dnssec=yes
# gmysql-socket=
When you are done, save and close the file.
Set the correct ownership and permission for the file:
# sudo chown pdns: /etc/powerdns/pdns.d/pdns.local.gmysql.conf
# sudo chmod 640 /etc/powerdns/pdns.d/pdns.local.gmysql.conf
Now you can verify your PowerDNS database connection on Ubuntu 22.04 by using the command below:
# sudo systemctl stop pdns.service
# sudo pdns_server --daemon=no --guardian=no --loglevel=9
In your output you will see:
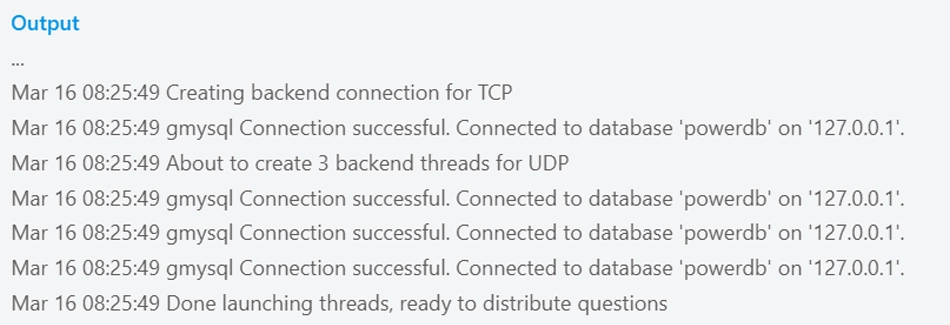
Start and Enable PowerDNS Service
At this point, start and enable your PowerDNS service by using the following commands:
# sudo systemctl restart pdns
# sudo systemctl enable pdns
Check PowerDNS Port
Verify that port 53 is open for PowerDNS on Ubuntu 22.04:
sudo ss -alnp4 | grep pdnsOutput
udp UNCONN 0 0 0.0.0.0:53 0.0.0.0:* users:(("pdns_server",pid=4402,fd=5))
tcp LISTEN 0 128 0.0.0.0:53 0.0.0.0:* users:(("pdns_server",pid=4402,fd=7))You can also check if PowerDNS is responding to requests by using the command below:
dig @127.0.0.1
At this point, the installation of PowerDNS is completed, and you can proceed to the next step to install PowerDNS Admin on Ubuntu 22.04.
5. Install PowerDNS Admin on Ubuntu 22.04
With this Web-based admin tool, we can easily manage the PowerDNS server. To install PowerDNS admin, you need to install the Python development package and other required packages.
Install Required packages
First, use the following command to install the Python development package:
sudo apt install python3-dev -yThen, install the required build tools:
sudo apt install libsasl2-dev libldap2-dev libssl-dev libxml2-dev libxslt1-dev libxmlsec1-dev libffi-dev pkg-config apt-transport-https virtualenv python3-venv build-essential libmariadb-dev git python3-flask -yAt this point, you need to install Node.js on Ubuntu 22.04. To do this, use the following commands:
# curl -sL https://deb.nodesource.com/setup_16.x | sudo -E bash -
# sudo apt install -y nodejs
Also, you need to have Yarn installed on your server. To do this, use the following commands to add the GPG key and repository and install Yarn:
# curl -sL https://dl.yarnpkg.com/debian/pubkey.gpg | gpg --dearmor | sudo tee /usr/share/keyrings/yarnkey.gpg >/dev/null
# echo "deb [signed-by=/usr/share/keyrings/yarnkey.gpg] https://dl.yarnpkg.com/debian stable main" | sudo tee /etc/apt/sources.list.d/yarn.list
# sudo apt update
# sudo apt install yarn -yClone PowerDNS Admin Souce Code
At this point, you need to clone the PowerDNS admin source code on Ubuntu 22.04 by using the command below:
# sudo su -
# git clone https://github.com/ngoduykhanh/PowerDNS-Admin.git /var/www/html/pdns
Create a Virtual Environment
At this point, you need to switch to your /var/www/html/pdns/ directory and create a virtual environment by using the commands below:
# cd /var/www/html/pdns/
# virtualenv -p python3 flask
Activate the environment and install the libraries specified in the requirements.txt:
# source ./flask/bin/activate
# pip install --upgrade pip
# pip install -r requirements.txt
After that, use the following command to deactivate your environment:
deactivateNow you need to configure the PowerDNS admin connectivity to your database.
Configure PowerDNS Admin Connection to PowerDNS Database
To do this, you need to edit the following file:
vi /var/www/html/pdns/powerdnsadmin/default_config.pyFind the lines below and change them to your PowerDNS database details:
### DATABASE CONFIG
SQLA_DB_USER = 'poweruser'
SQLA_DB_PASSWORD = 'password'
SQLA_DB_HOST = '127.0.0.1'
SQLA_DB_NAME = 'powerdb'
SQLALCHEMY_TRACK_MODIFICATIONS = True
....
When you are done, save and close the file.
Create a Database Schema
To do this, you can run the following commands step by step:
# cd /var/www/html/pdns/
# source ./flask/bin/activate
# export FLASK_APP=powerdnsadmin/__init__.py
# flask db upgrade
When you are finished, you should get an output similar to this:

Next, you need to generate the asset files using Yarn on Ubuntu 22.04:
# yarn install --pure-lockfile
# flask assets build
Last, deactivate your virtual environment:
deactivate6. Enable PowerDNS API access on Ubuntu 22.04
At this point, you need to edit the following file to enable PowerDNS API access:
sudo vi /etc/powerdns/pdns.confFind the sections below and add the following lines shown below:
# api   Enable/disable the REST API (including HTTP listener)
#
# api=no
api=yes

#################################
# api-key       Static pre-shared authentication key for access to the REST API
#
# api-key=
api-key=2315d9cd-047e-4dc2-8fde-3efa9092aeed #You can generate one from https://codepen.io/corenominal/pen/rxOmMJ
When you are done, save and close the file.
Finally, restart PowerDNS on Ubuntu 22.04 to apply the changes:
sudo systemctl restart pdns7. Create PowerDNS Admin Virtual Host File on Ubuntu 22.04
To complete this step, you need to install Nginx on your server:
sudo apt install nginx -yThen, use the following command to create and open a PowerDNS virtual host file:
sudo vi /etc/nginx/conf.d/powerdns-admin.confAdd the following content to the file:
server {
  listen	*:80;
  server_name               your-domain-name;

  index                     index.html index.htm index.php;
  root                      /var/www/html/pdns;
  access_log                /var/log/nginx/pdnsadmin_access.log combined;
  error_log                 /var/log/nginx/pdnsadmin_error.log;

  client_max_body_size              10m;
  client_body_buffer_size           128k;
  proxy_redirect                    off;
  proxy_connect_timeout             90;
  proxy_send_timeout                90;
  proxy_read_timeout                90;
  proxy_buffers                     32 4k;
  proxy_buffer_size                 8k;
  proxy_set_header                  Host $host;
  proxy_set_header                  X-Real-IP $remote_addr;
  proxy_set_header                  X-Forwarded-For $proxy_add_x_forwarded_for;
  proxy_headers_hash_bucket_size    64;

  location ~ ^/static/  {
    include  /etc/nginx/mime.types;
    root /var/www/html/pdns/powerdnsadmin;

    location ~*  \.(jpg|jpeg|png|gif)$ {
      expires 365d;
    }

    location ~* ^.+.(css|js)$ {
      expires 7d;
    }
  }

  location / {
    proxy_pass            http://unix:/run/pdnsadmin/socket;
    proxy_read_timeout    120;
    proxy_connect_timeout 120;
    proxy_redirect        off;
  }

}
When you are done, save and close the file.
Rename the default Nginx file with the command below:
sudo mv /etc/nginx/sites-enabled/default{,.old}Check the syntax of your created file:
nginx -tOutput
nginx: the configuration file /etc/nginx/nginx.conf syntax is ok
nginx: configuration file /etc/nginx/nginx.conf test is successfulNext, set the correct ownership for the file:
sudo chown -R www-data: /var/www/html/pdnsRestart Nginx to apply the changes:
sudo systemctl restart nginx8. Manage PowerDNS Admin on Ubuntu 22.04
To start and enable your service, you need to create a system unit file for PowerDNS Admin.
create and open the file with the following command:
sudo vi /etc/systemd/system/pdnsadmin.serviceAdd the following content to the file:
[Unit]
Description=PowerDNS-Admin
Requires=pdnsadmin.socket
After=network.target

[Service]
PIDFile=/run/pdnsadmin/pid
User=pdns
Group=pdns
WorkingDirectory=/var/www/html/pdns
ExecStart=/var/www/html/pdns/flask/bin/gunicorn --pid /run/pdnsadmin/pid --bind unix:/run/pdnsadmin/socket 'powerdnsadmin:create_app()'
ExecReload=/bin/kill -s HUP $MAINPID
ExecStop=/bin/kill -s TERM $MAINPID
PrivateTmp=true

[Install]
WantedBy=multi-user.target
When you are done, save and close the file.
Also, you need to create a socket file for PowerDNS Admin:
sudo vi /etc/systemd/system/pdnsadmin.socketAdd the following content to the file:
[Unit]
Description=PowerDNS-Admin socket

[Socket]
ListenStream=/run/pdnsadmin/socket

[Install]
WantedBy=sockets.target
when you are done, save and close the file.
Next, create an environment file:
# mkdir /run/pdnsadmin/
# echo "d /run/pdnsadmin 0755 pdns pdns -" >> /etc/tmpfiles.d/pdnsadmin.conf
Set the correct permissions for it:
# chown -R pdns: /run/pdnsadmin/
# chown -R pdns: /var/www/html/pdns/powerdnsadmin/
Finally, reload the system daemon:
sudo systemctl daemon-reloadNext, use the following commands to start and enable the PowerDNS Admin service on Ubuntu 22.04:
sudo systemctl enable --now pdnsadmin.service pdnsadmin.socketVerify your PowerDNS Admin is active and running on your server:
#sudo systemctl status pdnsadmin.service
● pdnsadmin.service - PowerDNS-Admin
     Loaded: loaded (/etc/systemd/system/pdnsadmin.service; enabled; vendor pre>
     Active: active (running) since Thu 2023-03-16 08:45:32 UTC; 17s ago
TriggeredBy: ● pdnsadmin.socket
   Main PID: 9831 (gunicorn)
      Tasks: 2 (limit: 4575)
...
#sudo systemctl status pdnsadmin.socket
● pdnsadmin.socket - PowerDNS-Admin socket
     Loaded: loaded (/etc/systemd/system/pdnsadmin.socket; enabled; vendor pres>
     Active: active (running) since Thu 2023-03-16 08:45:32 UTC; 58s ago
   Triggers: ● pdnsadmin.service
     Listen: /run/pdnsadmin/socket (Stream)
     CGroup: /system.slice/pdnsadmin.socket
...
9. Access PowerDNS Admin Web Interface
At this point, you can access your PowerDNS Admin web interface by typing your server’s IP or Domain name in your web browser:
http://domain_name
or
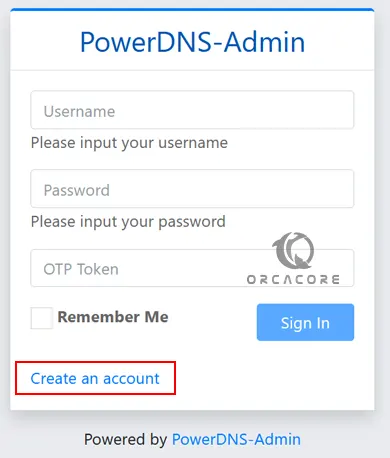
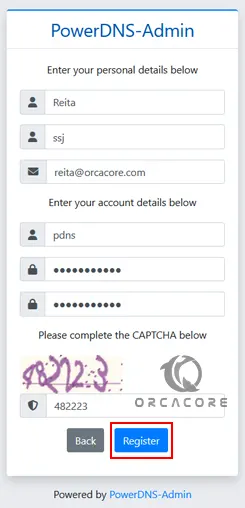
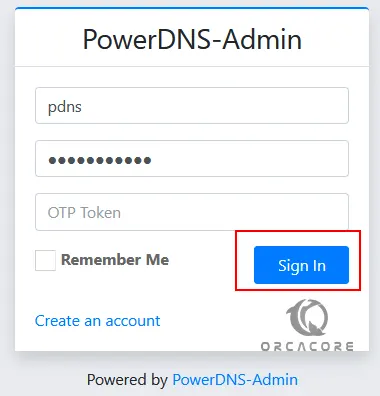
http://IP_addressBegin by creating the admin user account. With the required details provides, click register to create the account.
Now login to the PowerDNS Admin interface using the created user credentials.
Next, you should provide the PowerDNS API URL to connect to PowerDNS and manage it. Then, click on the Save Settings button to save the changes.

Click on the Dashboard button. You should see the PowerDNS admin dashboard. There are many configurations you can make to your server using the PowerDNS admin web UI such as editing the domain templates, removing domains, managing user accounts, etc. You can view the history of activities performed as well.
Conclusion
PowerDNS and PowerDNS Admin are tools used for managing DNS services, which are essential for mapping domain names to IP addresses. At this point, you have learned to Set up PowerDNS and PowerDNS Admin on Ubuntu 22.04.
Please subscribe to us on Facebook, Twitter, and YouTube.
Hope you enjoy it. You may also like these articles:
Introduce Ubuntu 22.04 (Jammy Jellyfish)
How To Set up Gradle on Ubuntu 22.04
Install and Configure Adminer on Ubuntu 22.04
How To Change Hostname on Ubuntu 22.04