Share your love
Install LAMP Stack on Ubuntu 20.04
LAMP Stack is a web service software that stands for the phrase Linux, Apache, MySQL, and PHP. In this article, we want to teach how to install LAMP Stack on Ubuntu 20.04. LAMP Stack helps to create a reliable, open-source, and cost-effective environment for building and hosting dynamic websites and web applications. Follow the steps below on the Orcacore website to install the LAMP stack step by step.
Table of Contents
Steps to Install LAMP Stack on Ubuntu 20.04
If you are connecting with a non-root user to your Linux, you should use the Sudo command first of all your commands. Check this article about the Initial server setup with Ubuntu 20.04.
Step 1 – Install Apache Web Server and Adjust the Firewall
At this point, you must install Apache as a web server on your Ubuntu 20.04. To do this, you can follow the steps below:
Installing Apache on Ubuntu 20.04
• Update your cache with:
sudo apt update• Install Apache with:
sudo apt install apache2 -yAdjust the Firewall on Ubuntu 20.04
To complete the installation of Apache for the LAMP stack on Ubuntu 20.04, you need to adjust the Firewall.
The default firewall configuration tool for Ubuntu is UFW. You can check that UFW has an application profile for Apache like so:
sudo ufw app listIn your output, you see available applications. Then, run this command:
sudo ufw app info "Apache Full"To allow incoming HTTP and HTTPS traffic for this server, run the command below:
sudo ufw allow "Apache Full"Reload the firewall to apply the changes:
sudo ufw reloadTo access your Ubuntu page, you need your IP address. Use the following command to get your IP address:
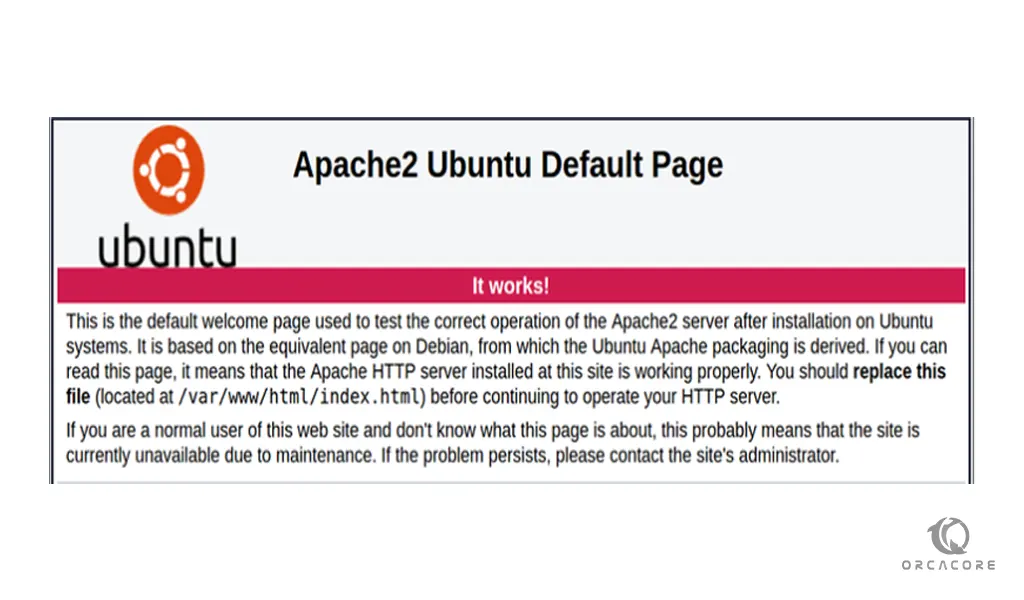
curl -4 icanhazip.comWhen you have your server’s IP address, enter it into your browser’s address bar:
http://your_server_ipYou’ll see the default Ubuntu Apache web page:
Step 2 – Installing MySQL on Ubuntu 20.04
At this point, you need MySQL for setting up the LAMP stack on Ubuntu 20.04. MySQL, the most popular open-source SQL database management system, is developed, distributed, and supported by Oracle Corporation.
Use this command to install the MySQL software:
sudo apt install mysql-server -yWhen the installation is completed, run a simple security script with the following command:
sudo mysql_secure_installationThis will ask if you want to configure the VALIDATE PASSWORD PLUGIN. If you answer yes, you should select a level of password level and then enter your password. It’s better to choose a strong password.
For the rest of the questions, press Y and hit the ENTER key at each prompt.
Test your MySQL by typing MySQL in your command line. Then type exit to exit from it.
Your MySQL server is now installed and secured.
Step 3 – Installing PHP on Ubuntu 20.04
At this point, to complete the installation of the LAMP stack on Ubuntu 20.04, you need to install PHP. PHP is a widely used open-source general-purpose scripting language that is especially suited for web development and can be embedded into HTML.
Run the following command to install all packages and their dependencies:
sudo apt install php libapache2-mod-php php-mysql -yRestart your Apache with the following command:
systemctl restart apache2Now your LAMP stack is installed and configured.
Conclusion
At this point, you have learned to set up LAMP Stack, which includes Apache as a web server, MySQL as a database management system, and PHP for web development on Ubuntu 20.04. Hope you enjoy it. Please subscribe to us on Facebook, X, and YouTube.
Recommendation: If you’re using Ubuntu 20.04 LTS, it’s advisable to plan an upgrade to a newer LTS version, such as Ubuntu 22.04 LTS or 24.04 LTS, to ensure continued support and security updates.
Install Ubuntu 25.04 on VMware
Install Ubuntu 24.04 LTS Desktop