Share your love
Add Multiple IP Addresses on Windows Server 2016

In this article, we want to teach you How To Add Multiple IP Addresses on Windows Server 2016.
The multiple IP addresses need to be configured when your Windows server is connected to multiple separate networks. And at the same time, the networks are not routed to each other, in which case you will need to enter multiple IP addresses.
In this guide, we will teach you to add more than one IP to your network settings and if you need to set several different IP addresses on it.
Note: You can use the following guide on Windows Server 2012, 2008, and their family.
How To Add Multiple IP Addresses on Windows Server 2016
To set up multiple IP addresses on your Windows Server, follow the steps below.
First, log in to your Windows Server 2016.
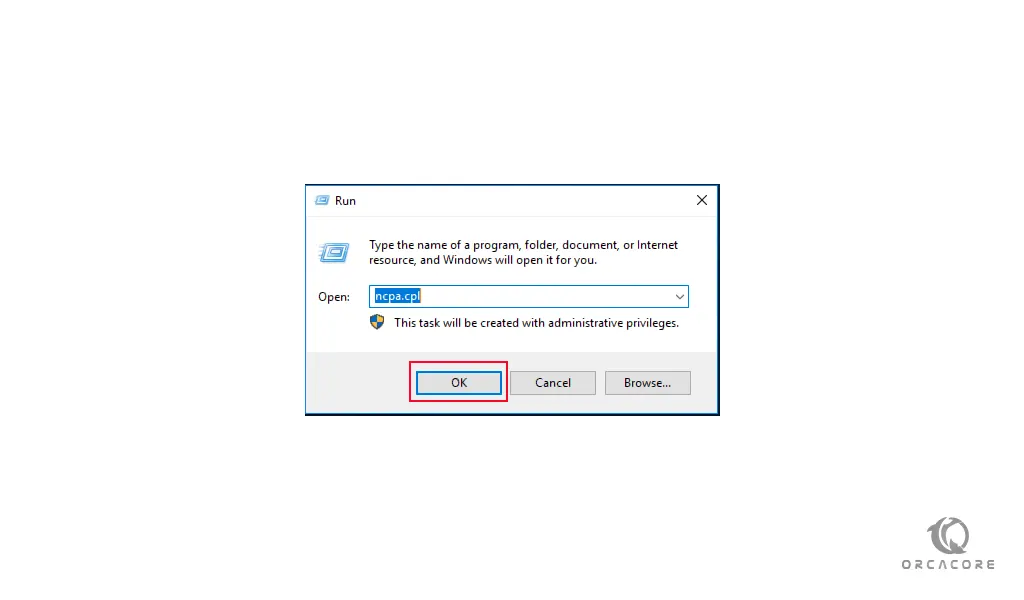
Then, open the Run window by pressing Winkey + R. Type the “ncpa.cpl” in your Run window to open the Network Connection window.
Note: The way to open the network adapter settings mentioned above, is the quick access method. You can also right-click on the network connection in the Windows taskbar. Click on Open Network and Sharing Center and then select Change Adapter Setting From the right side of the screen, and access your network interface settings.
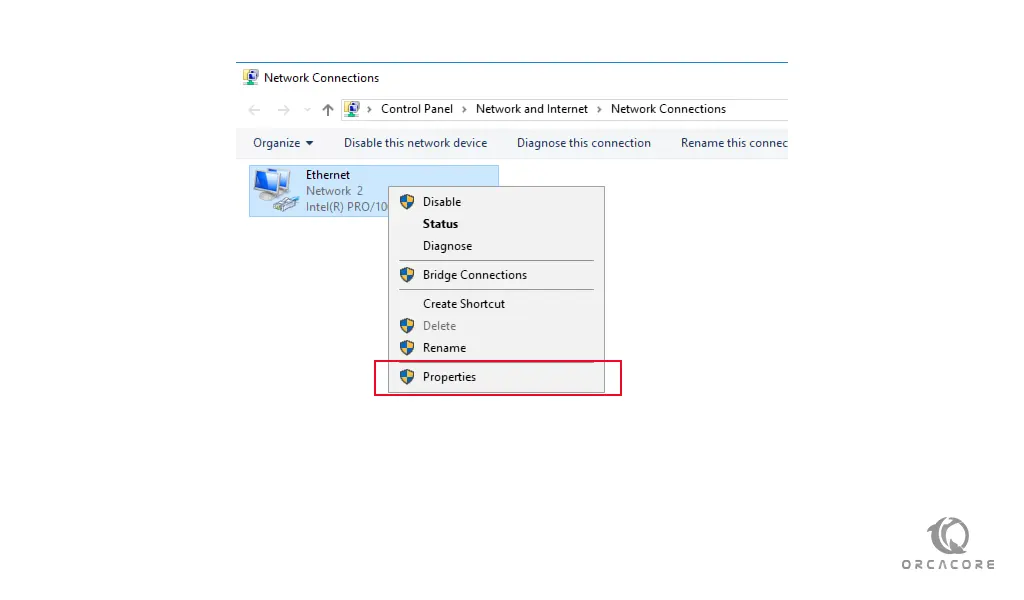
Now click on your desired interface and right-click on it and choose properties.
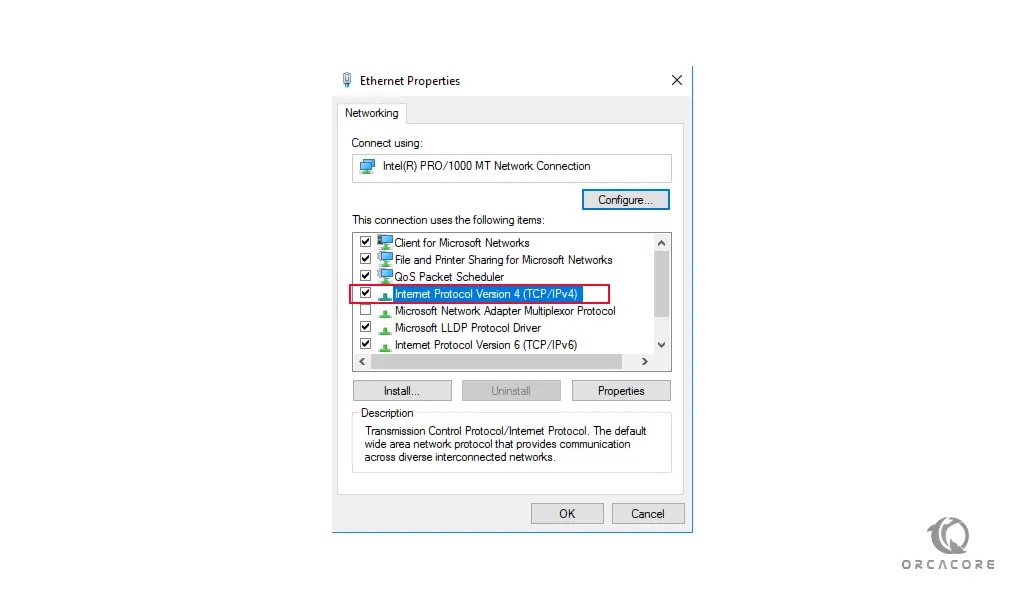
Next, in your server network adapter settings window, double-click Internet Protocol Version 4 to open it.
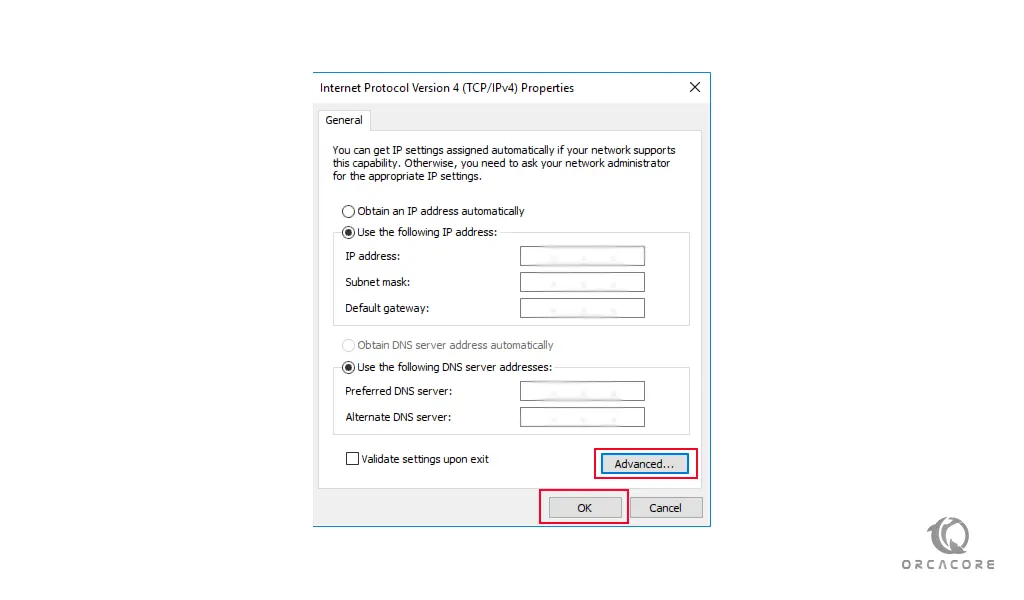
In this window, you will see the first IP address registered on your 2016 server; Click on Advanced.
Note: The second IP address can only be set manually if the first IP address is set manually on your Windows Server.
Then, click Add, enter the IP address along with your network Subnet Mask, and finally, click OK.
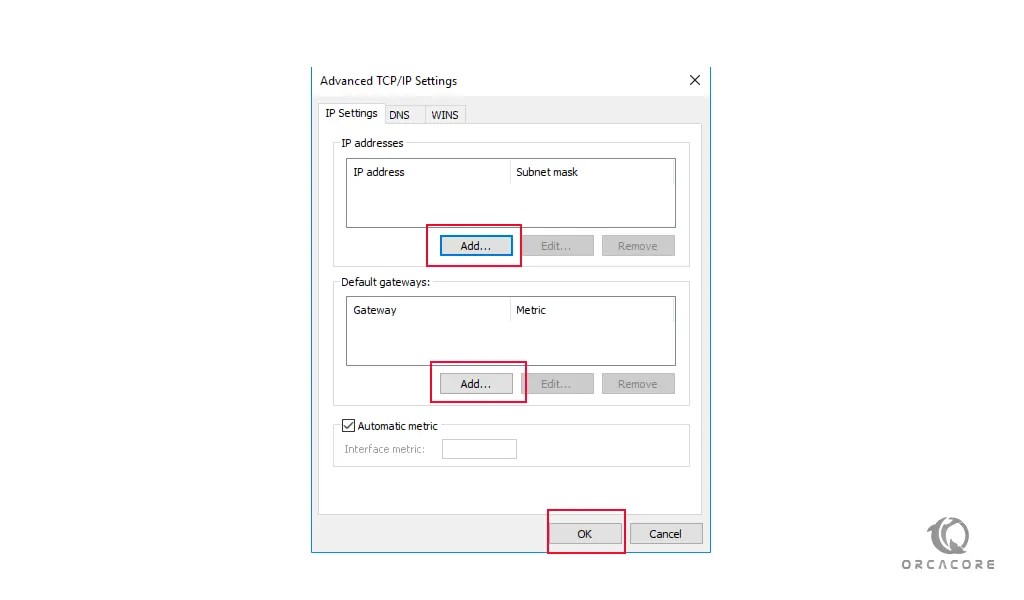
If needed, you will be able to add a new Default Gateway in the same window to access your new network.
After setting, close the windows by clicking OK to finish.
Now the settings for adding multiple IPs in Windows Server 2016 are complete and you can connect to your new network.
Conclusion
At this point, you learn to Add Multiple IPs on Windows Server 2016.
I hope you enjoy it.
May this article about Setting up Multiple RDP sessions on Windows Server 2016 be useful for you.