Share your love
Add Servers to Windows Admin Center
In this article, we want to teach you to Add Servers to Windows Admin Center.
Windows Admin Center is a free, flexible, and locally deployed browser-based management platform and solution.
Add Servers to Windows Admin Center
In this article about Setting up Windows Admin Center on Windows 10, we taught you to install it on your Windows 10.
Here you learn to add servers to the Windows Admin Center.
Requirements
- Set the system’s hostname.
- Set time, date, and time zone for it.
- Provide a correct and static IP address for it.
- Open the remote access on it.
- Become a Domain member.
Note: According to Microsoft standards, the server or client should add to the Windows Admin Center that be a Domain member.
At the end of this article, we will teach you how to do it, if a system isn’t a domain member.
In this article, the windows that have to be controlled from long-distance called server. and the windows that have Windows Admin Center called Admin Center.
How To Add servers
First, log in to your windows server. then, open a PowerShell environment with admin access.
Now run the following command to open the remote PowerShell access:
Enable-PSRemoting -SkipNetworkProfileCheck -Force
Go back to the Admin Center and open a PowerShell with admin access.
You have to be sure that your PowerShell has the ability to remote with the following command:
Set-Item -Path WSMan:\localhost\Client\TrustedHosts -Value * -Force
You need to download the PowerShell in the latest version from the GitHub PowerShell Releases page.
Then copy the downloaded file to the main directory of drive C of Windows Admin Center.
Run the following command and wait to receive your username and password:
$session = New-PSSession -ComputerName 192.168.176.130 -Credential (Get-Credential)
Remember to replace the IP address with your server’s IP address.
After you enter your username and password, run the following command to upload the PowerShell to your windows server:
Copy-Item PowerShell-7.1.5-win-x64.msi C:\ -ToSession $session
Remember to replace the PowerShell version with your own.
This operation will check the connection between your windows and server. If the file is uploaded correctly, means that while you are working with Windows Admin Center you don’t face problems.
After you are finished uploading the file, log in to your windows server again and run the following command in the CMD environment with the Admin access:
msiexec /i C:\PowerShell-7.1.5-win-x64.msi
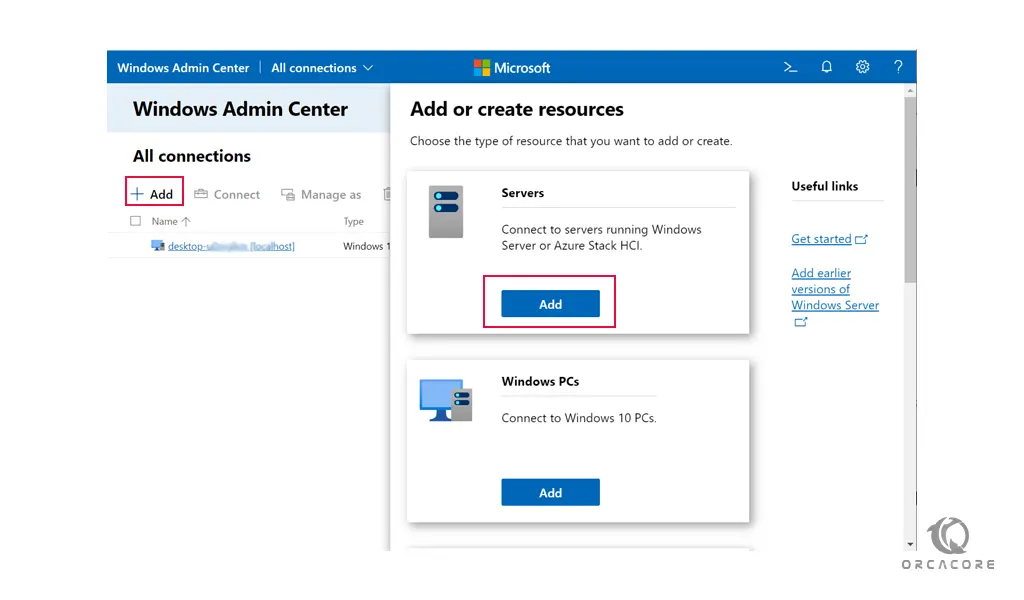
Now in your Windows Admin Center open a browser and enter the IP address with the Admin Center port to open the Admin Center environment.
Click on the Add and choose the Add server connection.
Note: If you consider adding Windows 10 to the Admin Center, you should choose to Add the Windows PC connection.
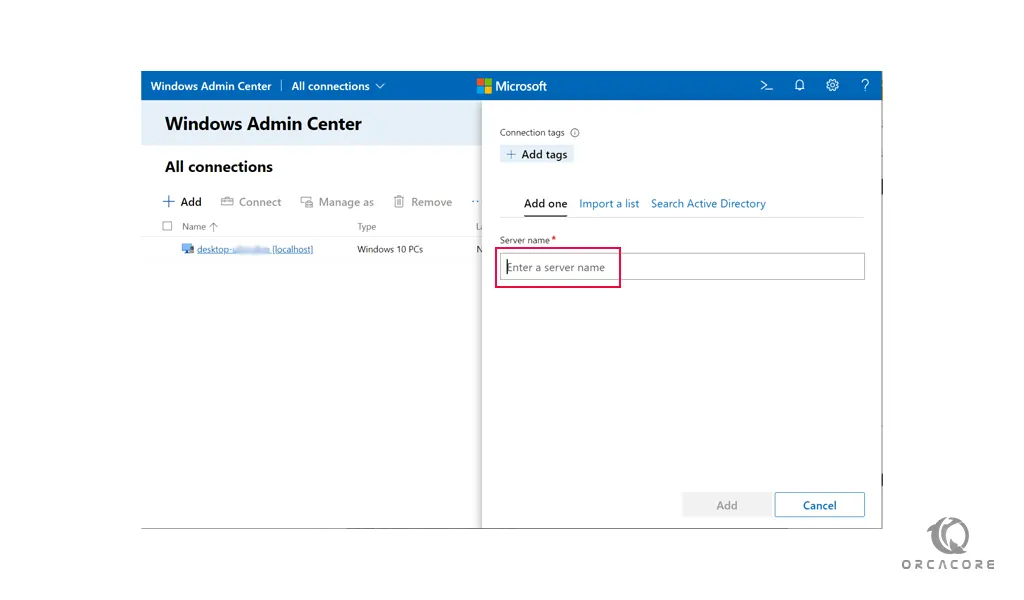
Enter your Server name or your server’s IP address:
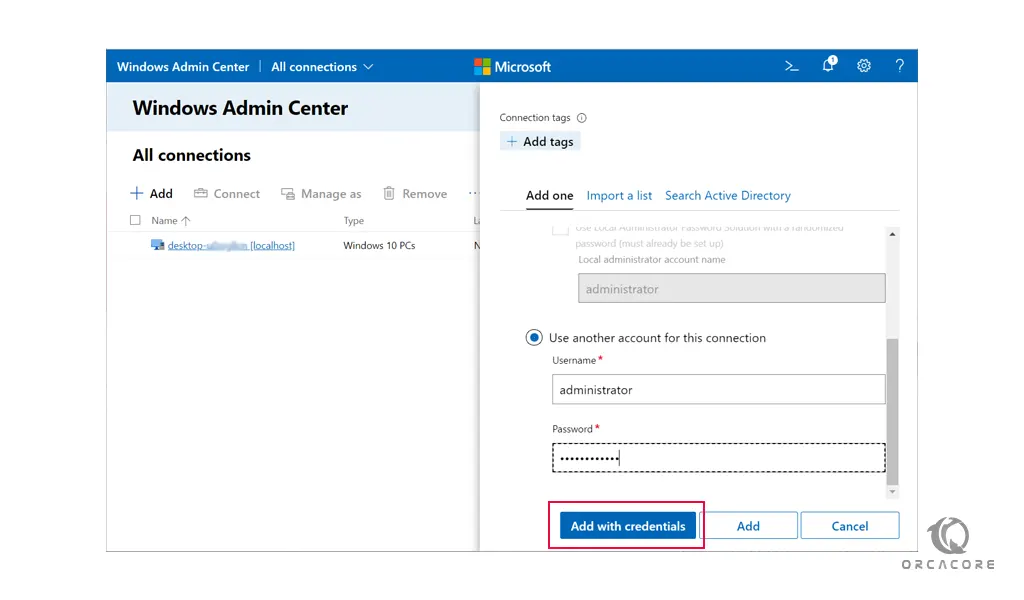
Press Add and choose the use another account for this connection and enter your username and password. Then, press the Add with credentials:
You will see that your server was added to the windows Admin server:
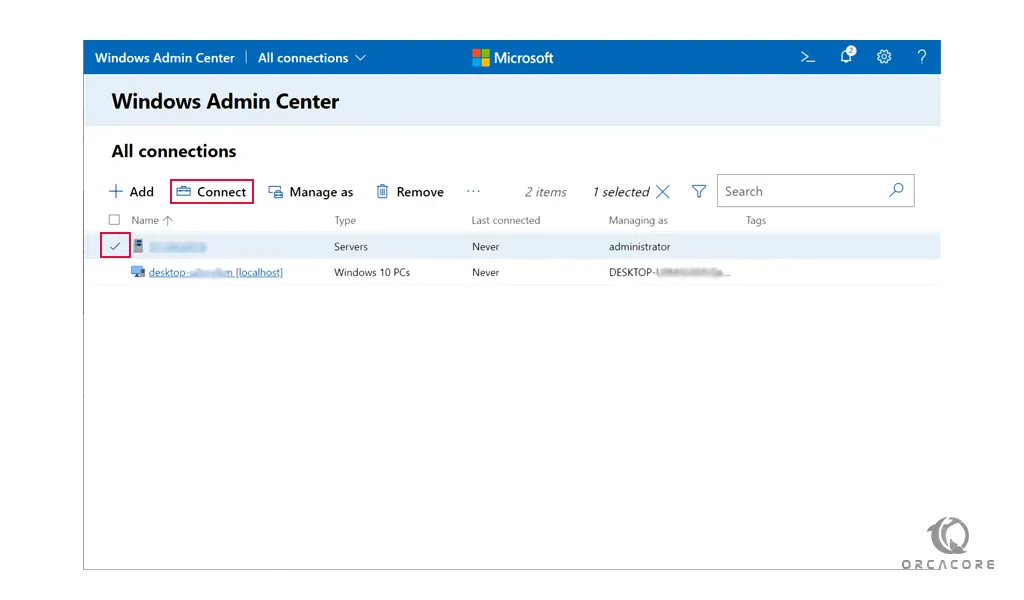
You can choose the server and click on the connect and connect to your server.
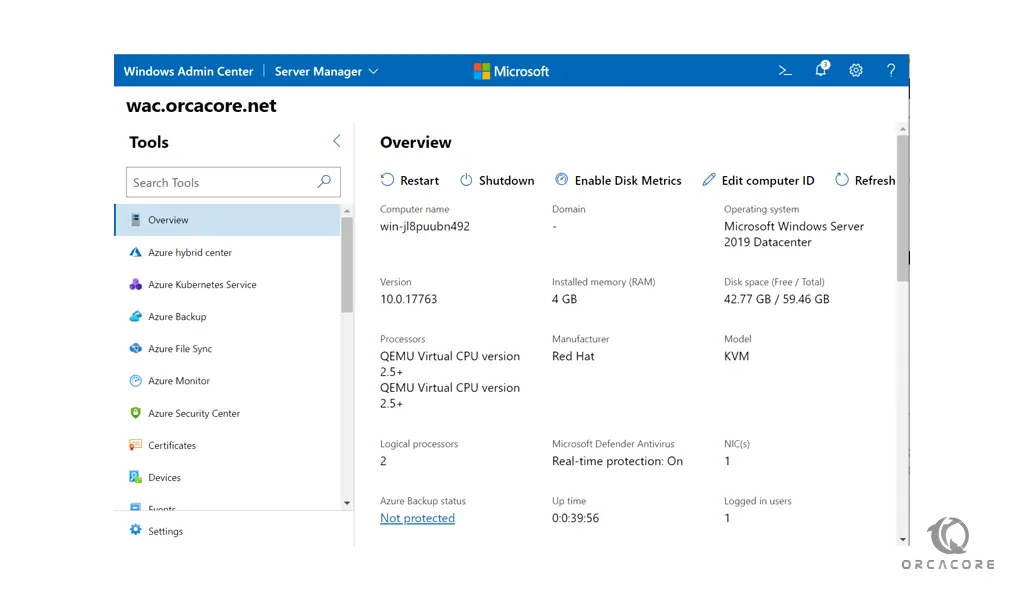
After connection you will see:
Now let’s see how to Add a domain-free server in the admin center.
Add a Domain-free Server in the Windows Admin Center
If your preferred server is not a member of a domain, when you want to connect to it you will face errors.
The reason for this is that Windows Admin Center connects to the server only with the name of the server. and after adding the server with the IP address or every name, only the name of your server host is important and should be accessible directly to the Windows Admin Center.
To do this, you can use the “hosts” file, and specify your server name with IP address for the Windows Admin Center, so you don’t face errors.
First, open a Notepad with Admin access.
Then, go in this direction and open the “hosts” file.
c:\windows\system32\drivers\etc\
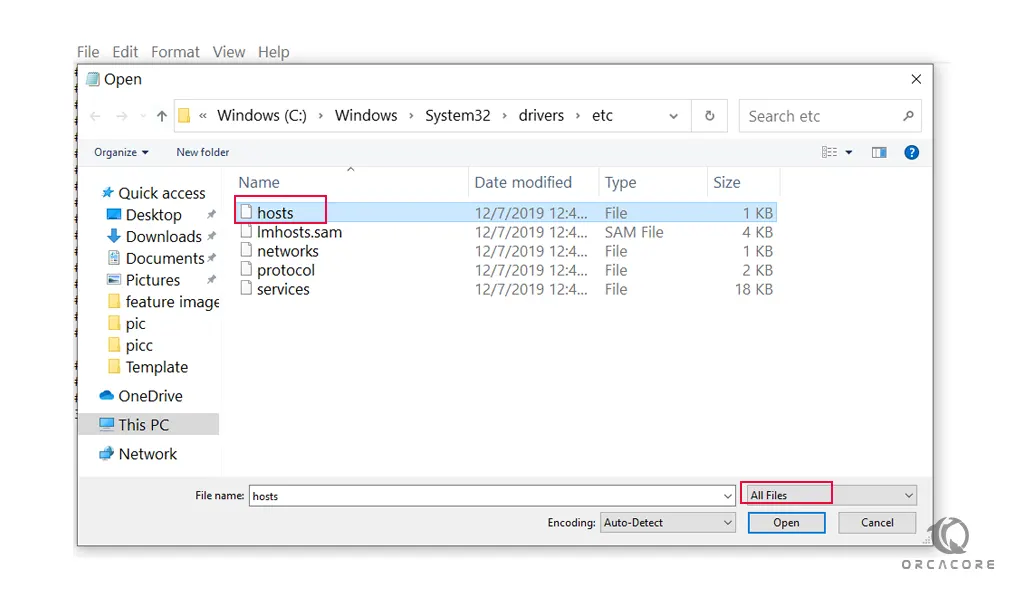
After you open the file, enter your Server’s IP address and server name at the end of the file.
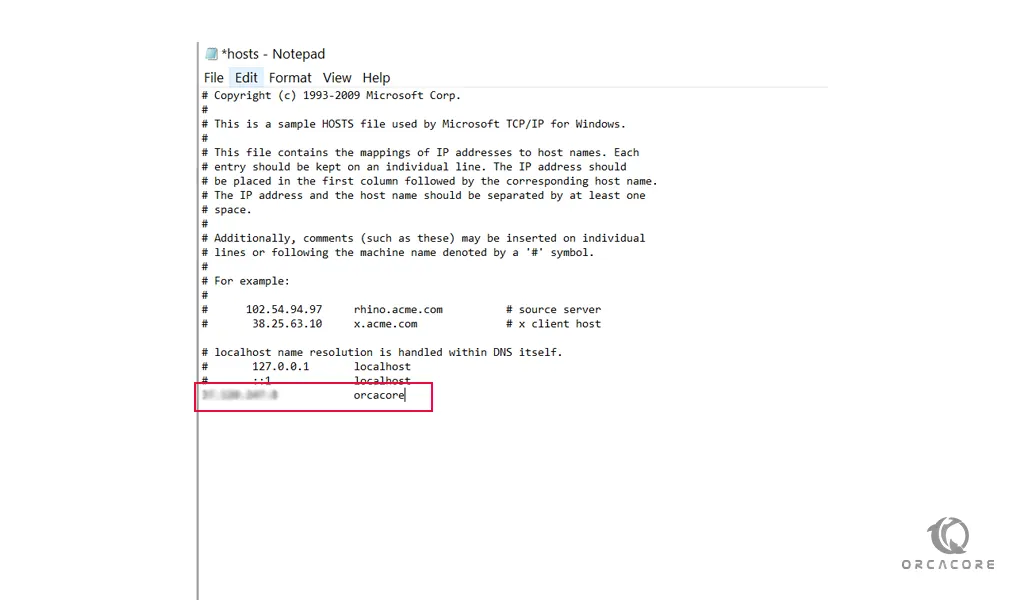
When you are finished, save and close the Notepad.
Note: While saving the file, if you face errors, means that you didn’t open the Notepad with Admin access.
Now from the Windows Admin Center, you can connect to your server that isn’t a member of a domain.
Conclusion
At this point, you learn to Add Servers to Windows Admin Center. by default, Windows Admin Center connects to the server only with the name of the server. because of this, you also learn to Add a domain-free server in the admin center.
Hope you enjoy this part of the Windows Tutorials.