Share your love
3 Easy Steps To Turn Off Quick Access in Windows

This guide will show you how to Disable or Turn Off Quick Access in Windows 10 and Windows 11. As you know, Windows 10 and Windows 11 ship with a home page for File Explorer which is Quick Access or Home. The Quick Access or Home will show highlights of the recent files, some folders, and more. Some of them are not useful for everyone. So if you plan to turn off or disable this option, you can proceed to the following steps on the Orcacore website to see how you can do it.
Table of Contents
Simply Turn Off Quick Access in Windows 10 and Windows 11
To Turn Off Quick Access in Windows, log in to your Windows Client and follow the steps below. In this guide, to show the guide steps we use Windows 10.
Step 1 – Change Default Home Page for File Explorer in Windows
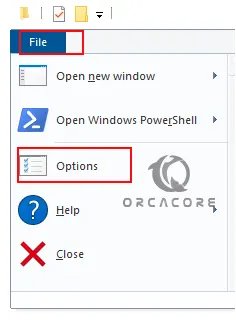
Before you start to disable Quick Access or Home in Windows, you must change the default home page for your File Explorer. To do this, open your File Explorer and click on the File tab. From there, click on Options.
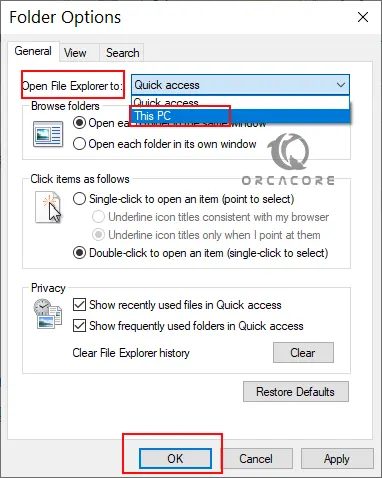
Then, next to the Open File Explorer, select This PC and click OK.
Step 2 – Completely Disable Quick Access in Windows
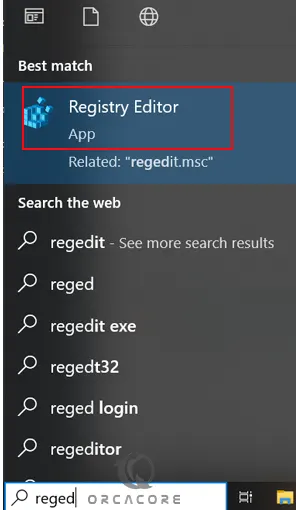
At this point, from your search bar, search for Regedit or Registry editor and open the app.
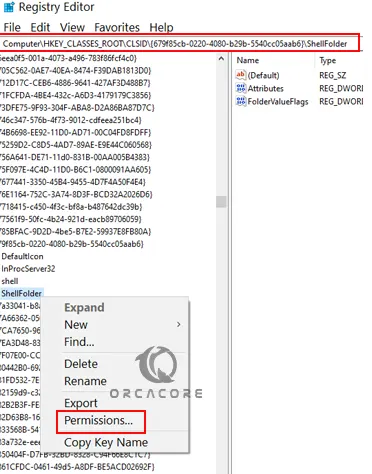
Next, from your Registry editor, navigate to the following path:
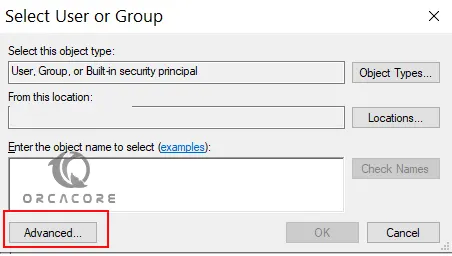
Computer\HKEY_CLASSES_ROOT\CLSID\{679f85cb-0220-4080-b29b-5540cc05aab6}\ShellFolderThen, right-click on ShellFolder and click Permissions.
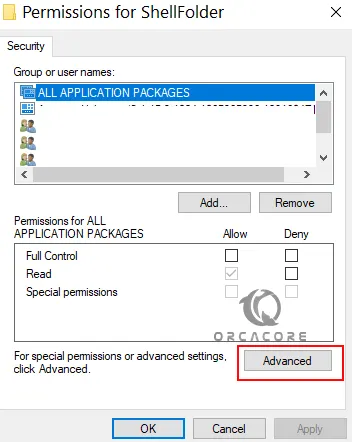
Now from the new pop-up windows, click on the Advanced button.
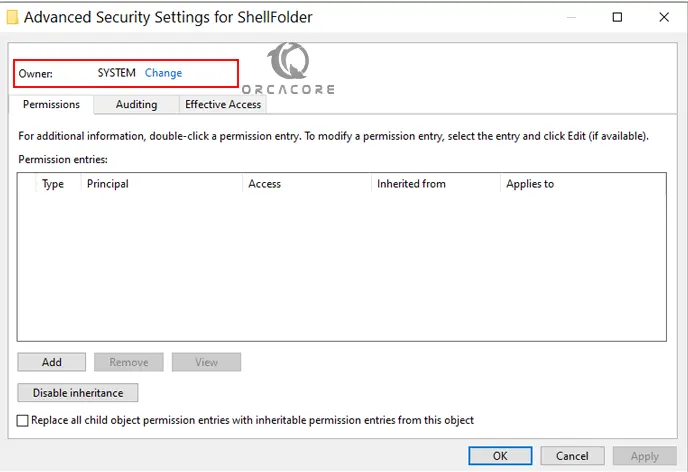
At this point, you must click on the Change button next to the Owner System.
From there, click on the Advanced button. Then, continue to disable quick access in File Explorer.
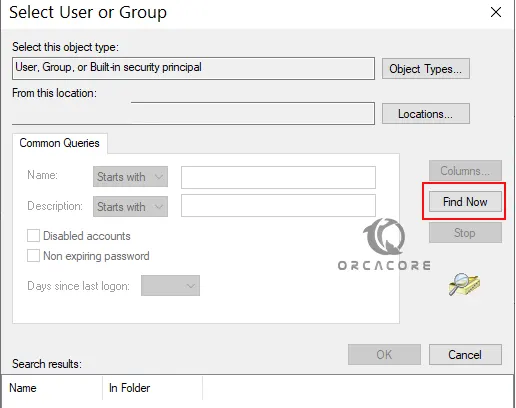
Click the Find Now button.
In the search results box, choose Administrators and click OK.
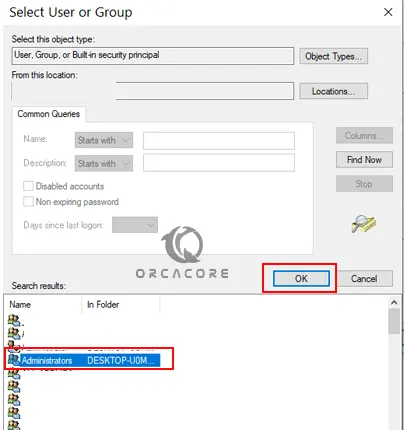
In the next window, click OK in the windows to see the Permissions window.

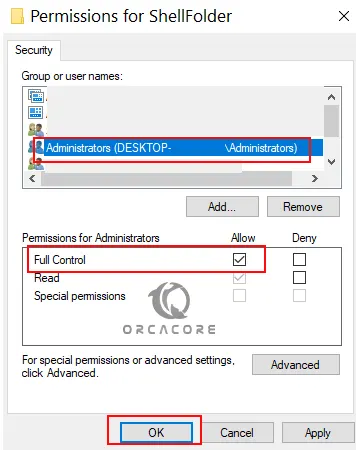
From there, click Administrators, in the permissions tab, click Allow Full Control, and click OK.
Now you must double-click on Attributes in the Registry editor.
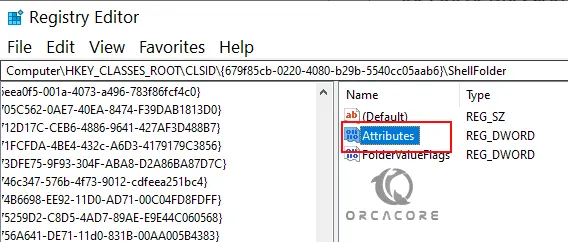
At this point, you must change the value to the a0600000 and click OK. Close your Registry editor app.

Finally, restart your computer to apply the changes. In this way, your Quick Access in File Explorer will be disabled and not shown anymore.
Step 3 – Re-Enable Quick Access in Windows
If you plan to re-enable your quick access, you need to open the Regedit, click on attributes the same as the above step, and change the value to a010000. Also, you can Change the Default Home Page for File Explorer back into Quick Access.
Conclusion
At this point, you have learned to Simply Turn Off or Disable Quick Access (HOME) in File Explorer in Windows 10 and Windows 11. First, you must change the default home page for File Explorer, and then from the Registry editor change the User permissions settings and value of attributes. Hope you enjoy it.
Also, you may like to read the following articles: