Share your love
Efficiently backup and restore data on Linux with restic: Best Setup

In this guide, you will learn to Efficiently backup and restore data on Linux with restic. The data backup process is a very important component in Linux. Losing data may cause so many issues. So you must find the best solution to back up your data. One of the best tools that you can use to back up data is restic. You can follow the rest of the article on the Orcacore website to get familiar with restic utility and learn to Efficiently backup and restore data on Linux with restic.
Table of Contents
Introduction to Restic Tool on Linux
Restic is a free, open-source, and cross-platform software that can back up your files to different storage types. It is a fast, secure, and reliable solution for the data backup process. Restic takes snapshot backups of data and saves them in a backup location known as a repository.
Also, it works on different operating systems such as Linux, Windows, macOS, FreeBSD, and OpenBSD.
The restic utility supports many backup backends including:
- Local Directory
- SFTP server (via SSH)
- HTTP REST Server
- Amazon S3
- Google Cloud Storage
- Microsoft Azure Blob Storage
- OpenStack Swift
- Backblaze B2
Now you can follow the steps below to see how to Efficiently backup and restore data on Linux with restic.
Efficiently backup and restore data on Linux with restic
To Efficiently backup and restore data on Linux with restic, you must have access to your Linux server as a root or non-root user with sudo privileges. For this purpose, you can visit the Orcacore website and check the initial server setup guides.
Step 1 – Install restic on Linux Server
First, you must install the restic tool on your Linux server. Restic is available in most official Linux repositories. You can easily use the following commands to install restic and Efficiently backup and restore data on Linux with restic.
Install Restic on Ubuntu / Debian / Linux Mint
You can easily use the APT package manager to install restic on Debian-based distros. To do this, you can use the command:
sudo apt install resticInstall Restic on Rocky Linux / AlmaLinux / CentOS
The restic packages are available under the Epel repository in the RHEL-based distros. To install it, you can run the commands below:
# sudo dnf install epel-release
# sudo dnf install restic
When your installation is completed, follow the steps below to efficiently back up and restore data with restic.
Step 2 – Create a Restic Repository on Linux
The first step to back up the data is to create a new repository where your backups will be stored. You can create a local and remote restic repository. To do this, follow the steps below.
Creating a Local Restic Repository
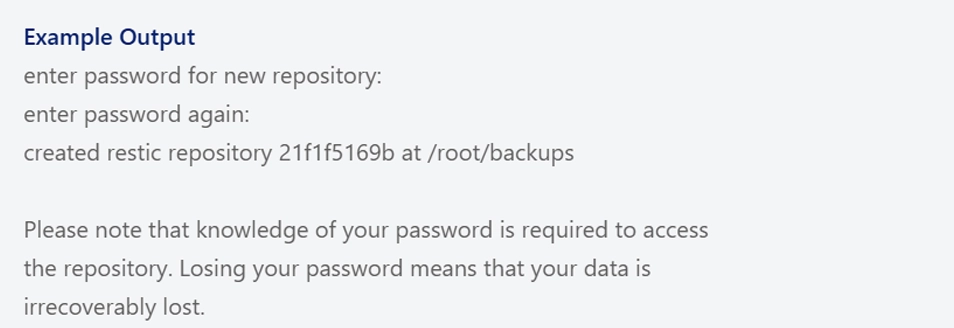
To create a local repository in your Home directory, you can use the command below:
restic init --repo ~/backupsYou will be asked to set a password for your repository and confirm it. Note that to choose a password you will remember.
Creating a Remote Restic Repository
At this point of Efficiently backup and restore data on Linux with restic, you can create your repository on a remote server. Here we use the SFTP backup backend support to create a remote repository. For example:
restic init --repo sftp:root@192.168.122.25:/tst/backupsThis will create a new repository on a remote server (192.168.122.25) in the directory “/tst/backups.”
After you have created your desired repository, you can Efficiently backup and restore data on Linux with restic.
Step 3 – Efficiently Data Backup with Restic on Linux
At this point, depending on your restic repository, you can start your data backup process.
Data Backup To Restic Local Repository
You can easily create backups with restic. If you have a local repository, you can easily use the following syntax to start your backup process. For example:
restic backup ~/testfiles --repo ~/backupsThis example will back up the contents of the testfiles directory to the local repository we have created before.

Data Backup To Restic Remote Repository
Now if you want to back up your data in a remote repository, it is the same as the above step. You just need to define the remote path to the command. For example:
restic backup ~/testfiles --repo sftp:root@192.168.122.25:/tst/backupsStep 4 – List Restic Snapshots on Linux
As you must know, restic takes snapshot backups of data. You can list the snapshots in a restic repository by using the command below:
restic snapshots --repo ~/backups/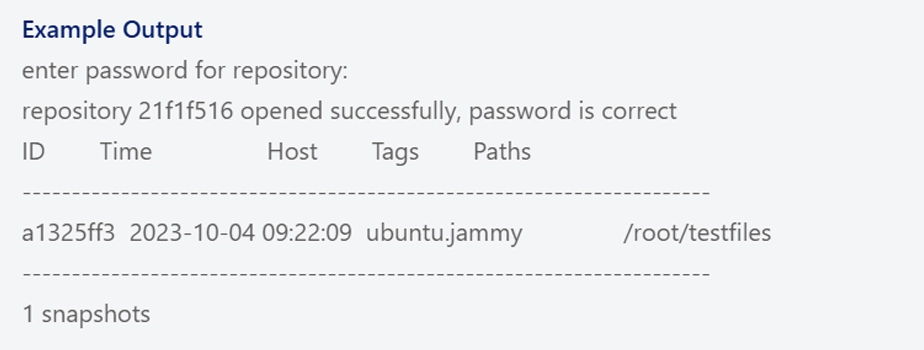
The information provided with this command means:
- ID: The snapshot’s unique identifier
- Time: The precise time, day, month, and year when the snapshot was taken
- Host: The host from which the snapshot is created
- Tags: Snapshot-associated tags (if any)
- Paths: The full path of the backed-up directory
Differences Between Restic Snapshots
Also, you can list the differences between the snapshots you have. You can use the snapshot’s ID with the diff option to do this. For example:
restic diff a1325ff3 46adb587 --repo ~/backups/List Files in Restic Snapshot
Another option that you can use with restic is to list the files available in a snapshot by using the ls and ID. For example:
restic ls a1325ff3 --repo ~/backups/Now you can proceed to the following steps to see how you can restore data with restic on Linux.
Step 5 – Efficiently Restore Data with Restic on Linux
Restoring data with restic is easy and simple. You only need the snapshot ID and use the –target option. For example, to restore our testfile to the tmp directory, we use the command below:
restic restore a1325ff3 --repo ~/backups/ --target ~/tmpdata
Note: Restic will create the target directory if it does not already exist.
For the remote restic repository, you can use the command below:
restic restore a1325ff3 --repo sftp:root@192.168.122.25:/tst/backups --target ~/tmpdataRestore a Specific file with Restic
If you want to restore a specific file in a directory from the restic snapshot, you can use the –include option with the path of the file. For example:
restic restore a1325ff3 --repo ~/backups/ --target ~/tmpdata --include '/root/testfiles/*.jpg'This will only restore the jpg files in the directory.
Step 6 – Delete a Snapshot from the Restic Repository on Linux
If you no longer need a snapshot, you can easily delete it from the repository by using the forget option with the desired ID you want to remove. For example:
restic forget a1325ff3 --repo ~/backups/In this way, the data referenced by files in this snapshot is still in the repository. To clean it up, you can use the prune option:
restic prune --repo ~/backups/Step 7 – Get information about Restic Repository on Linux
You can easily get a piece of full information about a restic repository. For example:
restic stats --repo ~/backups/
Also, you can use the snapshot ID to get the information about it. For example:
restic stats a1325ff3 --repo ~/backups/Step 8 – Pass Password To Restic Command in Linux
At this point of Efficiently backup and restore data on Linux with restic, you can pass the password to the restic command. In this way, you don’t need to enter the password every time you run the command, and your process immediately is started.
To do this, create a new file with your desired text editor like vi editor or nano editor. For example:
vi .resticpassEnter your repository password to the file. Then, save and close the file.
Next, set its permissions so that you are the only one who can read and edit its content:
chmod 600 .resticpassNow you can use the –password-file option to pass the password in the restic command. For example:
restic snapshots --repo ~/backups/ --password-file ~/.resticpassThis will immediately start your process without entering the password.
To get more information, you can visit the Restic Docs page.
Conclusion
At this point, you have learned to Efficiently backup and restore data on Linux with restic. It is great too that you can use it to back up your data in a local or remote repository and manage them by using the snapshots.
Hope you enjoy it. You may be interested in these articles: