Share your love
How To Create NFS Share Folder on Windows Server 2019
In this article, we want to teach you How To Create NFS share Folder on Windows Server 2019.
NFS or Network File System allows a user on a client computer to access files over a network in the same way they would access a local storage file. Because it is an open standard, anyone can implement the protocol.
To access data stored on another machine (i.e. a server) the server would implement NFS daemon processes to make data available to clients. The server administrator determines what to make available and ensures it can recognize validated clients.
From the client’s side, the machine requests access to exported data, typically by issuing a mount command. If successful, the client machine can then view and interact with the file systems within the decided parameters.
Create NFS Share Folder on Windows Server 2019
Before you start to create the NFS shared folder on your Windows server, you need to install an NFS server. To do this, you can follow our article How To Set up an NFS Server on Windows Server 2019.
Now you can follow the steps below to configure the NFS share folder.
Set up the NFS share Folder on the Windows Server
At this point, we show you how to create a folder that you shall export to the clients.
First, you need to create a directory or folder in your desired partition.
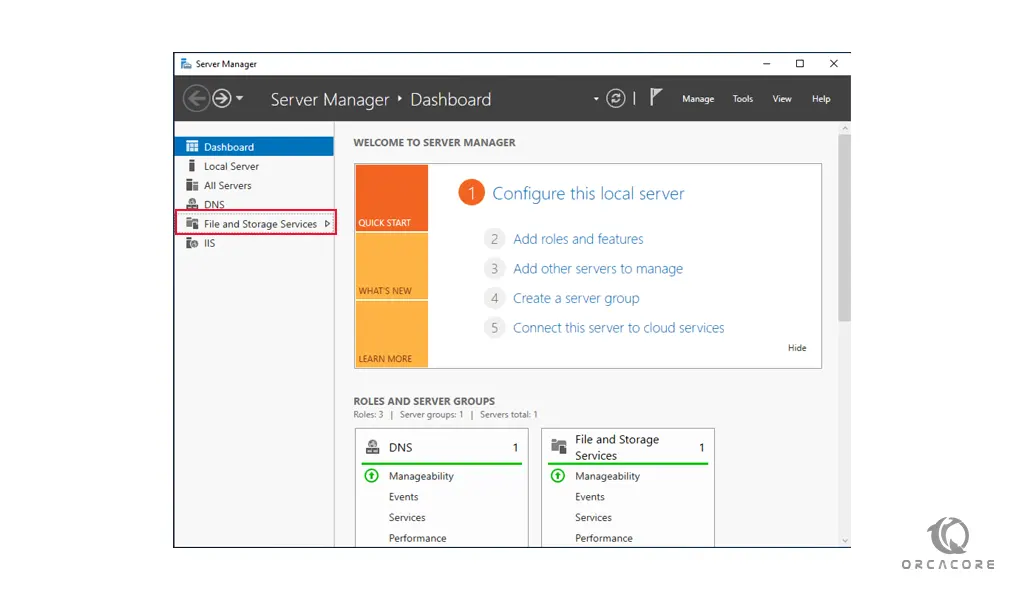
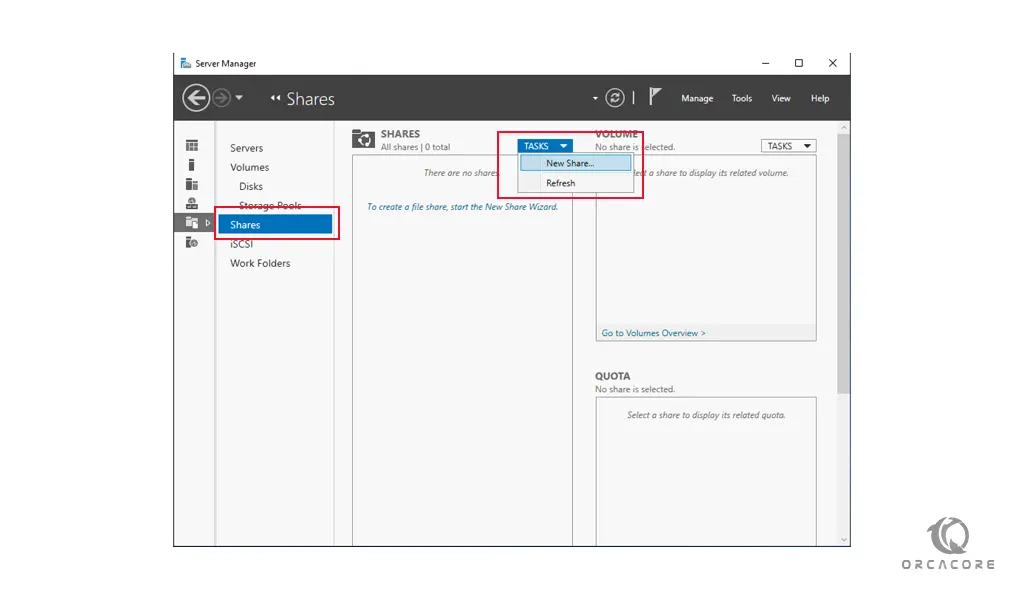
To do this, open your server manager app. From the server manager dashboard, click on File and Storage Services.
In the next window, click on the Shares option, and from the TASKS click on the new share.
This will open an NFS new share wizard on Windows Server 2019 for you.
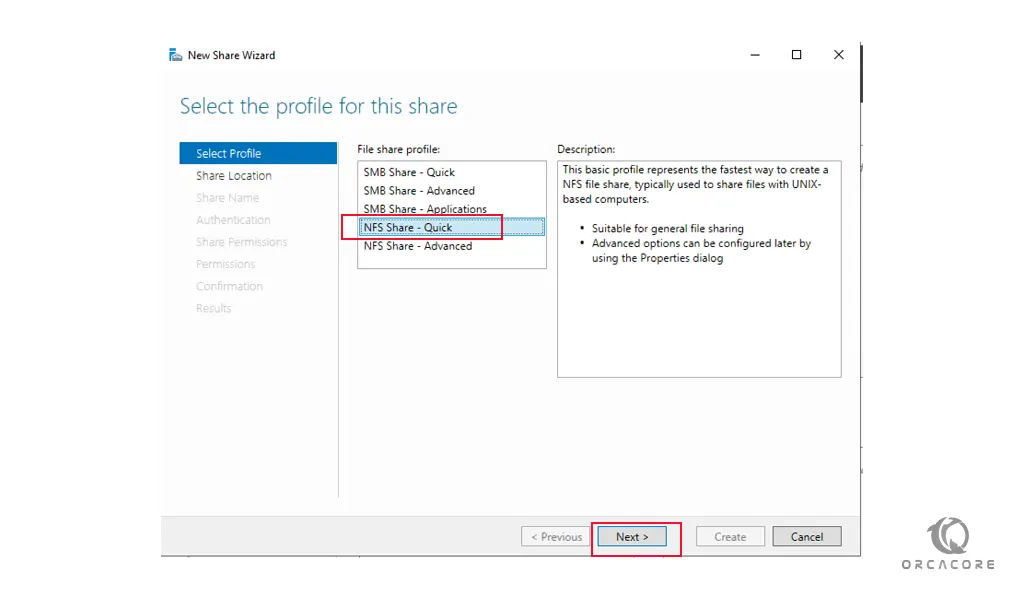
On the new share wizard, you need to select the profile for this share. Click on the NFS Share-Quick on the Windows Server 2019 and click on Next.
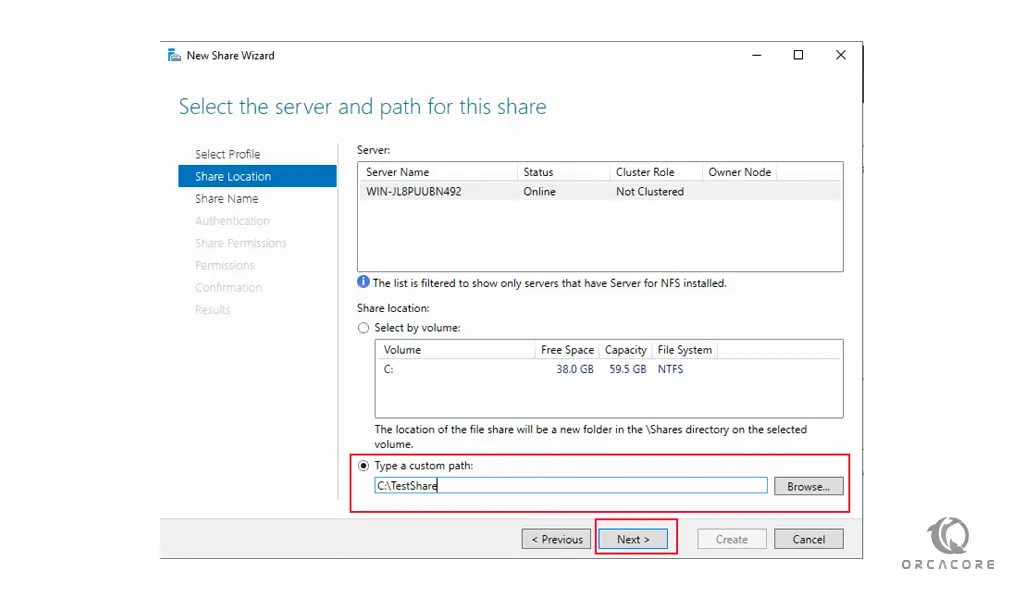
Here you need to select your share location. Choose Type a custom path and browse for the directory that you have created before. And click on Next to continue.
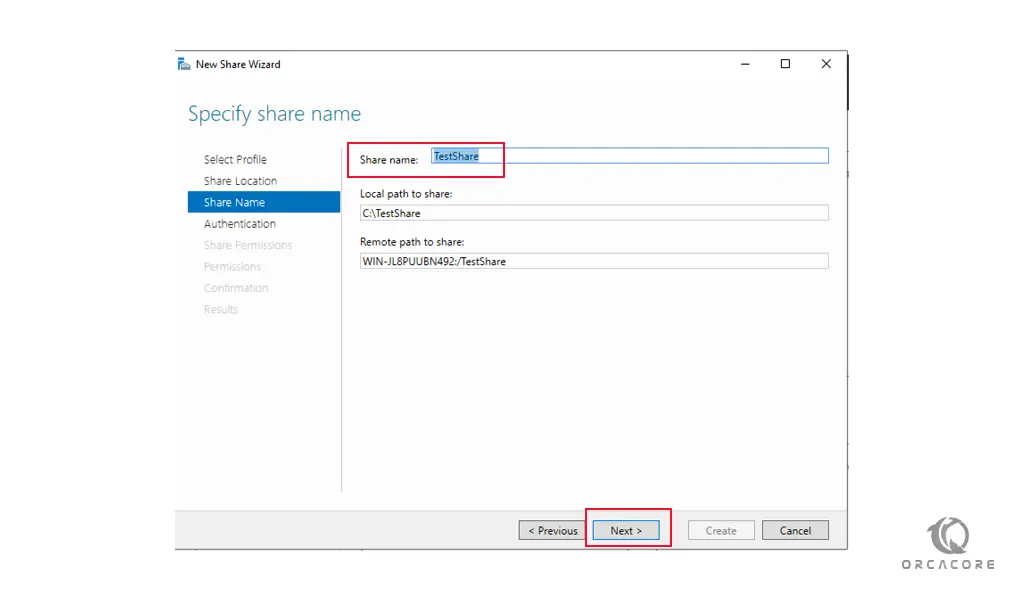
Now in the share name screen, choose a name for your NFS share folder on Windows Server 2019 and click on the Next button.
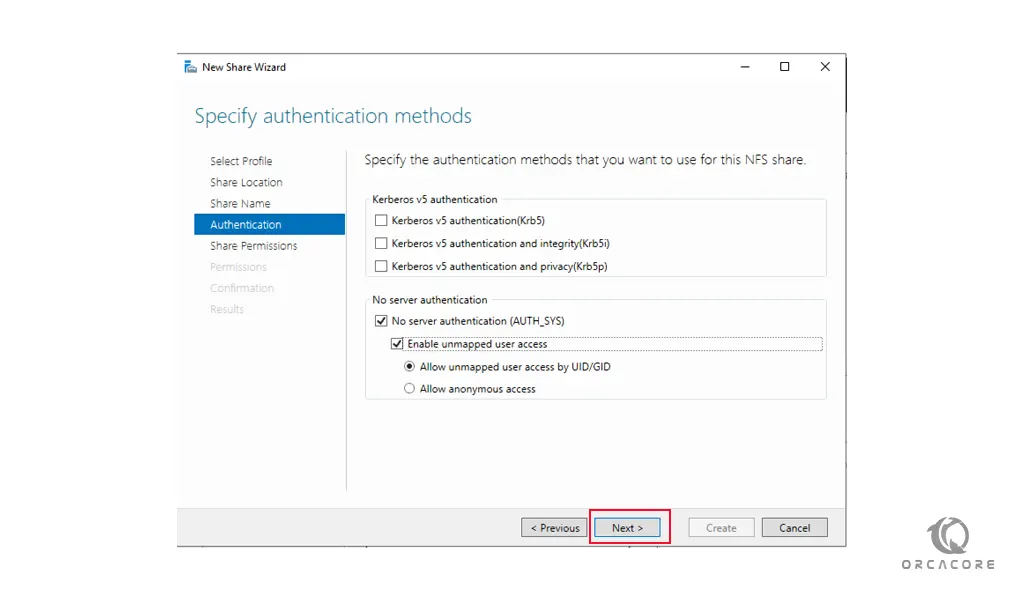
In the Authentication methods screen, depending on the authentication method that you are using choose them and click on the Next.
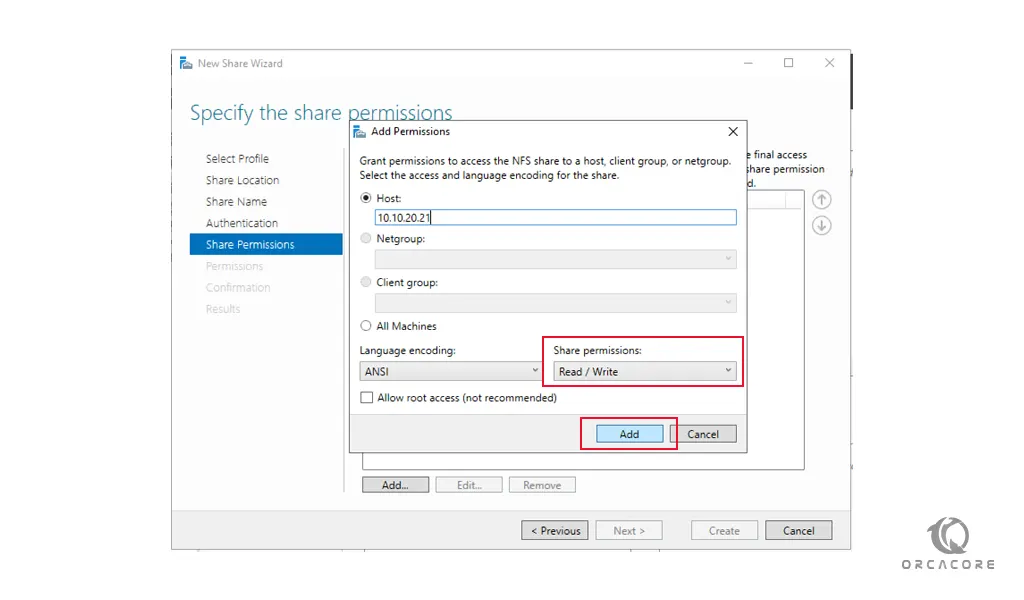
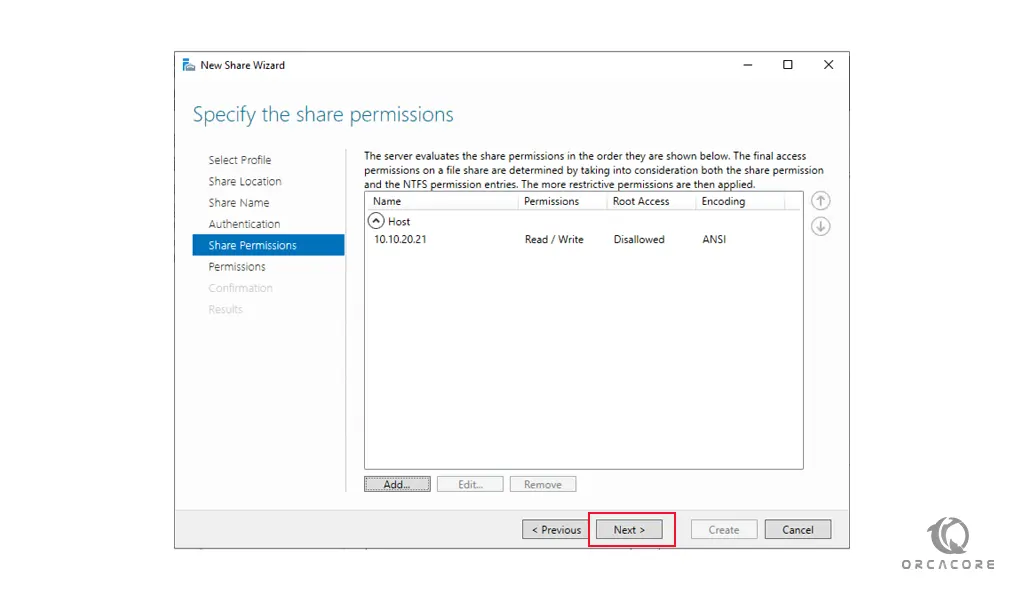
Next, in the NFS share permissions window click on the Add button. Now you have many options to choose the hosts to access the share. You can choose only one host, a Net-group, a Client group, or all servers that can reach it. Choose your option and specify your share permissions and click on Add.
In the next window, just press the Next button.
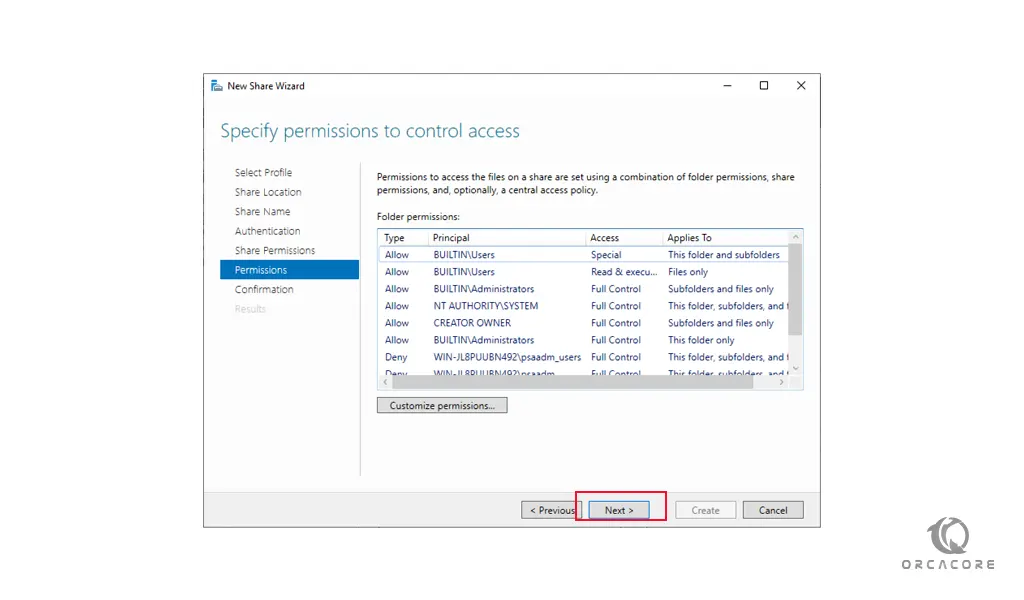
At this step, you can change the permissions with your own plan. When you are done, click on the Next.
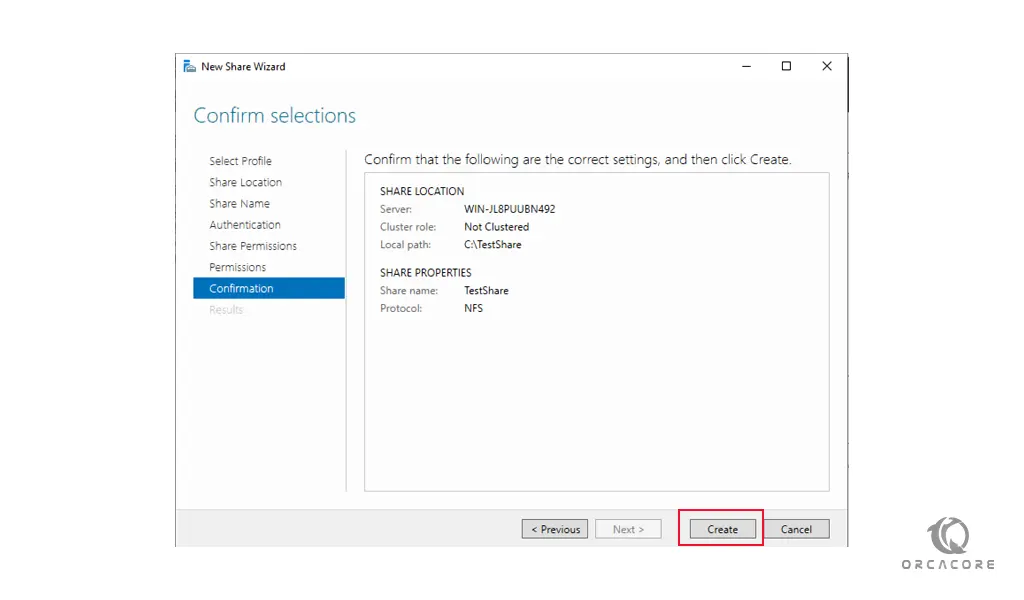
You need to confirm your selections and click on the Create button.
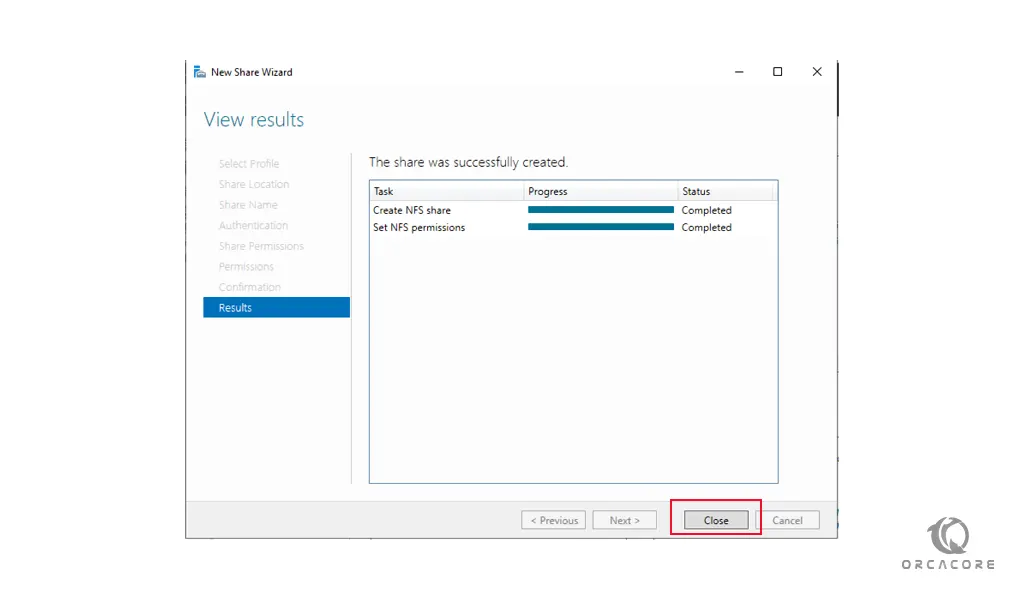
When your NFS shared folder creation is completed, click on the close button to finish your setup.
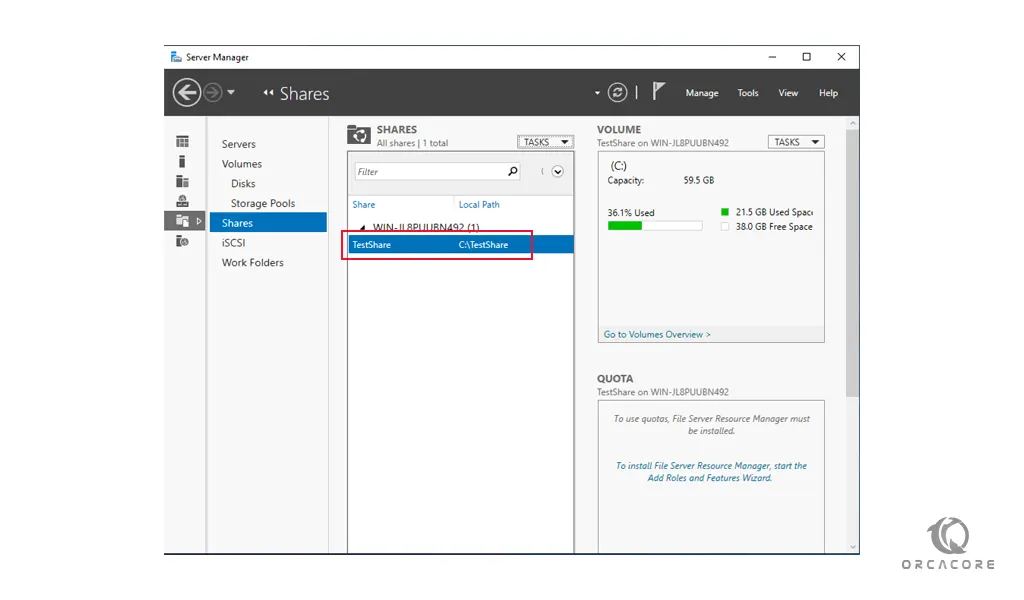
You will see that your NFS share Folder is created on your Windows Server 2019.
Conclusion
At this point, you have successfully created your NFS share folder on Windows Server 2019.
I hope you enjoy it.
Also, you might find this link interesting: