Share your love
How To Set up an NFS server on Windows Server 2019

In this article, we want to teach you How To Set up an NFS server on Windows Server 2019.
An NFS is a protocol that lets users on client computers access files on a network, making it a distributed file system.
NFS or Network File System is necessary for helping your business share files over a network.
You can access remote data and files from any remote computer or device that links to the network you will use.
All people within a network will have access to the same files, making file-sharing efforts easier.
Set up an NFS server on Windows Server 2019
To install the NFS server on your Windows Server, you can follow the steps below.
Install NFS on Windows Server 2019
First, open your server manager app.
Then, on the server manager click on the Add roles and Features. On the “before you begin” screen click next to continue.
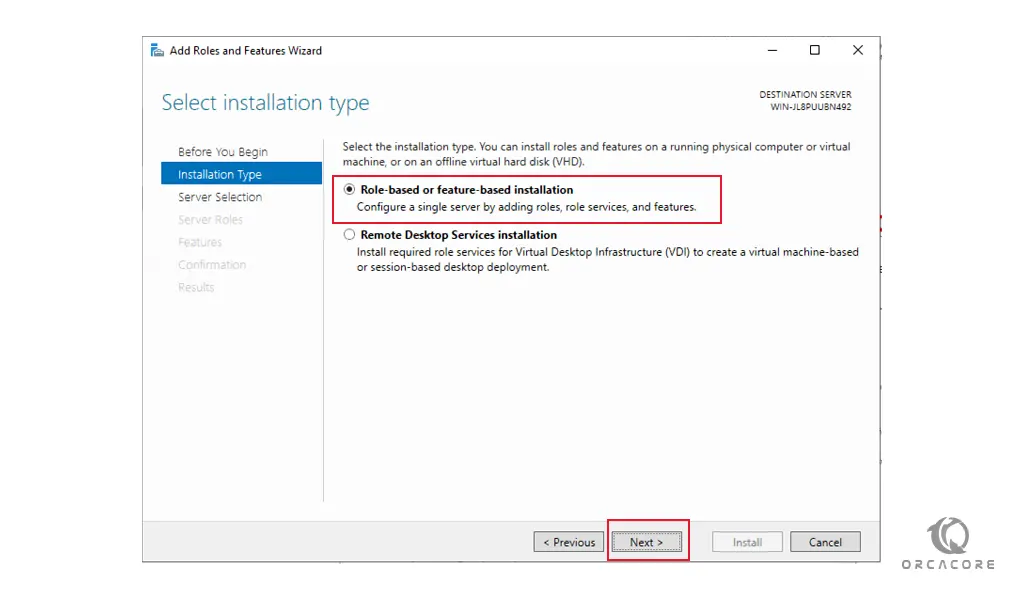
Next, you will see the select installation type screen. You need to choose role-based and click on the Next button.
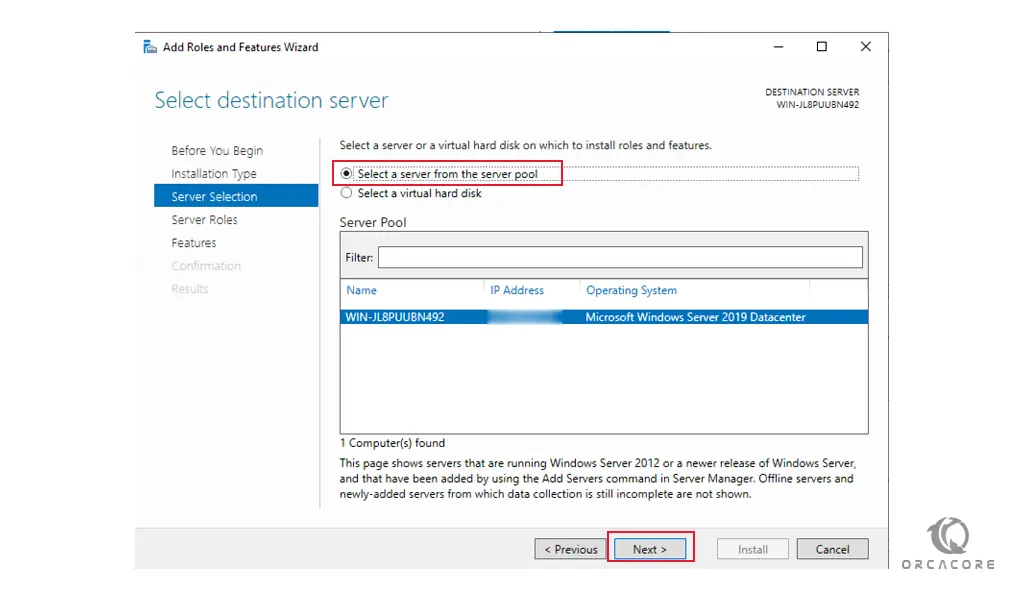
In the next window, you need to select the destination server. Select your server and click on the next.
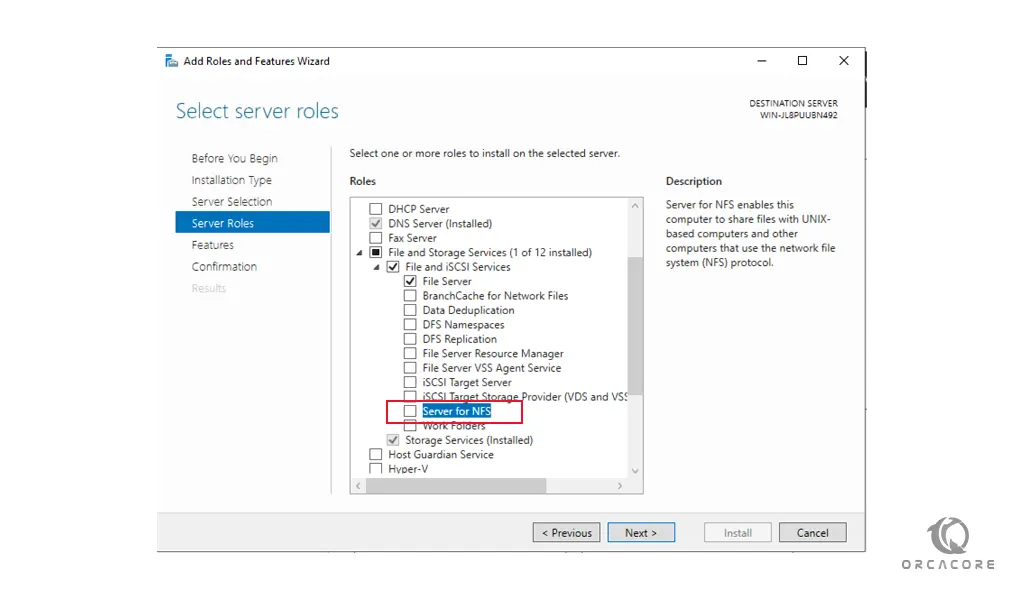
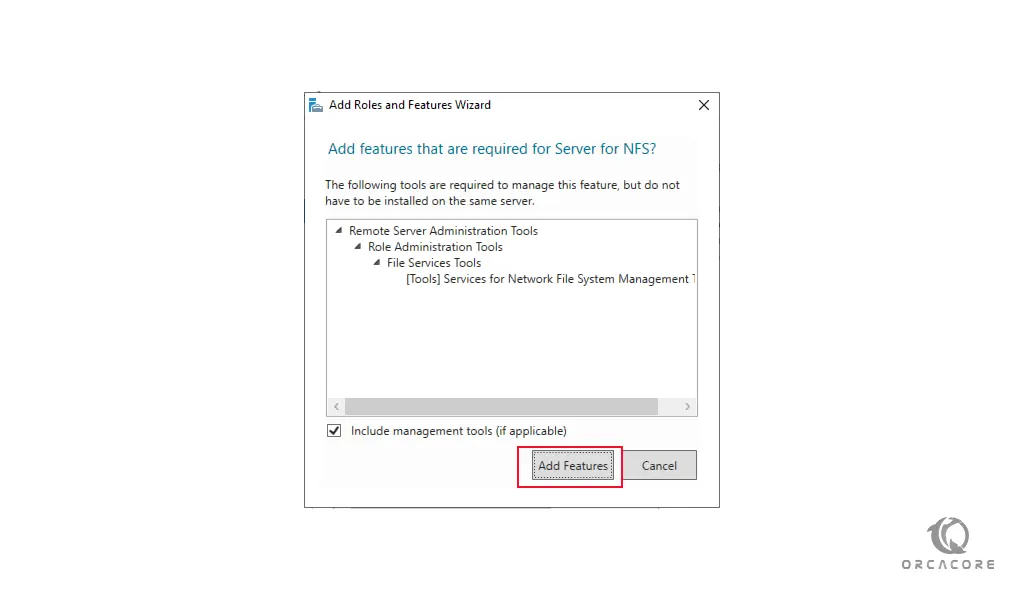
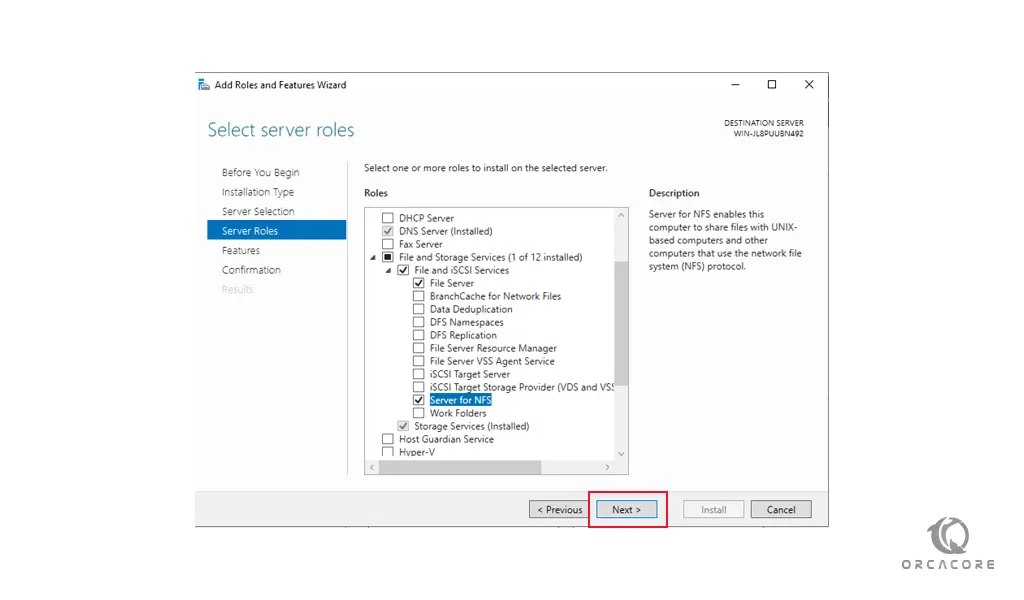
At this point, in the select server roles window, expand the File and Storage Services, and under it expand File and iSCSI services. Here you need to check the box next to the Server for NFS.
This will open a pop-up window, just click on the Add Features to continue.
After that, you will back to the Select Server Roles window, and press Next to continue.
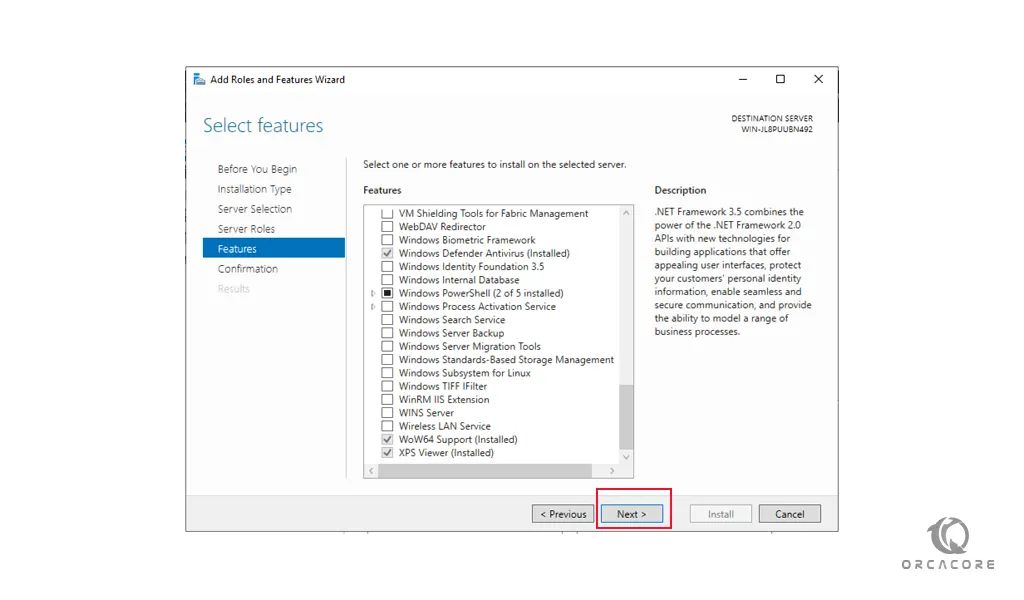
In the Next window, you can always get back and add more features. So press Next to continue.
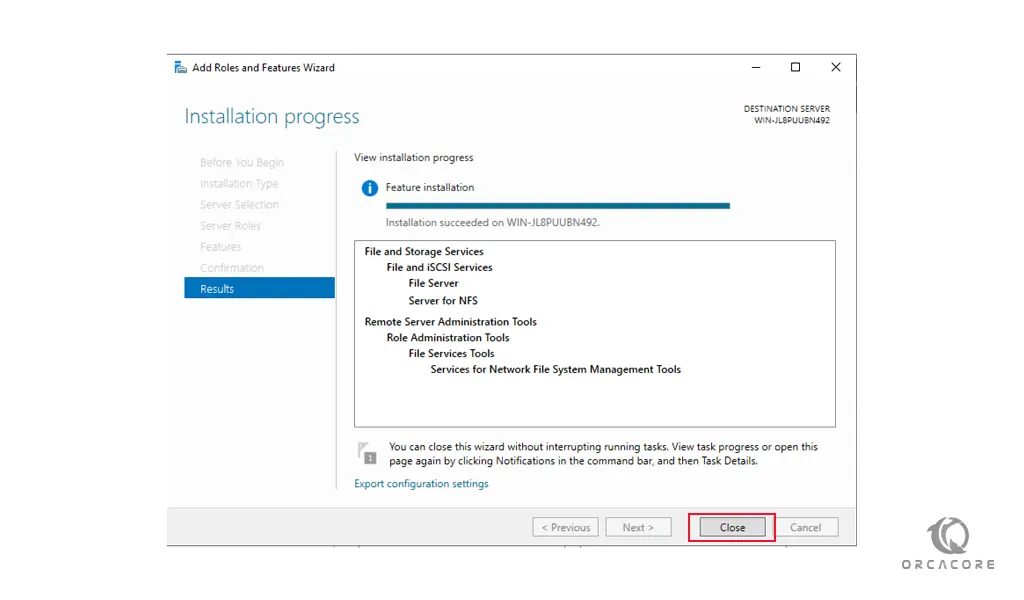
Then, click on the Install button to start your NFS server installation. When your installation is completed, click on the close button to Finish your installation on Windows Server 2019.
Conclusion
At this point, you learn to Set up an NFS server on Windows Server 2019.
Hope you enjoy it.
In future articles, we will show you how to configure the NFS share folder.
May you will be interested in these articles:
Set up Plesk on Windows Server 2019.
How To Change HostName on Windows Server/Client.