Share your love
CSF Firewall on CyberPanel – Installation and Configuration
This guide intends to teach you to Install and Use CSF (ConfigServer Security and Firewall) on CyberPanel. CSF is a security tool for Linux-based operating systems. It is widely used in web hosting panels such as CyberPanel. It has amazing features that make it a popular security tool including:
- SPI Firewall
- Intrusion Detection
- Login Detection
- Interface for Management
- Flexibility and Customization
- Direct Integration with Control Panels
- Connection Tracking
- Port Flood Protection
Now you can proceed to the following steps to start your CSF installation on CyberPanel.
A Comprehensive Guide for CSF Firewall on CyberPanel
Before you start your CSF setup on CyberPanel, you must access your CyberPanel dashboard and follow the steps below. To access your panel, you can use the following URL:
https://your-server-ip:8090Step 1 – Install CSF Firewall on CyberPanel
From your dashboard panel, click on the Security option.
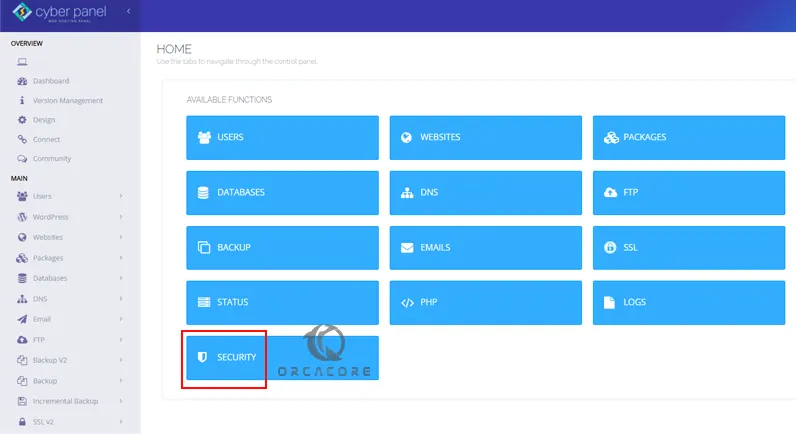
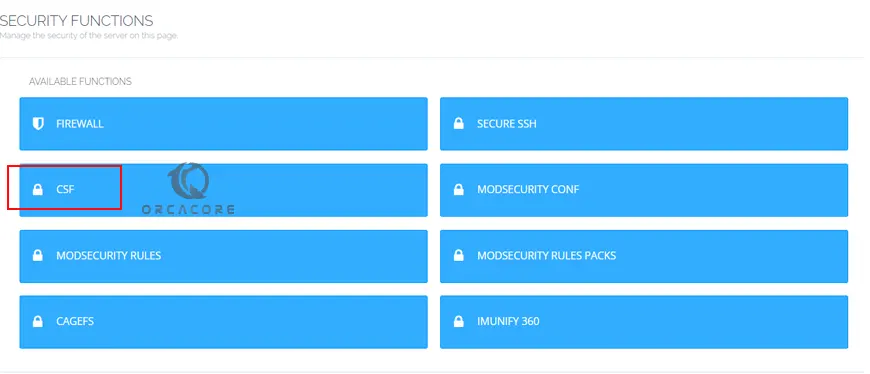
Then, click on the CSF option. You can also, click on CSF from the left-side menu bar under the security tab.
Next, you can easily install a CSF firewall on your CyberPanel. Click on Install Now.

Wait until your installation process is completed. This will take some time to complete.
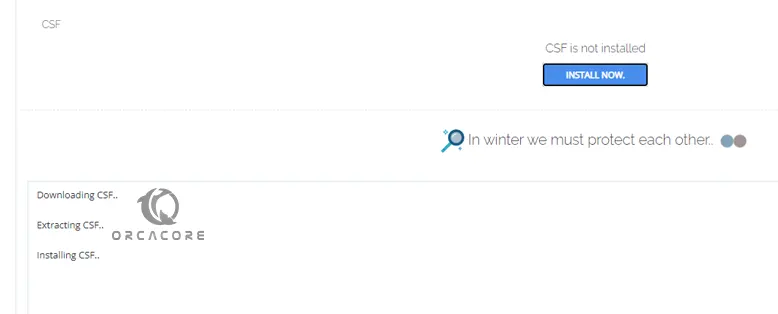
Once your installation is completed, you will see the successful status. Reload the page to see your CSF interface on CyberPanel.
Step 2 – Use CSF on CyberPanel – Configurations
At this point, you will see the following CSF Firewall options in the general tab on CyberPanel:
- Remove CSF
- Firewall (may be enabled or not)
- Testing Mode
- TCP IN Ports
- TCP Out Ports
- UDP In Ports
- UDP Out Ports
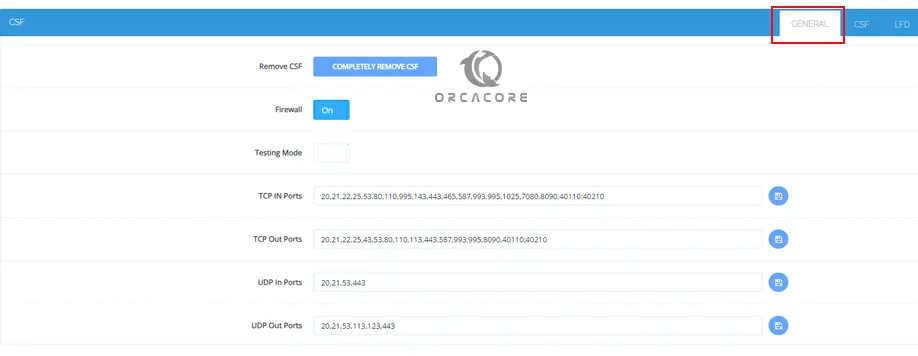
From there, you can easily remove CSF, disable or enable the firewall, enable testing mode, and add or remove TCP and UDP ports.
Add or Remove Ports in CSF
To add a port, you can enter your desired port, separate it with a comma, and click on the save image button to apply your changes. Also, you can delete a port in this way.
Allow or Block an IP Address in CSF
To allow or block an IP address, navigate to the CSF tab.

From there, you can easily allow or block an IP address and click on save image.
The LFD option in CSF CyberPanle is not coming yet.
Summing Up CSF Configuration in CyberPanel
CSF firewall in CyberPanel offers a robust and comprehensive security solution for your web hosting panel. As you can see, CSF has a user-friendly interface that you can easily manage your firewall settings in CyberPanel in a simple way. Hope you enjoy using it.
Also, you may like to read the following articles:
Configure FTP Settings on CyberPanel
Steps to Manage Databases in CyberPanel
Enable and Configure CSF Firewall on CWP


