Share your love
Install and Configure CSF Firewall on cPanel
In this article, we want to teach you How To Install and Configure CSF Firewall on cPanel.
ConfigServer Firewall, also known as CSF, is a firewall configuration script created to provide better security for your server while giving you an advanced, easy-to-use interface for managing firewall settings.
CSF configures your server’s firewall to lock down public access to services and only allows certain connections, such as logging in to FTP, checking email, or loading websites.
This application will work as a WHM plugin and is free.
How To Install and Configure CSF Firewall on cPanel
To install CSF on cPanel, you need to log in to your server as a root user via SSH.
Then, follow the steps below to set up the CSF (ConfigServer Firewall) on cPanel.
Install CSF Firewall on Server
First, you need to switch to your src directory with the following command:
cd /usr/local/src/Then, use the wget command to download the CSF on your server.
wget https://download.configserver.com/csf.tgzExtract your downloaded file with the command below:
tar -xzf csf.tgzNow switch to the CFS directory:
cd csf Run the CSF installer script with the following command:
sh install.shWhen your CSF installation is completed, you can delete the script with the following command:
# cd ..
# rm -Rfv csf/ csf.tgz
Configure CSF Firewall from cPanel / WHM
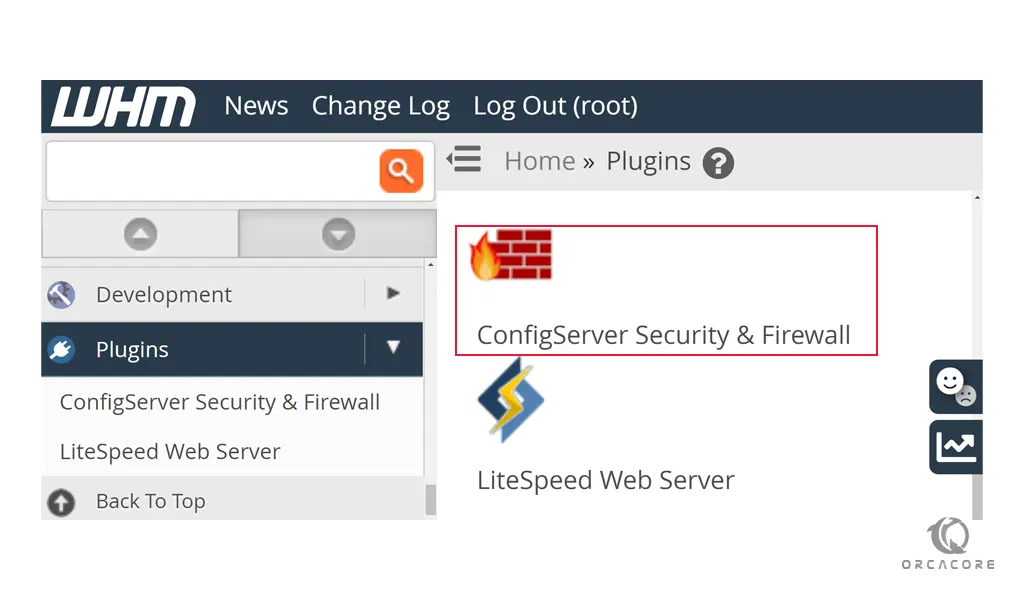
At this point, log in to your WHM as root. From the Plugins section on cPanel click on the ConfigServer & Security Firewall (CSF).
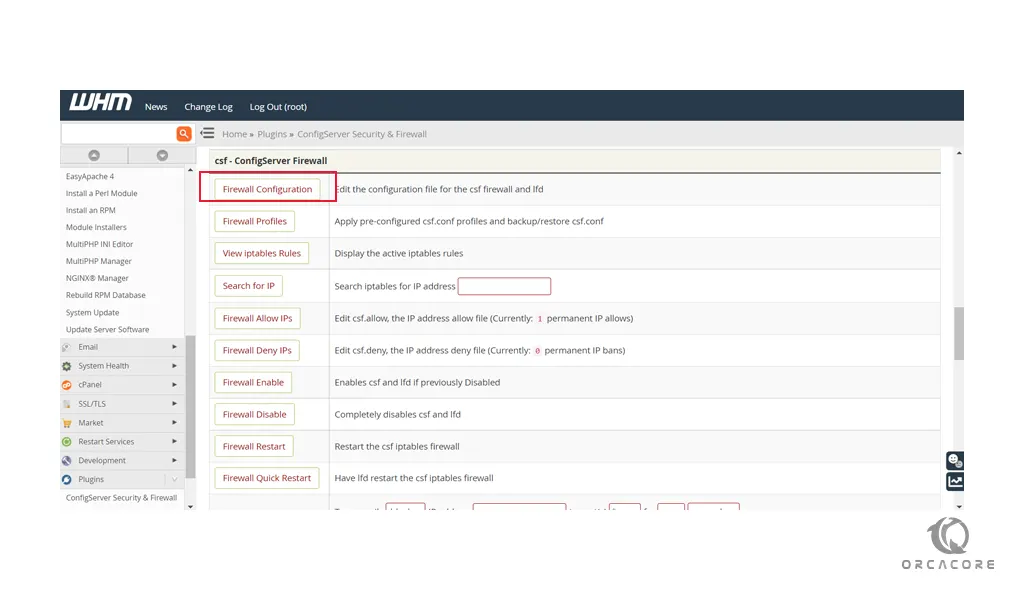
Then, scroll down to see the CSF – ConfigServer Firewall section. You need to click on the Firewall configuration.
Next, in the IPv4 Port Settings section, you will see that the following ports are opened by default.
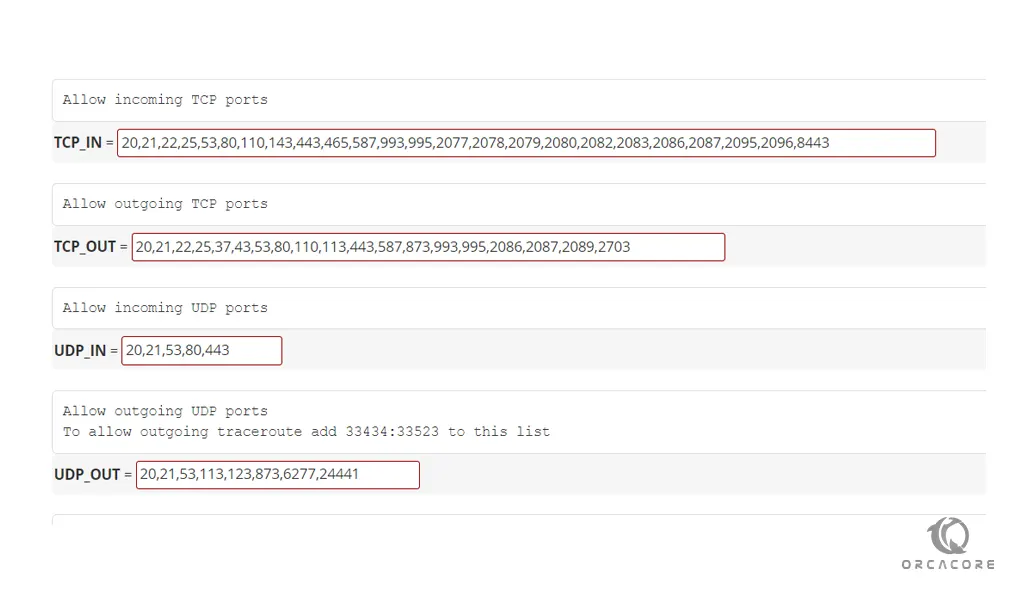
Note: If you changed your SSH port number, you need to add this new port on the “IPv4 Port Settings” and/or “IPv6 Port Settings”.
Also, in this section, you can add a specific port for a new app installed on the server.
For example, if you are using R1soft/Idera external backup solution, you need to allow inbound traffic for TCP port 1167 in the port TCP_IN section.
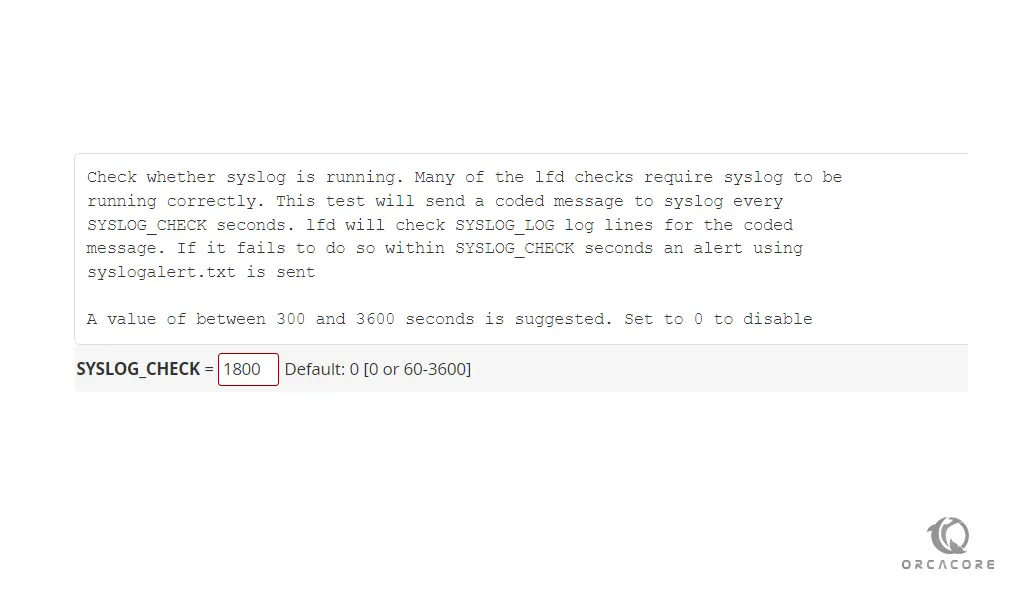
Now scroll down to see the General settings. To enable Syslog monitoring find the SYSLOG_CHECK option and set it to 1800.
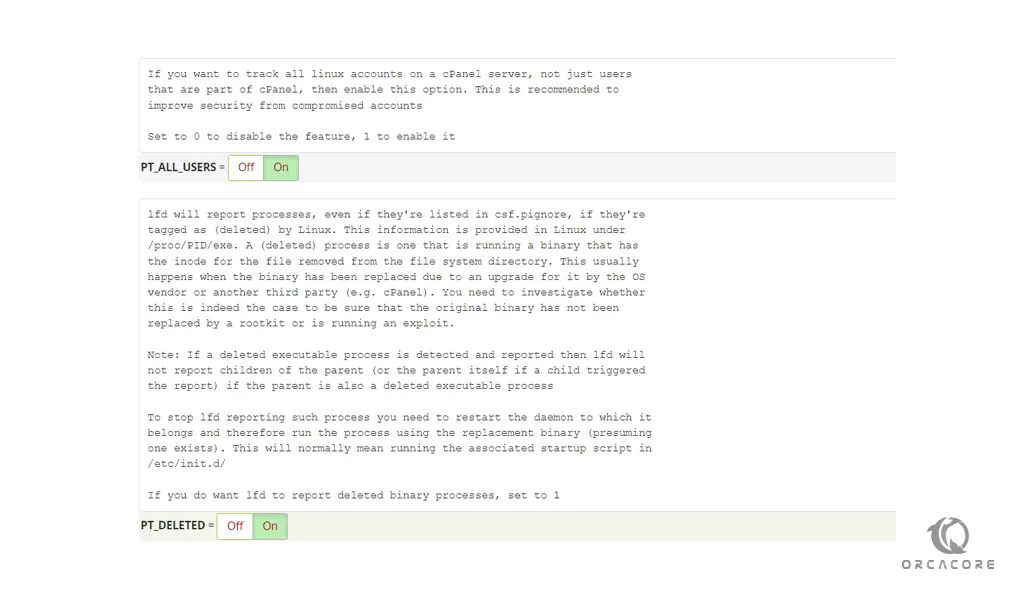
At this point, find the Process Tracking section. Find the PT_ALL_USERS and PT_DELETED and turn them on to detect suspicious processes.
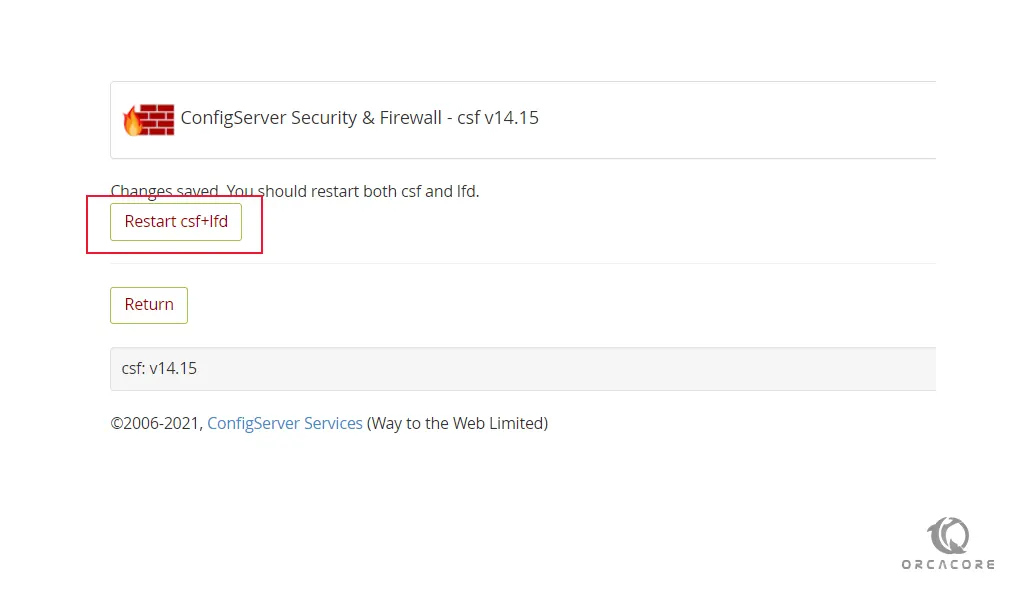
Now you need to save the configuration. Navigate to the bottom of the page and click on the Change button. Then, restart CSF and LFD.
At this point, you need to confirm the CSF firewall status on cPanel / WHM. You need to go to the ConfigServer Security Firewall main page. On the top of this page, you should see “Firewall Status: Enabled but in Test Mode” If you see “Firewall Status: Disabled and Stopped” please click on “Enable”.
To remove the Test mode, go to the Firewall configuration again. In the initial Settings section. You need to turn off the Testing option.
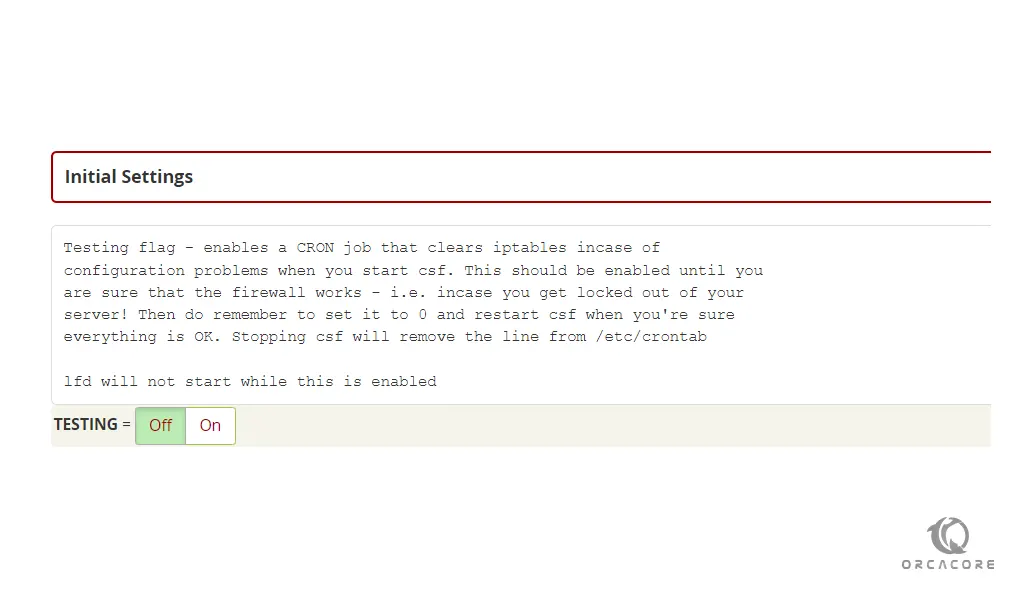
Again you need to save your configuration again and restart the CSF firewall and LFD on cPanel. You should see that the Firewall Status: Enabled and Running.
Here you can monitor the firewall activity by clicking the “Watch system Logs” button on the ConfigServer Security Firewall main page.
Or from your SSH you can read the log file /var/log/lfd.log.
Conclusion
At this point, you learn to install and configure the CSF firewall on cPanel.
Hope you enjoy using it.
May you will be interested in these articles:
How To Set up cPanel and WHM on Centos 7.