Share your love
How To Install Apache Solr on Ubuntu 22.04

In this guide from the Linux Tutorials, we want to teach you How To Install Apache Solr on Ubuntu 22.04.
Apache Solr is an open-source search server built on top of Lucene that provides all of Lucene’s search capabilities through HTTP requests. It has been around for almost a decade and a half, making it a mature product with a broad user community.
Solr offers powerful features such as distributed full-text search, faceting, near real-time indexing, high availability, NoSQL features, integrations with big data tools such as Hadoop, and the ability to handle rich-text documents such as Word and PDF.
How To Install Apache Solr on Ubuntu 22.04
To install Apache Solr, you need to log in to your server as a non-root user with sudo privileges. To do this, you can follow our guide the Initial Server Setup with Ubuntu 22.04.
Install Java on Ubuntu 22.04
To set up Apache Solr, you need to have Java installed on your Ubuntu 22.04. First, update your local package index with the following command:
sudo apt update
Then, install Java and the required packages on Ubuntu 22.04 with the command below:
sudo apt install default-jdk gnupg2 apt-transport-https wget -y
When your installation is completed, you can verify your Java installation by checking its version:
java -version
In your output you will see:
Output
openjdk version "11.0.15" 2022-04-19
OpenJDK Runtime Environment (build 11.0.15+10-Ubuntu-0ubuntu0.22.04.1)
OpenJDK 64-Bit Server VM (build 11.0.15+10-Ubuntu-0ubuntu0.22.04.1, mixed mode, sharing)
Installing Apache Solr on Ubuntu 22.04
First, you need to check the latest version of Apache Solr from the Solr Downloads Page.
Then, download Solr on Ubuntu 22.04 with the following command, just remember to replace the version of Solr:
wget https://downloads.apache.org/solr/solr/9.0.0/solr-9.0.0.tgz
Now you need to extract your downloaded file with the following command:
tar xzf solr-9.0.0.tgz
Here you can install Apache Solr with the command below:
bash solr-9.0.0/bin/install_solr_service.sh solr-9.0.0.tgz
When your installation is completed, you should see the following output:
Output
Service solr installed.
Customize Solr startup configuration in /etc/default/solr.in.sh
● solr.service - LSB: Controls Apache Solr as a Service
Loaded: loaded (/etc/init.d/solr; generated)
Active: active (exited) since Thu 2022-06-09 12:15:01 CEST; 5s ago
Docs: man:systemd-sysv-generator(8)
Process: 5199 ExecStart=/etc/init.d/solr start (code=exited, status=0/SUCCE
You can use the following command to start your Solr service on Ubuntu 22.04:
sudo systemctl start solr
To enable Solr to start at boot you can run the following command:
/lib/systemd/systemd-sysv-install enable solr
You can check your Apache Solr status with the command below:
sudo systemctl status solr
Also, you can create a new Solr collection to test the Apache Solr functionality with the following command:
su - solr -c "/opt/solr/bin/solr create -c newcollection -n data_driven_schema_configs"
In your output you will see:
Output
Created new core 'newcollection'
Configure Apache Solr on Ubuntu 22.04
The default Apache Solr runs on localhost only. To allow the Solr server publically accessible over networks, edit the /etc/default/solr.in.sh configuration file.
sudo vi /etc/default/solr.in.sh Search for the SOLR_JETTY_HOST variable. Uncomment it by removing the starting hash (#) symbol. Set the value to “0.0.0.0”.
SOLR_JETTY_HOST="0.0.0.0"
When you are done, save and close the file.
Restart the Solr service to apply changes.
sudo systemctl restart solr Check the Apache Solr listening host address.
sudo ss -tupln | grep 8983 Output tcp LISTEN 0 50 *:8983 *:* users:(("java",pid=7009,fd=136))
Access Apache Solr Web Interface
At this point, you can access to Solr web interface by typing your server’s IP address in your web browser followed by 8983:
http://your-server-ip:8983
You will see the Apache Solr dashboard screen:
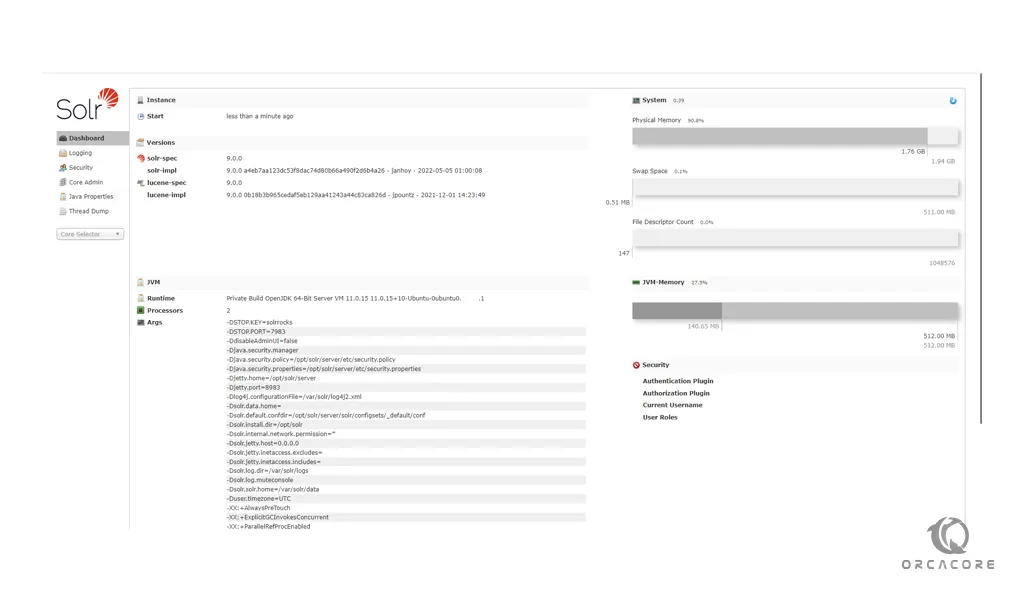
From the core selector on the left side, you can choose my collection to view statics of your collection created in the previous step.
Conclusion
At this point, you learn to Install Apache Solr on your Ubuntu 22.04.
Hope you enjoy it.