Share your love
How To Install MySQL on Windows Server 2019

In this article, we intend to teach you How To Install MySQL on Windows Server 2019.
MySQL is a relational database management system (RDBMS) developed by Oracle that is based on structured query language (SQL).
MySQL is integral to many of the most popular software stacks for building and maintaining everything from customer-facing web applications to powerful, data-driven B2B services.
Its open-source nature, stability, and rich feature set, paired with ongoing development and support from Oracle, have meant that internet-critical organizations such as Facebook, Flickr, Twitter, Wikipedia, and YouTube all employ MySQL backends.
Steps To Install MySQL on Windows Server 2019
In this guide, you will learn to install MySQL on your Windows Server.
Follow the steps below to complete this guide.
Install and Download MySQL on Windows Server
First, you need to download MySQL for Windows from the MySQL Downloads Page.
A free “MySQL Community Server” edition is available in both a “web” installer and a “standalone” installer.
The “web” installer (which has a smaller initial installer download size but with additional components downloaded during installation), or the “full” installer (which has a larger installer download size, but doesn’t require downloading any additional components during installation) and click “Download”.
Here we will download the Full installer.

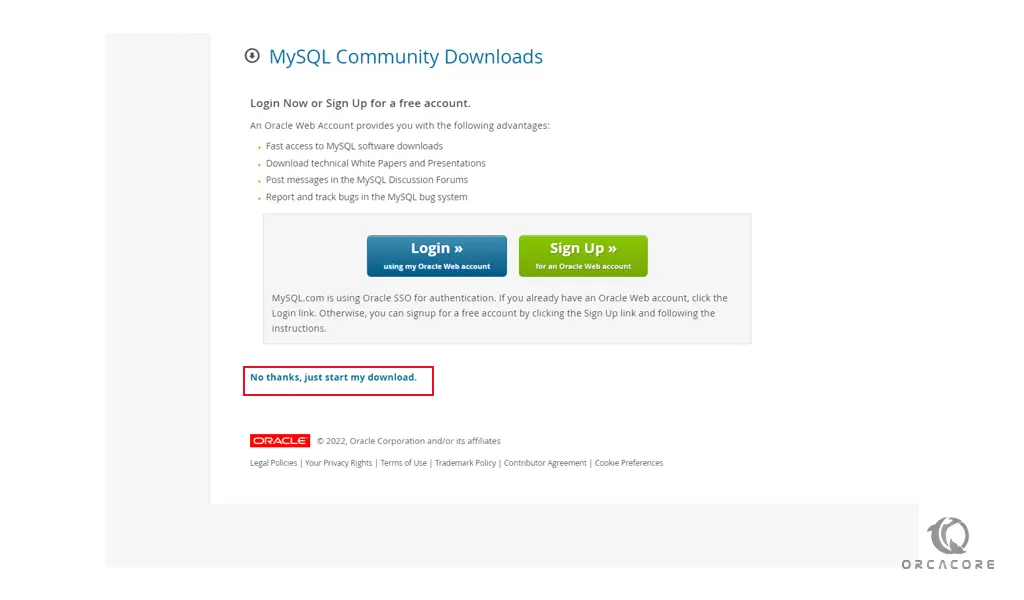
On the next screen, click No thanks just start my download.
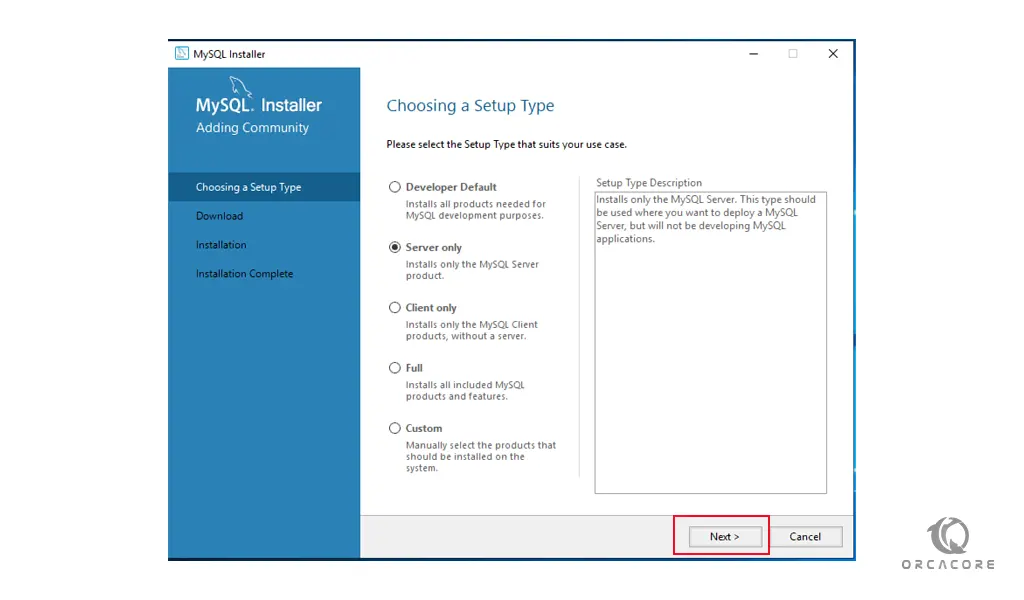
When your download is completed, open your MySQL installer on your Windows server 2019. Then, you need to choose a setup type and click Next. Here we choose Server only.
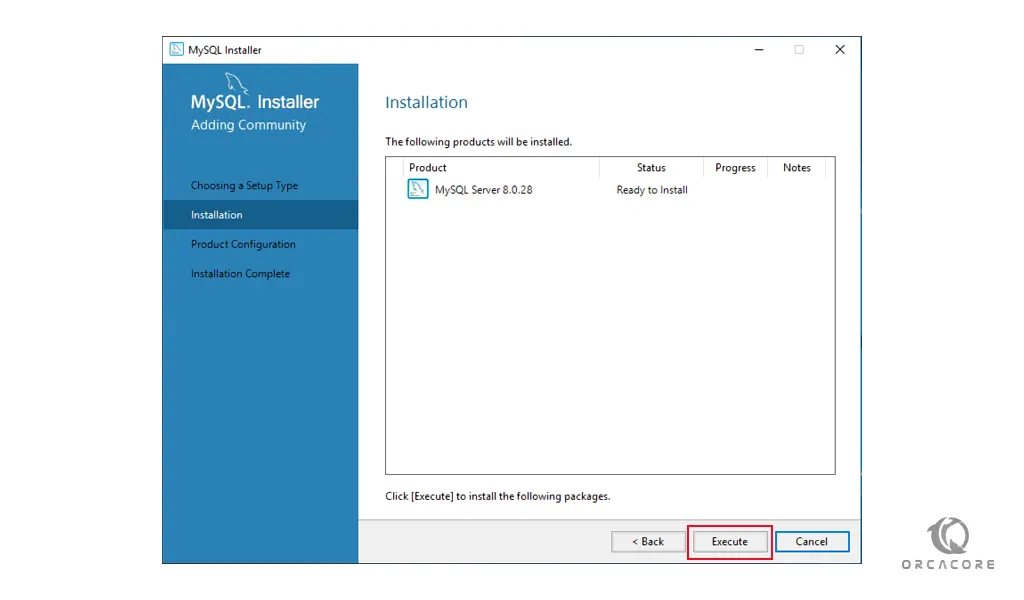
Next, you need to click Execute.
The installer will then download (in the case of the “web” installer) and then install the selected components.
When your MySQL installation is completed click Next to configure your MySQL server.
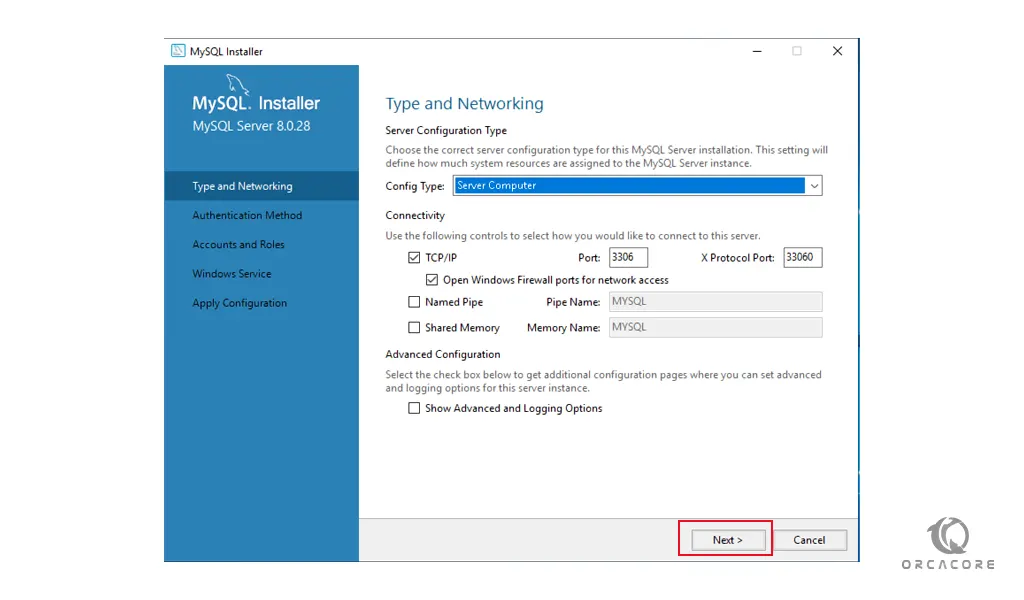
Then, you need to choose your config type. Here we select Server computer in the case that we’re installing MySQL on a server. Also, you can specify the “Connectivity” options on this screen. In most cases, you can leave these as the default (TCP/IP, Port 3306) and click Next.
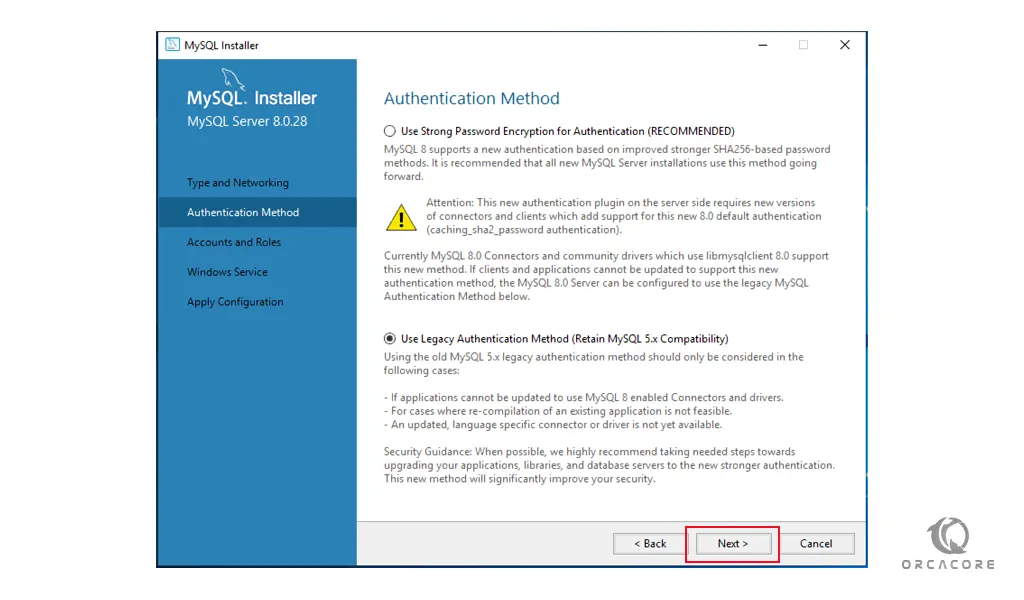
At this point, you need to choose an authentication method. Its recommended for maximum compatibility and to avoid any additional configuration, select “Use Legacy Authentication Method” and click Next.
Configure MySQL on Windows Server
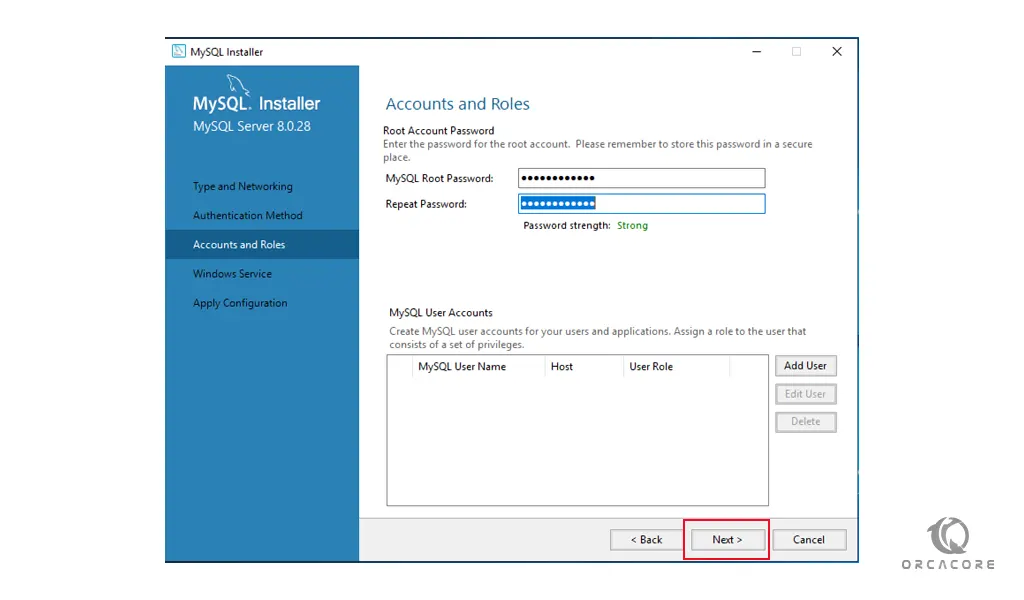
Next, you need to set up a MySQL root password on Windows Server 2019. Choose a strong one and click Next.
Also, you can set up additional MySQL user accounts from this screen.
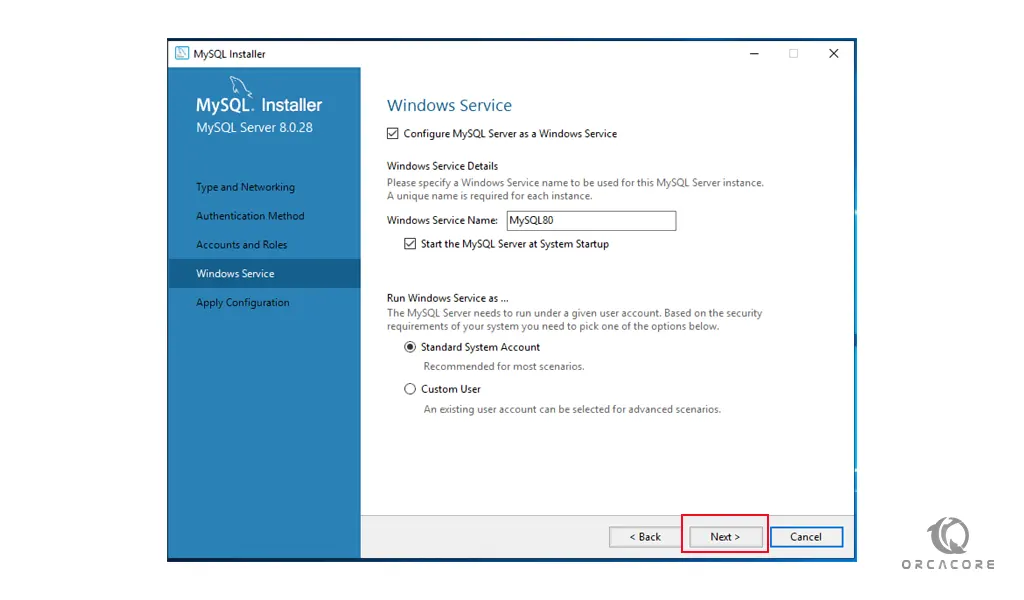
Now you need to configure MySQL to run as a Windows service. Check the box next to the Configure MySQL a Windows service and Start MySQL at the system startup. And run Windows service as a Standard System Account and click Next.
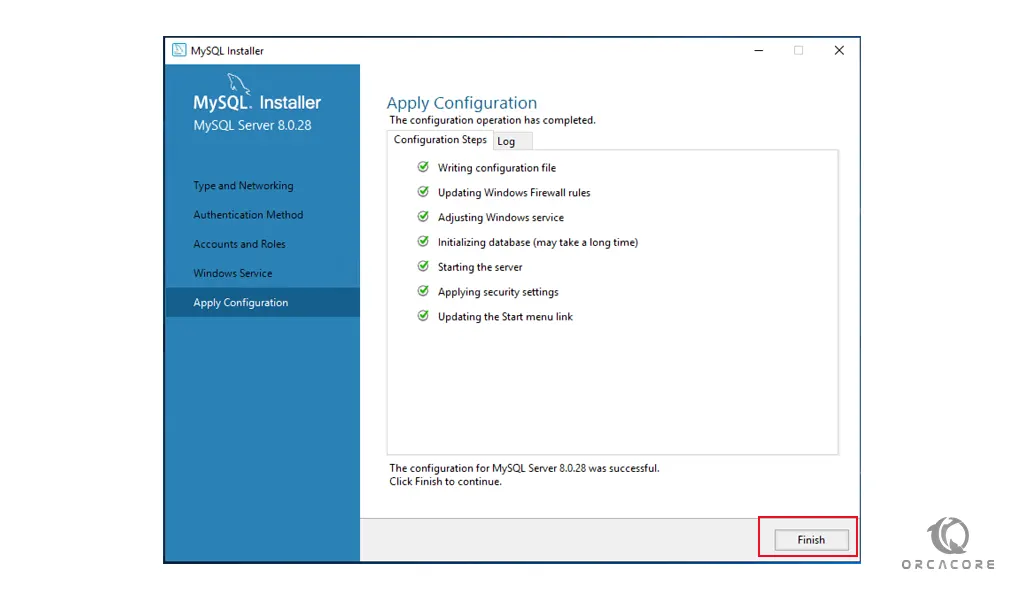
In the Apply configuration screen, click Execute to start your MySQL configuration. Then, click finish.
Next, you will see the Product configuration click Next and Finish your MySQL installation on Windows Server 2019.
Conclusion
At this point, you learn to Install MySQL on Windows Server 2019.
Hope you enjoy it.
Also, you may interested in these articles: