Share your love
Easy Steps To Install SVN Server on AlmaLinux 9
In this guide, we want to teach you How To Install SVN Server on AlmaLinux 9. Apache Subversion (SVN) is a free, open-source version control system that operates according to the client/server model.
An SVN server is usually installed on a central computer and it manages the data of the SVN repository in a database. An SVN repository is simply a directory tree that contains your CODESYS project. The SVN server makes client access available to the stored data and the CODESYS projects.
The project data is available as a working copy on your workstation computer, which acts as the client. When you open your project, CODESYS SVN displays the SVN status of all objects in the object tree and provides SVN commands. Then you can further develop your project in CODESYS using version control.
You can now proceed to the following steps from the Orcacore website to Install SVN Server on AlmaLinux 9.
Table of Contents
Steps To Install SVN Server on AlmaLinux 9
To Install SVN Server on AlmaLinux 9, you must log in to your server as a non-root user with sudo privileges and set up a basic firewall. To do this, you can follow our guide on Initial Server Setup with AlmaLinux 9.
Step 1 – Install Subversion (SVN) on AlmaLinux 9
First, you need to update your local package index with the following command:
sudo dnf update -yThen, install the Epel release repository on AlmaLinux 9 with the command below:
sudo dnf install epel-release -yNow you can use the following command to Install SVN Server on AlmaLinux 9:
sudo dnf install subversion mod_dav_svn httpd -yStep 2 – Configure SVN on AlmaLinux 9
The SVN module package will create an Apache configuration file. You need to make some configuration changes to it. Open the file with your favorite text editor, here we use vi:
sudo vi /etc/httpd/conf.d/subversion.confAdd the following contents to the file:
<Location /svn>
   DAV svn
   SVNParentPath /var/www/svn
   AuthType Basic
   AuthName "Apache SVN Repositories"
   AuthUserFile /etc/svn/svn-auth
   Require valid-user
</Location>
When you are done, save and close the file.
Next, you need to create SVN directories on AlmaLinux 9 with the command below:
sudo mkdir /var/www/svn /etc/svn/Switch to the directory with the following command:
cd /var/www/svnCreate SVN Repository
At this point, you can create an SVN repository with the following command, here we named it myrepo, you can choose your own name:
sudo svnadmin create myrepoThen, set the correct permissions for it:
sudo chown -R apache.apache myrepoCreate SVN HTTP Access Authentication File
Here you need to create an SVN HTTP access authentication file on AlmaLinux 9 with the command below:
sudo touch /etc/svn/svn-authAdd your first SVN user in the SVN authentication file, here we named it orca:
sudo htpasswd -cm /etc/svn/svn-auth orcaIn your output you will see:
Output
New password:
Re-type new password:
Adding password for user orca
You can add more SVN users on AlmaLinux 9 with the command below:
sudo htpasswd -m /etc/svn/svn-auth userNow set the correct permissions for the SVN authentication file with the following commands:
$ sudo chown root:apache /etc/svn/svn-auth
$ sudo chmod 640 /etc/svn/svn-auth
Next, you need to enable and restart your httpd service with the following commands:
$ sudo systemctl enable --now httpd
$ sudo systemctl restart httpd
Configure Firewall
We assumed that you enabled firewalld at the beginning of the article. Now you need to open the HTTP port through the firewall with the command below:
sudo firewall-cmd --add-service=http --permanentThen, reload the firewall to apply the new rules:
sudo firewall-cmd --reloadStep 3 – Access the SVN Repository
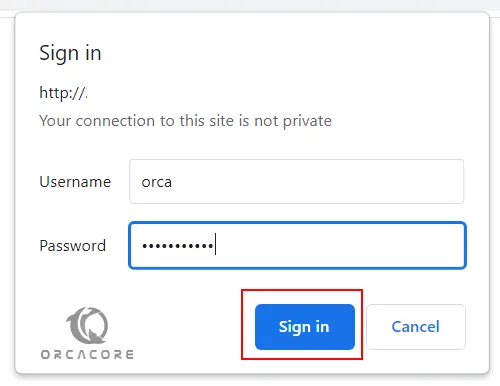
At this point, you have learned to Install SVN Server on AlmaLinux 9 and create an SVN repo. Now you can access the SVN repo by typing your server’s IP address in your web browser followed by /svn/myrepo:
http://server_ip_or_hostname/svn/myrepoYou should enter your username and password that you have defined before to access the SVN repo.

That’s it, you are done.
Conclusion
At this point, you have learned to Install SVN Server on AlmaLinux 9. You can easily install and configure SVN and create your SVN repositories. Hope you enjoy it.
You may like these articles:
Install MariaDB 10.8 on AlmaLinux 9