Share your love
Install Windows Server 2022 in Vmware Workstation 17 + Easy Video Tutorial
In this article from the Orcacore website, we intend to show you to install Windows Server 2022 in VMware Workstation 17. Before starting the installation steps, we will explain concepts like “VMware Workstation” to users who are not fully aware of them.
Table of Contents
What is Vmware Workstation and what is its advantage?
In simple words, VMware Workstation is a virtualization software.
The VMware Workstation is installed on the local operating system like Windows 11 and provides the possibility of installing operating systems on it.
These types of virtualizers are slightly different from server-based virtualization and can be used mostly for running a laboratory or using several operating systems on a PC or laptop.
Workstation is a product of the great VMware, which has complete expertise in virtualization software and its related products.
This software has added many features in the new versions and provides users with good benefits.
How to install windows server 2022 in VMware Workstation 17 pro?
First, you need to download the Windows Server 2022 ISO file. To download the ISO, visit the Windows Server 2022 download page and download the item file.
After that, open the VMware workstation on your computer and follow the steps below to Install Windows Server 2022 in Vmware Workstation 17.
Step 1: Create a Virtual Machine on VMware Workstation
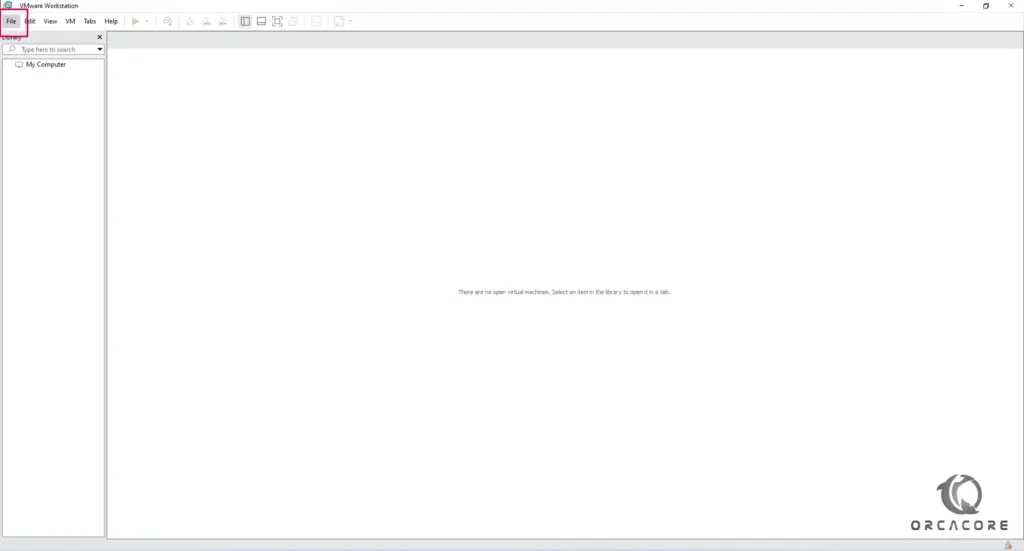
1-1. From the File menu, click New Virtual Machine. You can also use the keyboard shortcut Ctrl+N to create a new virtual machine.
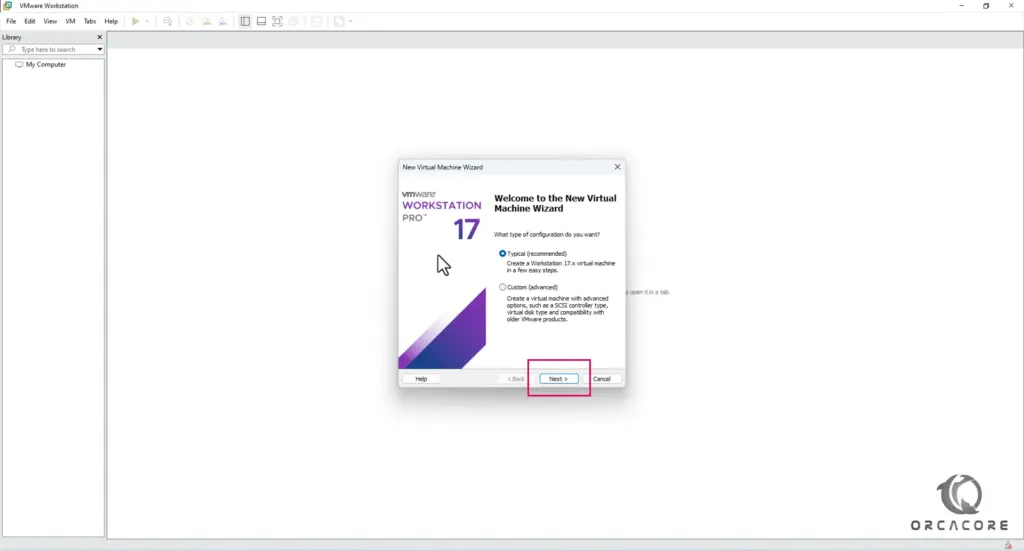
1-2. In the first window, select the Typical option and click Next.
Point: You can choose the custom option and change the SCSI controller type and compatibility older version.
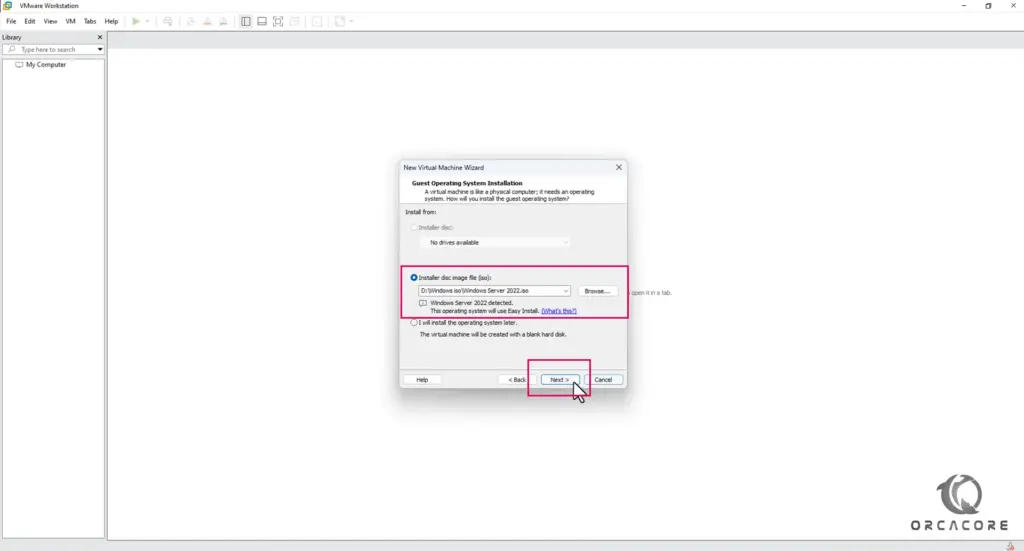
1-3. In this step, select the ISO file of Windows Server 2022 with click the browse button.
Once selected, you will notice that VMware Workstation will automatically detect the operating system.
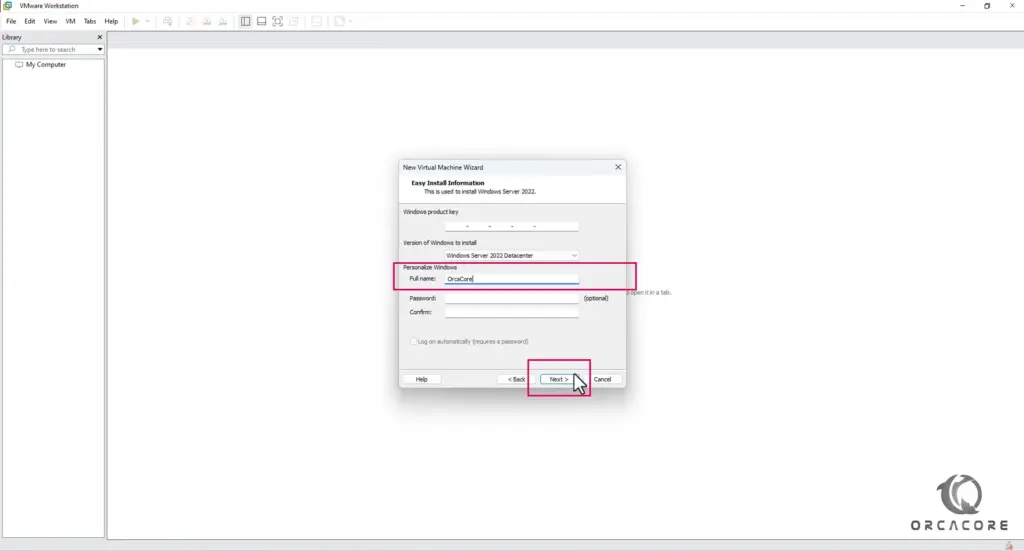
1-4. Here you should see a window similar to the image below.
In this section, you do not need to enter all the fields and only enter a desired name in the full name section.
Point: With the name you enter here, a user with the same name will be created in Windows after installation but don’t worry, we will enable Administrator finally on the final steps.
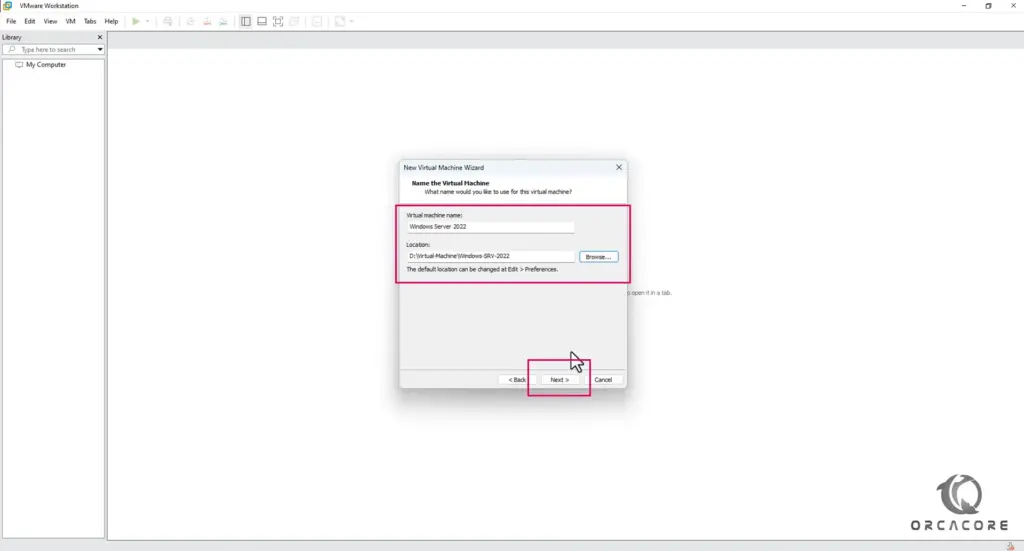
1-5. After that, In the next window, enter the virtual machine name and choose where your Virtual Machine is stored.
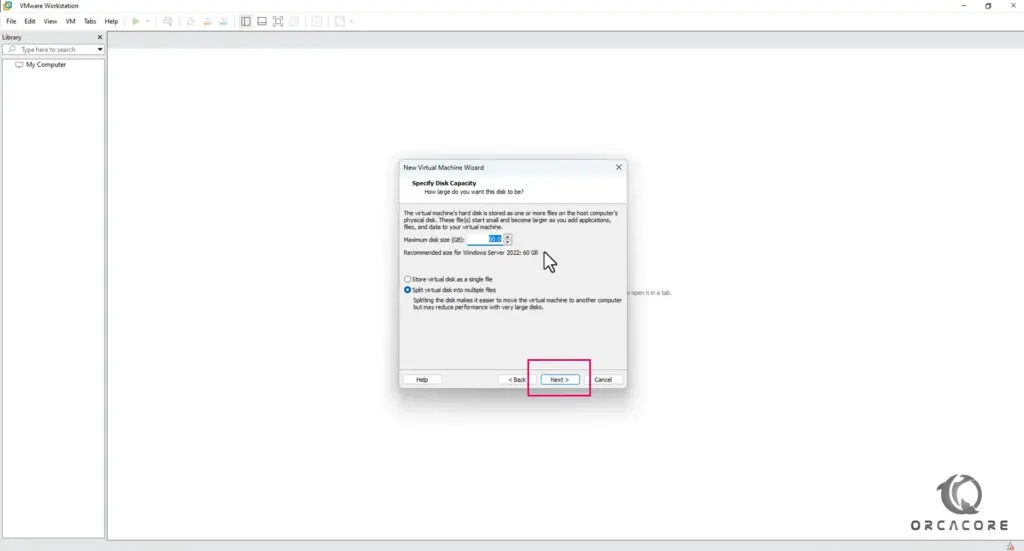
1.6- On the next window, you can specify disk capacity and after that, click on next.
Point: 60 GB capacity is enough for Windows, but if you want to install other software inside the virtual machine or need more capacity, you can increase that.
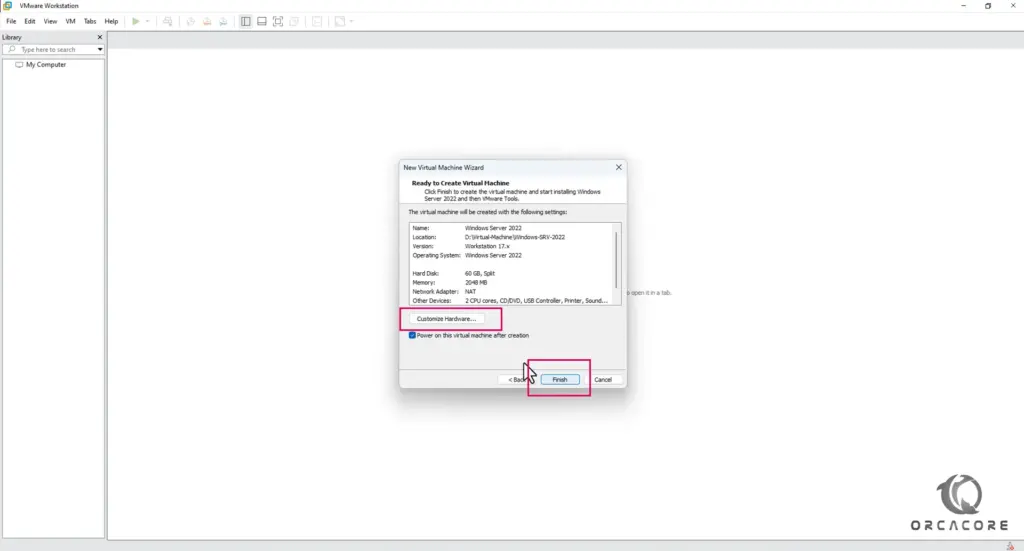
Customize Virtual Machine Hardware
1.7- In the last window from the new virtual machine wizard, you can select finished or click on “customize hardware” for customizing RAM, CPU, or others.
In this tutorial, we select customize hardware for increasing RAM and CPU.
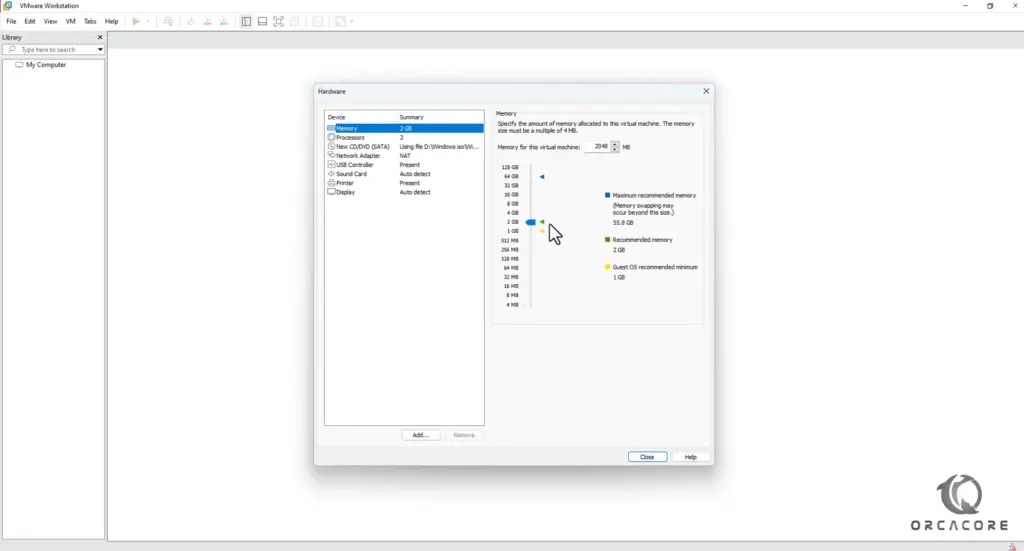
Recommendation: If you have enough RAM and CPU, choose more RAM and CPU for your virtual machine.
1.8- Next, you can select the hardware you want from the left panel and customize it from the right panel.
1.9- Click Close and Finish to build your virtual machine when the customization is completed.
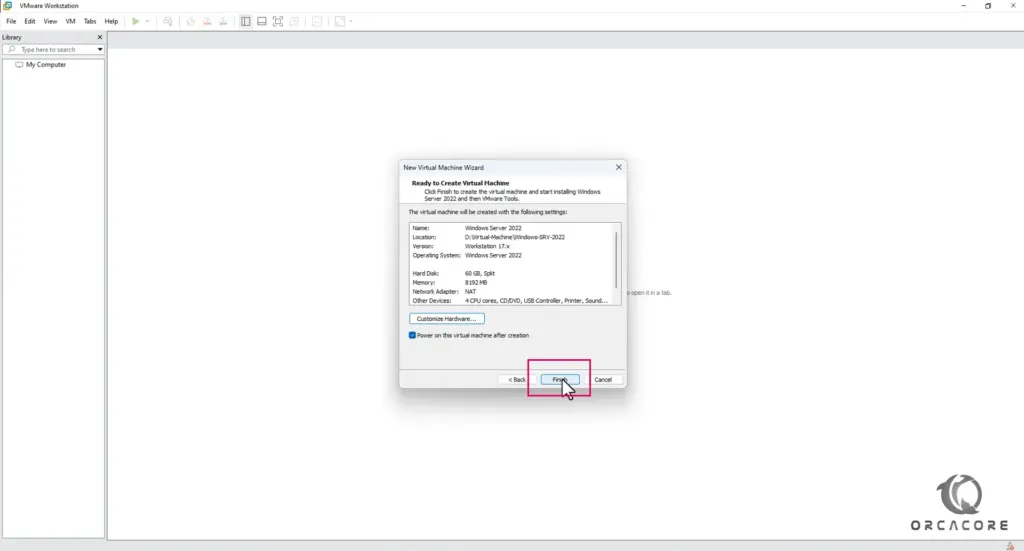
So far, you have succeeded in creating a virtual machine for Installing Windows Server 2022 in VMware Workstation 17.
Wait a few moments for the virtual machine to turn on automatically to proceed with the installation process.
Step 2: Start the unattended Installing Windows Server 2022 in VMware Workstation 17
I have to tell you one thing here, in the new version of VMware Workstation, you will not see the Windows installation steps normally and all the steps will be done automatically.
So don’t be surprised if you don’t see some of the steps below. The workstation will proceed with the steps automatically.
2-1. After you click on the finish button on the last step, the virtual machine turns on and starts to install windows server 2022 in VMware Workstation.
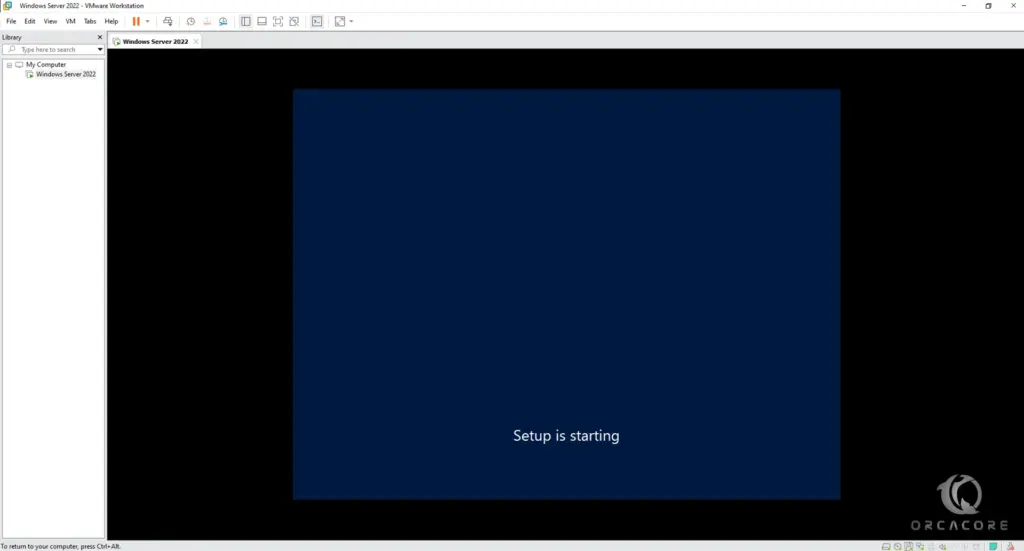
2-2. After a few minutes, you will see a window like the one below. In this section, the files will start to be copied.
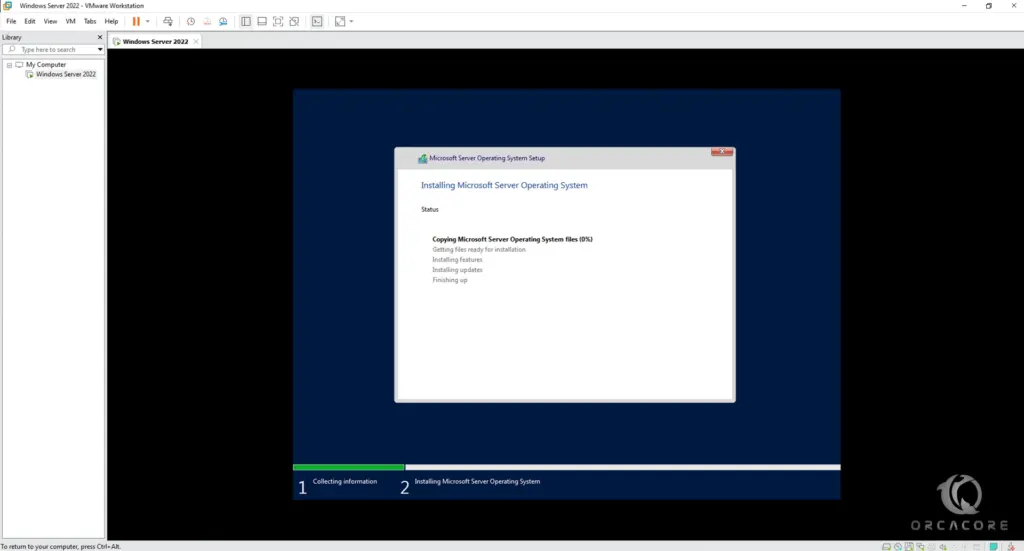
2-3. Depending on the speed of your system and your hard disk, the installation process will be finished after a few minutes and you will see a window similar to the below image.
At this stage, click on restart now or wait for the operating system to restart after 10 seconds.

Install VMware Workstation tools automatically
2.4- At this point, the virtual machine will be started the final installation process and will be restarted twice, and then the login window will be displayed to you.
Points: Same as the name you entered when creating the virtual machine A user will be created in your Windows.
The workstation will log in with the same user and start installing its tools.
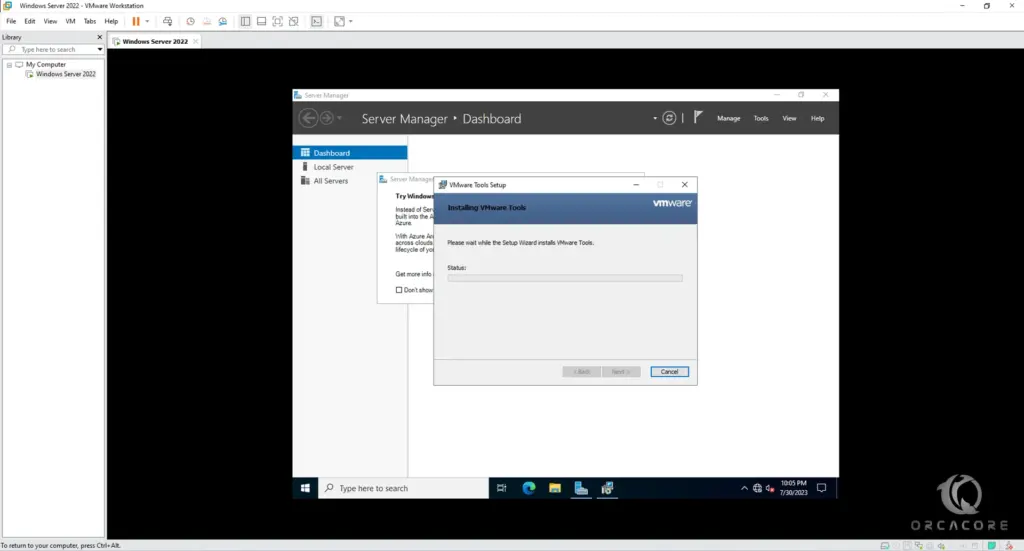
2-5. After the VMware Workstation Tools process is completed, a window will appear asking you to restart the operating system. Click on Reboot.
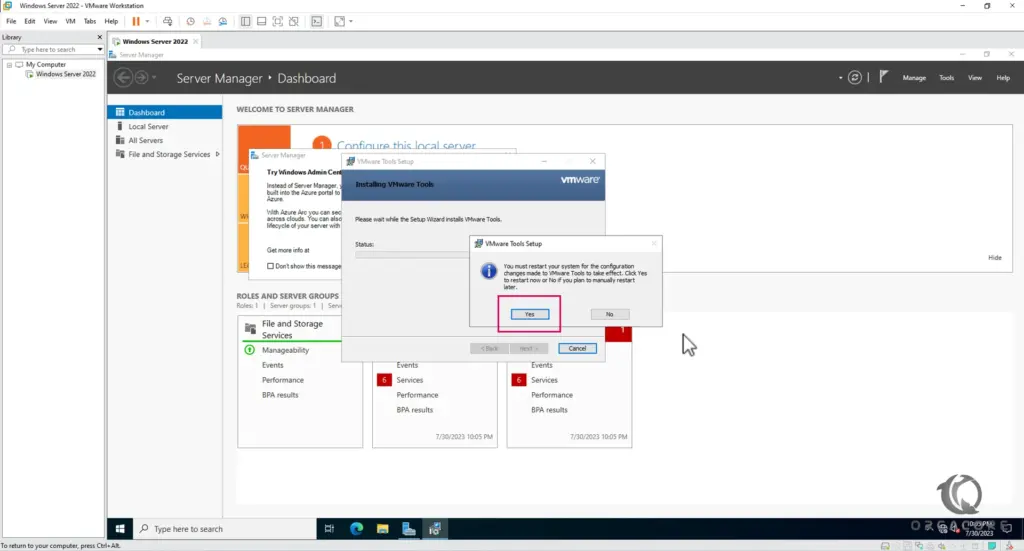
OK! The installation of Windows Server 2022 in VMware Workstation is done.
Now you can work with it but if you want to enable Administrator user and work on the Windows server 2022 with Administrator User, follow the below steps.
Step 3: How to enable Administrator user on Windows Server 2022?
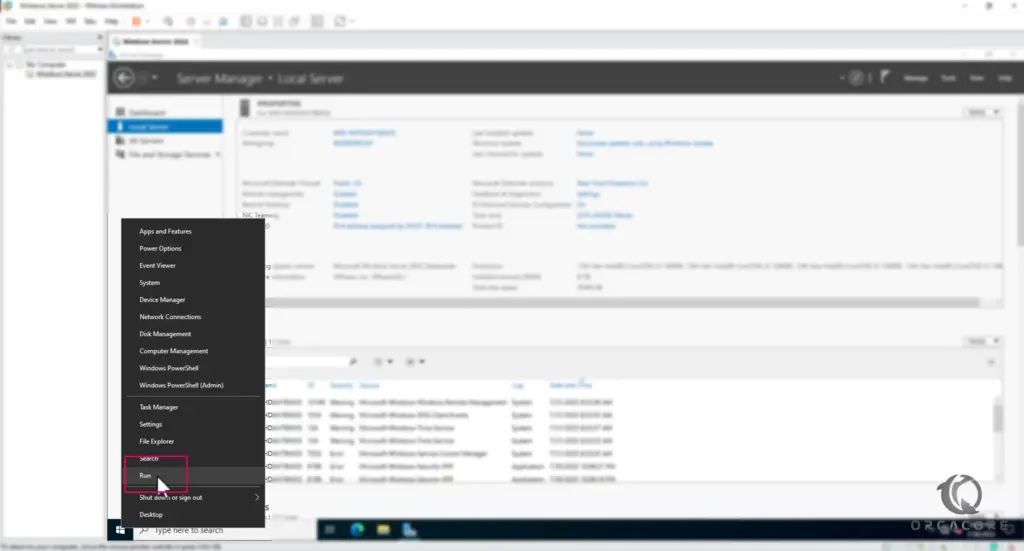
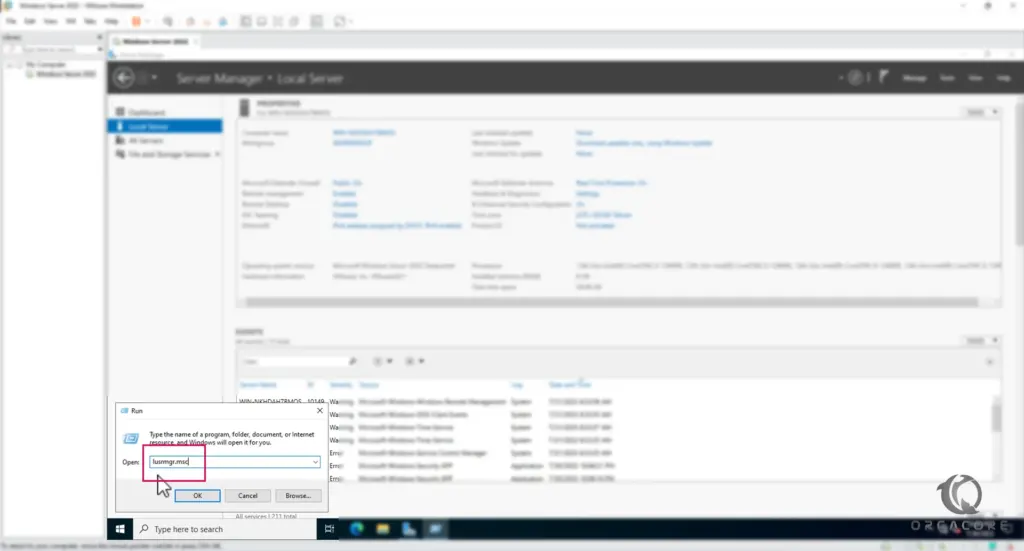
3-1. After login to your VM, right-click on the start menu and select run.
3-2. Enter lusrmgr.msc and click ok.
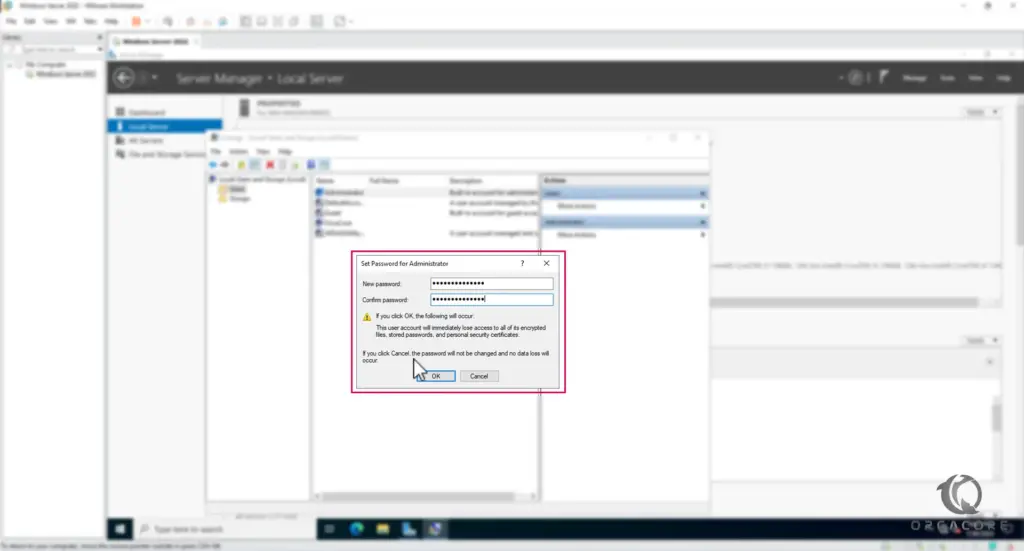
3-3. On this window, select Administrator and right-click on it and then “Set password“.

3-4. You will see a window like the below image, click on proceed.

3-5. Enter your password and click on Ok.
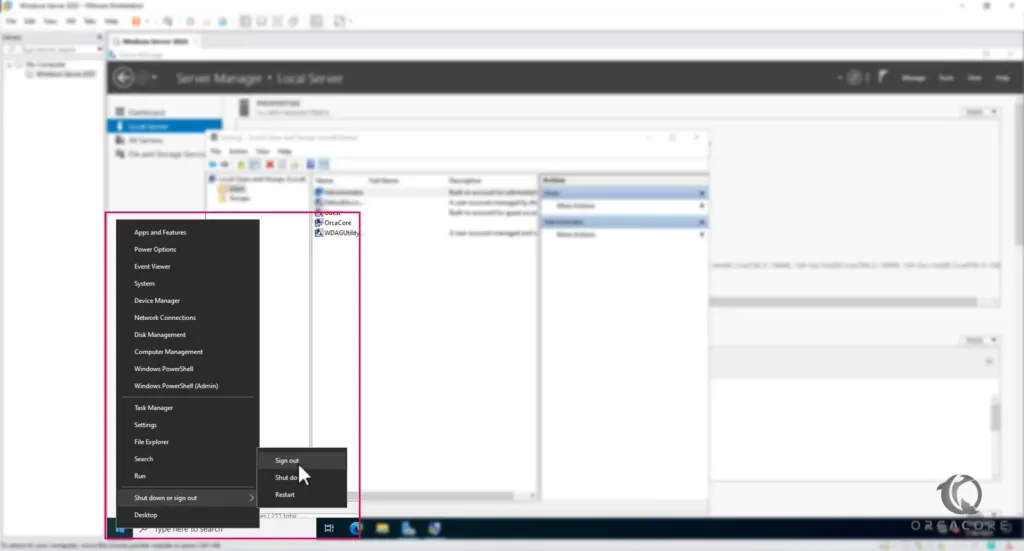
3-6. Now you need to sign out; right-click on the start menu, and select shutdown or sign out > sign out.
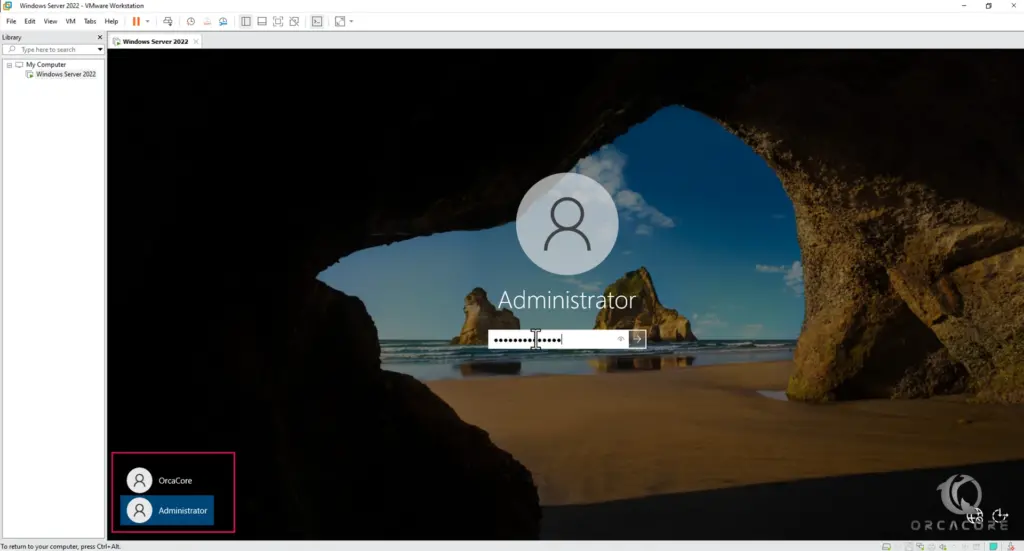
3-7. Once logging in to Windows Server, you must press the CTRL+ALT+DEL buttons from the keyboard at the same time to enter the username and password but in the VMware workstation, you must press the CTRL+ALT+INS.
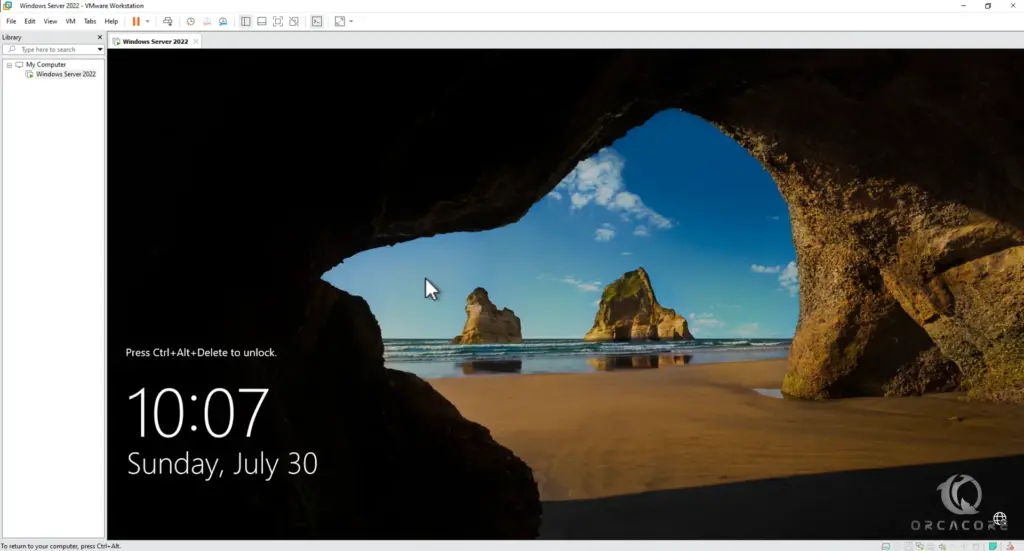
3-8. After that, select Administrator user from the bottom left, type your Administrator password, and enter.
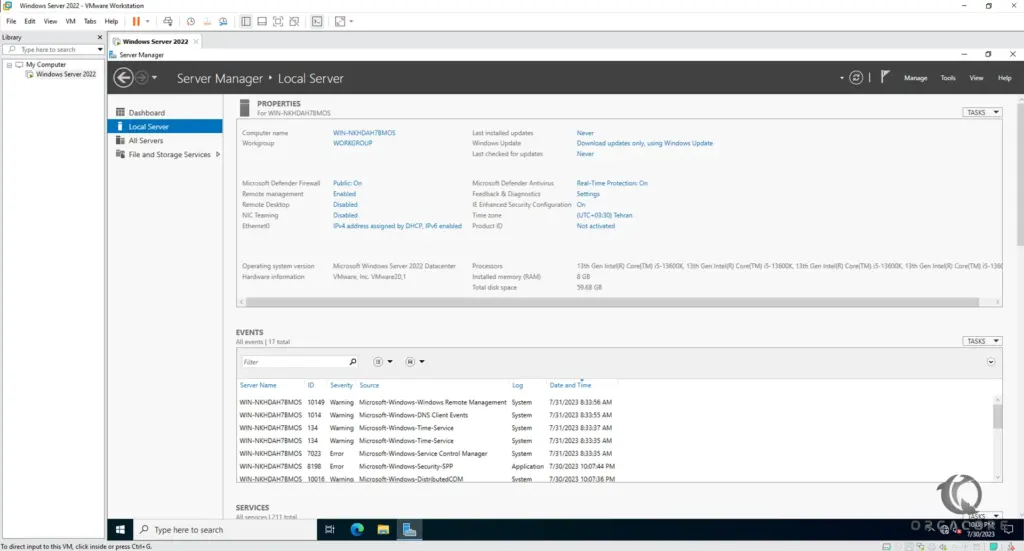
Well done, you have successfully created a new virtual machine on VMware Workstation and installed Windows Server 2022 in VMware Workstation 17 Pro. Now you can use the Windows VM for your purposes.
Conclusion
In this article, we tried to teach you to install Windows Server 2022 in Vmware Workstation 17 step by step. At first, we created a new virtual machine in VMware Workstation step by step, then we proceeded with the automatic installation of the Windows server and finally, we made the final setup.
In the end, we enable the administrator user.
I hope you enjoy this tutorial on Install Windows Server 2022 in Vmware Workstation 17, if you need any help or have any questions, you can comment for us.
You may also like to read the following articles:
Set Static IP address on Windows Server 2025