Share your love
Installing FastAPI with MongoDB on Ubuntu 24.04: Comprehensive Guide

This tutorial intends to teach you the comprehensive steps for Installing FastAPI with MongoDB on Ubuntu 24.04. FastAPI is a modern, high-performance Python web framework, and MongoDB is a NoSQL database that provides flexibility and scalability. When these two compile together, they create a powerful backend solution for web applications.
This guide on the Orcacore website will take you through the installation and configuration steps for setting up FastAPI with MongoDB on Ubuntu 24.04.
Table of Contents
Full Guide Steps For Installing FastAPI with MongoDB on Ubuntu 24.04
Before you start installing FastAPI with MongoDB on Ubuntu 24.04, you must log in to your Ubuntu 24.04 server as a non-root user with sudo privileges. You can check for Creating a Sudo User on Ubuntu 24.04. Then, proceed to the following steps to start your FastAPI setup with MongoDB on Ubuntu 24.04.
Step 1. Install MongoDB on Ubuntu 24.04
First, run the system update and upgrade by using the following commands:
# sudo apt update
# sudo apt upgrade -y
Then, run the command below to install the required packages:
sudo apt install gnupg curl -yOnce you are done, you must add the MongoDB GPG Key and Repository.
Add MongoDB GPY Key and Repository
Now, add the MongoDB server GPG key by using the following command on your Ubuntu 24.04:
curl -fsSL https://www.mongodb.org/static/pgp/server-8.0.asc | \
sudo gpg -o /usr/share/keyrings/mongodb-server-8.0.gpg \
--dearmor
Next, add the MongoDB server repository on Ubuntu 24.04 with the following command:
echo "deb [ arch=amd64,arm64 signed-by=/usr/share/keyrings/mongodb-server-8.0.gpg ] https://repo.mongodb.org/apt/ubuntu noble/mongodb-org/8.0 multiverse" | sudo tee /etc/apt/sources.list.d/mongodb-org-8.0.listOnce you have added the MongoDB repository, you must run the system update:
sudo apt updateInstalling MongoDB
You can now use the command below to install your MongoDB server:
sudo apt install mongodb-org -yStart and Enable MongoDB
At this point, you must start and enable your MongoDB service, which is called mongod, by using the command below:
sudo systemctl enable --now mongodThen, check that your MongoDB service is active and running on Ubuntu 24.04 with the command below:
sudo systemctl status mongod
Also, you can check for additional information by running the Mongosh command:
mongosh
You can exit by pressing Ctrl + D.
Step 2. Install Python and Virtual Env for FastAPI Setup
At this point, you must install Python and set up the Python virtual environment for your FastAPI setup. First, install Python, Python Pip, and Python Venv by using the command below:
sudo apt install python3 python3-pip python3-venv -yThen, you must create a new project directory to store your FastAPI project and navigate to it:
mkdir -p ~/app; cd ~/appNext, set up a virtual environment and activate it with the following commands:
# python3 -m venv fastapi-env
# source fastapi-env/bin/activate
With this, your shell prompt will become like this:

Step 3. Install FastAPI in Python Virtual Env
Now, from your virtual environment, run the command below to install FastAPI and uvicorn, which is the implementation of the ASGI (Asynchronous Server Gateway Interface) web server in Python, and install motor, which is the MongoDB driver:
pip3 install fastapi uvicorn motor
Step 4. Create a FastAPI Application
At this point, you must create a database.py file with your desired text editor, like Vi editor or Nano editor:
sudo vi database.pyThis will open an empty file. You can add your database connection logic to the file. For example:
from motor.motor_asyncio import AsyncIOMotorClient

MONGO_DETAILS = "mongodb://localhost:27017"

client = AsyncIOMotorClient(MONGO_DETAILS)

db = client.mydatabase

collection = db.mycollection
Once you are done, save and close the file.
Next, you must create a main.py that holds your application’s logic:
sudo vi main.pyIn this FastAPI app:
- The database connection is set up using database.py.
- Routes for AI predictions are created.
- Input data is checked and validated before making predictions.
from fastapi import FastAPI, HTTPException
from pydantic import BaseModel
from sklearn.linear_model import LinearRegression
import numpy as np
from database import collection

app = FastAPI()

# Simple dataset and model
x = np.array([[1], [2], [3], [4], [5]])
y = np.array([2, 4, 6, 8, 10])

model = LinearRegression()  # Corrected class name
model.fit(x, y)

# Define the Pydantic model for input validation
class InputData(BaseModel):
    feature: float

# Route_1 for predicting the output based on input feature
@app.post("/predict/")
async def predict(input_data: InputData):
    try:
        prediction = model.predict([[input_data.feature]])
        return {"prediction": prediction[0]}
    except Exception as ex:
        raise HTTPException(status_code=400, detail=str(ex))

# Route_2 to interact with MongoDB
@app.get("/items/")
async def get_item():
    items = []
    async for item in collection.find():
        items.append(item)
    return items

# Route_3 to add a new item to MongoDB
@app.post("/items/")
async def create_item(item: dict):
    new_item = await collection.insert_one(item)  # Insert item
    created_item = await collection.find_one({"_id": new_item.inserted_id})  # Correct method name
    return created_item
- Linear Regression Model (from sklearn): This model makes predictions using one input value.
- InputData (from Pydantic): Defines the expected format for the input, which should be a number (float) for making predictions.
- MongoDB Routes:
- GET /items/ → Fetch all items from the MongoDB collection.
- POST /items/ → Add a new item to the MongoDB collection.
Once you are done, save and close the file.
Step 5. Run FastAPI Application
At this point, you must install the required packages and libraries for running your project with the command below:
pip install pydantic scikit-learn numpy
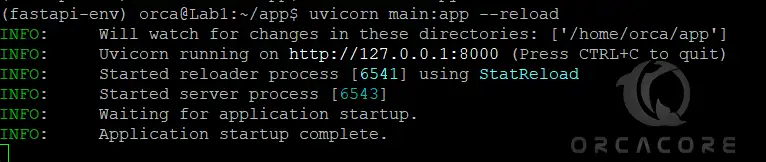
Then, run your FastAPI app by using the following command:
uvicorn main:app --reloadIn the output, you should see:
FastAPI automatically creates interactive API documentation using Swagger UI. You can view it by going to http://127.0.0.1:8000/docs in your browser.
To test the prediction endpoint, you can use tools like curl or Postman to send requests and get results based on your input:
curl -X POST "http://127.0.0.1:8000/predict/" -H "Content-type: application/json" -d '{"feature": 3}'Conclusion
In this guide, you learned how to build a FastAPI application integrated with MongoDB, creating a simple AI-powered system for storing and retrieving predictions. FastAPI, combined with a NoSQL database, provides a fast and scalable solution for developing AI-driven applications efficiently.
Hope you enjoy it. Please subscribe to us on Facebook, Instagram, and YouTube.
You may also like to read the following articles:
Install Podman on Ubuntu 24.04
Install PyCharm on Ubuntu 24.04