Share your love
Set up a Linux Distro on Android Device with Termux: Best Linux Terminal for Android
This guide intends to teach you to Set up a Linux Distro on Android Device with Termux. If you plan to use a Linux terminal on your Android device, Termux is an excellent tool. Termux is a free and open-source tool that provides a terminal environment on your Android device. If you don’t have access to a PC, Termux helps you to write codes.
Table of Contents
How To Set up a Linux Distro on Android Device with Termux?
At this point, you can follow the rest of the article to Set up a Linux Distro on Android Device with Termux.
Step 1 – Termux Setup on Android
You can easily download Termux directly from the Play Store. But the version of Termux available there has been depreciated and no longer receives updates. So we will use an app called Andronix to set it up.
First, from your play store download Andronix Linux on Android.
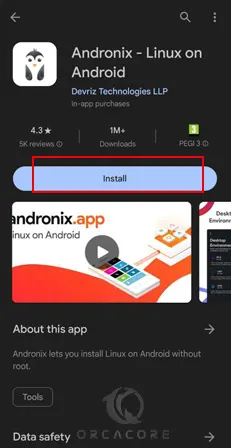
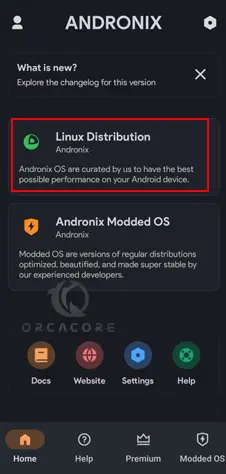
When your installation is completed, open the Andronix app. Once it is open, you will see the following screen. Click on Linux Distribution.
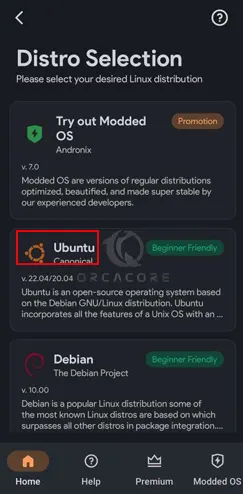
Then, you will see the Distro selection screen. You can select your desired Linux distro. Here we choose Ubuntu.
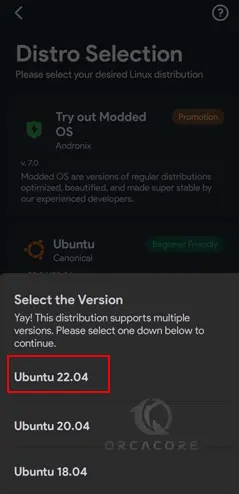
Next, you should choose your Ubuntu version. Here we use Ubuntu 22.04 as our Linux distro on our Android device.
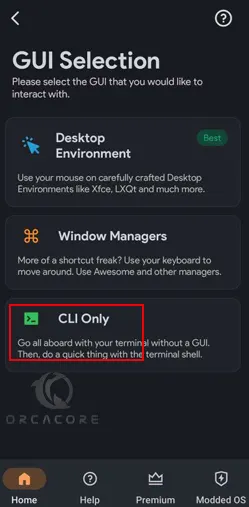
Now you will see the GUI selection screen. Here we want to use CLI Only that do our tasks from a terminal shell. So click on CLI Only.
At this point, you will see a page that directs you to download the Termux on your Android device. Click on Open Termux.
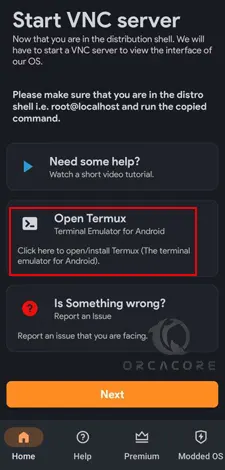
Important Note: There is a command that the Andronix app automatically copies into your clipboard when you are on this page. Keep the command safe. (if you lose it, just go back and click the Recopy button).
Next, click on Download Termux on your Android device.

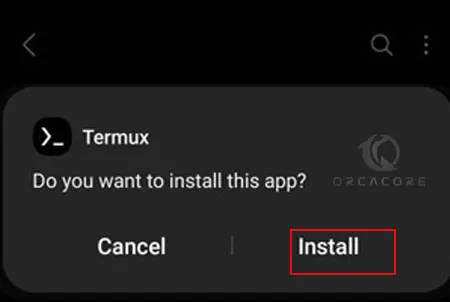
Wait until your Termux download process is completed. When it is completed, click on your downloaded file and click Install.
Step 2 – How To Run Termux Linux Terminal on Android?
After your Termux has been installed, open your Termux app. You will see the following Welcome screen:
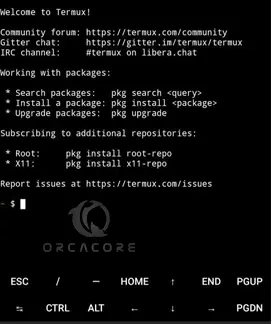
Important Note: At this point, you must quickly paste the command that you have copied from the previous step here. Click anywhere on your screen in the terminal and click paste and click enter to run.
This will update and upgrade all packages and dependencies and set up your Ubuntu Linux environment on your Android device.
Then, type exit in your Termux terminal:
$ exitNext, reopen the Termux terminal and run the command below to start your Ubuntu environment:
./start-ubuntu22.shNow you have your Ubuntu shell in your Android device and you can run your Linux Commands.
Note: If you are not being able to install any package, this error might be because of the DNS. To resolve this issue, you can run the command below in your Termux Linux terminal:
echo "nameserver 8.8.4.4" > $PREFIX/etc/resolv.confThat’s it, you are done.
Conclusion
At this point, you have learned to Set up a Linux Distro on Android Device with Termux. This amazing tool lets you have a Linux terminal shell on your Android and run your codes from there. In this guide, we set up an Ubuntu distro by using the Andronix app. If you want to change your Linux distro, you can go back to your Andronix app and do the steps like this and change the Linux distro.
Hope you enjoy using your Linux shell on your Android Device. Need any help? Comment for us.
You may be interested in these articles on the Orcacore website: