Share your love
Best Way to Enable Remote Desktop in Windows Server 2016

In this article, we want to teach you How To Enable Remote Desktop in Windows Server 2016.
The Microsoft Remote desktop app is a technology that allows users to connect to a specific computer from a remote location as if they were sitting in front of it.
Also, when the connection is established, users can perform many tasks like they are using the computer in person. They can manage apps, fix issues, and perform administrative tasks.
How To Enable Remote Desktop in Windows Server 2016
The remote desktop is disabled in Windows Server 2016, by default.
In this article, you learn to turn on and enable remote desktop protocol(RDP).
Let’s see how to Enable Remote Desktop in Windows Server 2016.
Allow Remote Desktop in Windows Server 2016
At this point, you need to enable the remote desktop by following these steps.
By default, the server manager will open when you log in to the GUI. If this does not happen, you can select it by typing server manager from the search icon in the taskbar.
Then, open the server manager.
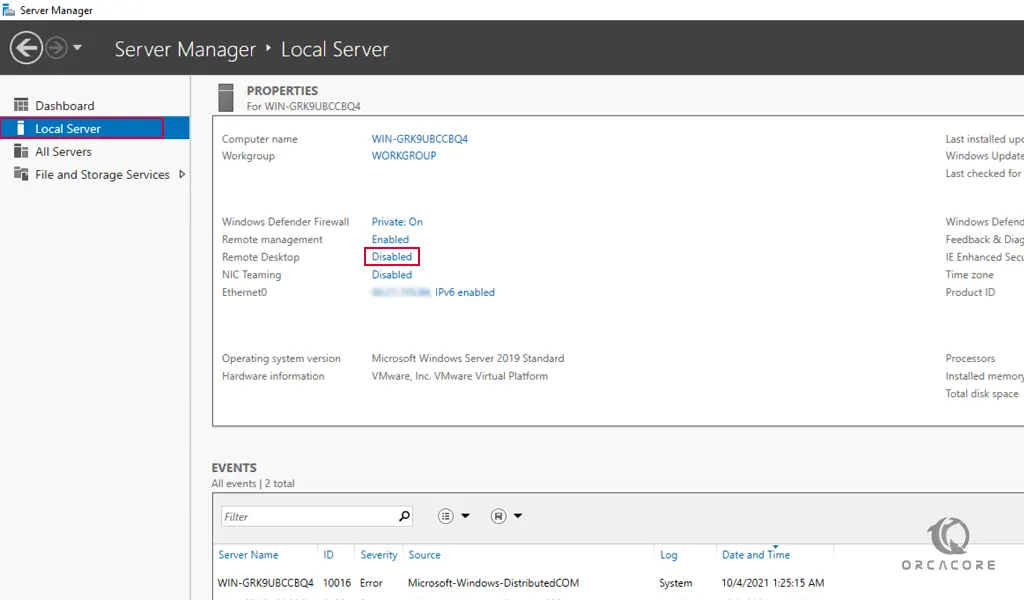
In the server manager window, select the local server that is on the left side. you will see that the remote desktop is disabled.

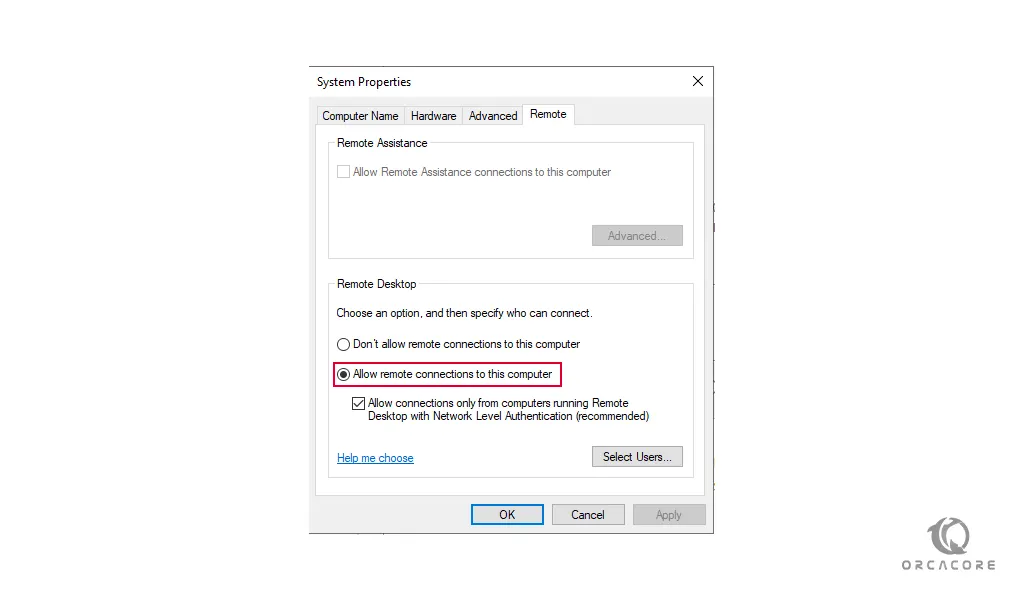
Now click on the disabled text to open the remote desktop properties. In the properties window, select “Allow remote connections to this Computer” like the image below:

Note: Also, you can open the system properties window by entering the “SystemPropertiesRemote” into a command prompt or PowerShell terminal.
Or, you can use the win+R key and then type “sysdm.cpl” to open the system properties window.
When you select the “Allow remote connections to this Computer” you will see a warning message that tells you to enable the remote desktop connections for selected network connections. Press OK to continue.
Note: If you want to add a specific user or group to have permission to connect via remote desktop, you can click “select users” and then define them there.
Press ok to close the system properties window.
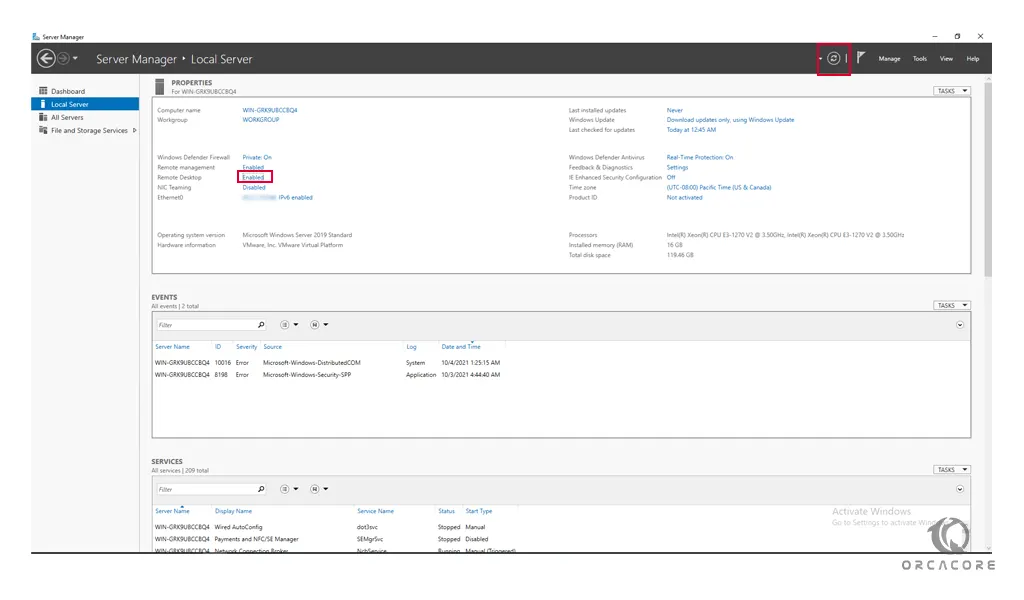
Back into the server manager, then refresh the view to see if the remote desktop is enabled.

Now the remote desktop is ready to use.
Conclusion
At this point, you learn to enable remote desktop on Windows Server 2016. Also, for more security, you can select specific users and groups to access the remote desktop.
May this article on the Orcacore website about How To Enable Remote Desktop on Windows be useful for you.


