Share your love
Firewall in Virtualizor, Setup and Configure: Full and Easy Guide

Virtualizor has its own firewall based on IPtables. In this article on the Orcacore website, all items related to the Firewall in Virtualizor will be discussed. Enable, Disable, Add/Remove port and IP, and testing mode will be described.
Table of Contents
How does the Firewall work in Virtualizor?
It is so necessary to have a firewall service on each server and service you run. The Virtualizor like any control panel and service, supports it and you can enable it to use it. Let’s try the below steps to learn how we can enable and use it.
step 1 – How to Enable/Disable the Virtualizor Firewall?
Please login to the Virtualizor panel by entering ServerIP:4085 in your browser. Then complete login credentials and login to the panel. In the left panel, navigate to the Firewall menu. Therefore You will see the below page.
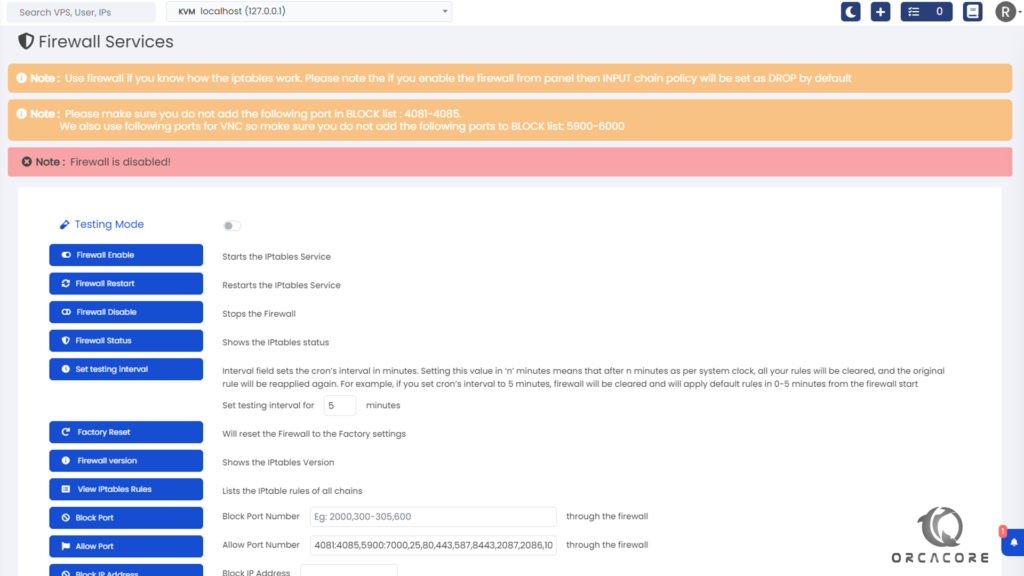
The First 6 items, set the functionality of the firewall in Virtualizor. The best option is you can Set a testing interval. Therefore, we can set a time that shows how minutes Testing Mode can be enabled. Testing mode allows you to test the rules you added to the service. If the rules were true or false, all rules will be disabled after the mentioned time period.

After Testing successfully, You can enable or restart the firewall. Also, Firewall Status shows the service’s current status.
Step 2 – General Options
For the next 3 options, you can see the general choice. With Factory Reset you can reset all rules to default.
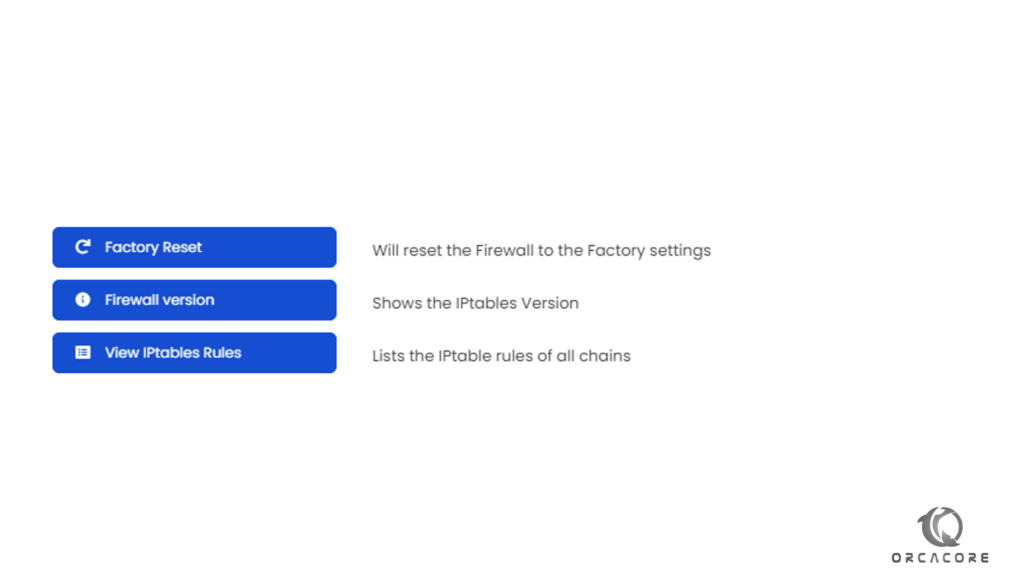
The firewall Version in Virtualizor shows the current IPtables version installed on the server. Certainly, you can use View IPtables Rules to see all defined rules. The panel Uses Ajax codes to show what is available inside of rules.
Step 3 – How to Add/Remove IP or Port?
The most usable section is the next 6 items which allow you to add/block IPs and ports to the firewall.
Therefore, Block Port can stop access to the mentioned port in the box. Also, Allow Port can help you to make access to which port you want.
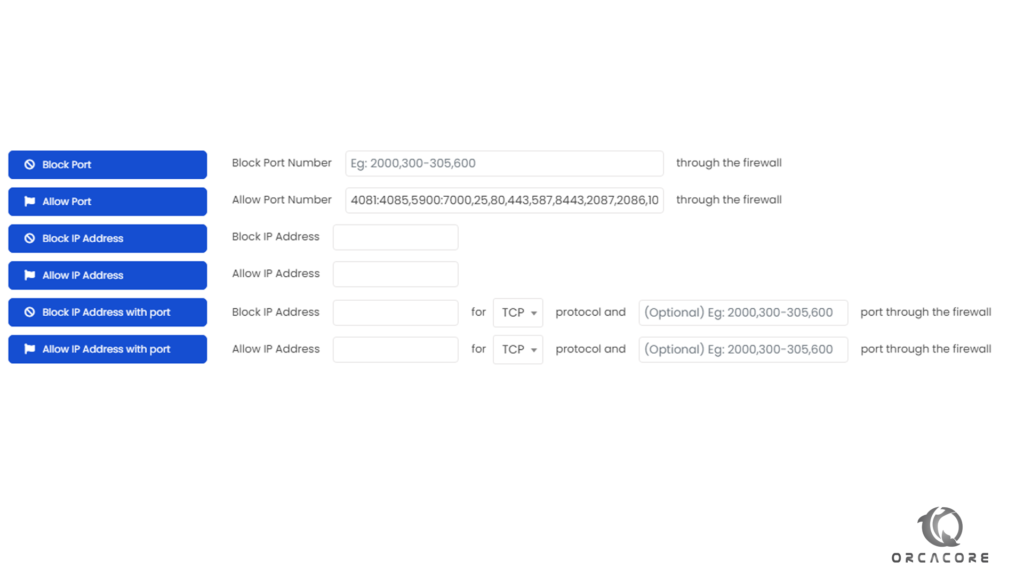
Note: All needed ports are added by default. Please add the new port to the end of this line and separate it using “,”.
According to the previous section, You can Block an IP Address or Allow an IP Address. Therefore we can block some nuisance IPs or we can add trustable IP to the firewall.
Another key point, you can allow or block IP addresses with a special port. certainly, Block IP address with a port help to block IPs with a special port, and Allowing IP Address with a Port helps to allow IP address with a special port.
Step 4 – Search for IP in the Firewall
Finally, we reach the last option name Search IP. This item helps to find an IP address that is available in the firewall list or not. Therefore, you can prevent adding duplicate rules in the firewall.
Conclusion
In this tutorial, we found out how to work the firewall in Virtualizor. Enabling, disabling, and adding rules are the main subjects of this article. Please don’t hesitate to contact us by commenting if you have any questions about the post.
Also, you may be interested in other Tutorials about Virtualizor, you can follow the below links:
Virtualizer Tutorials step by step