Share your love
How To Use PuTTY on Windows 10/11

In this article, we want to teach you how to use PuTTY on Windows. PuTTY is widely used for managing remote systems, transferring files (with tools like PSCP), and executing commands on remote servers securely. Its simplicity and reliability make it ideal for both beginners and experienced users.
Now proceed to the guide steps below on the Orcacore website to complete PuTTY setup on Windows 10/11.
Table of Contents
How To Use PuTTY on Windows?
PuTTY is a free and lightweight SSH and Telnet client for Windows, commonly used to remotely access and manage servers. Let’s start by downloading and installing PuTTY on Windows and start using it on your Windows machine.
1. How to Download PuTTY for Windows?
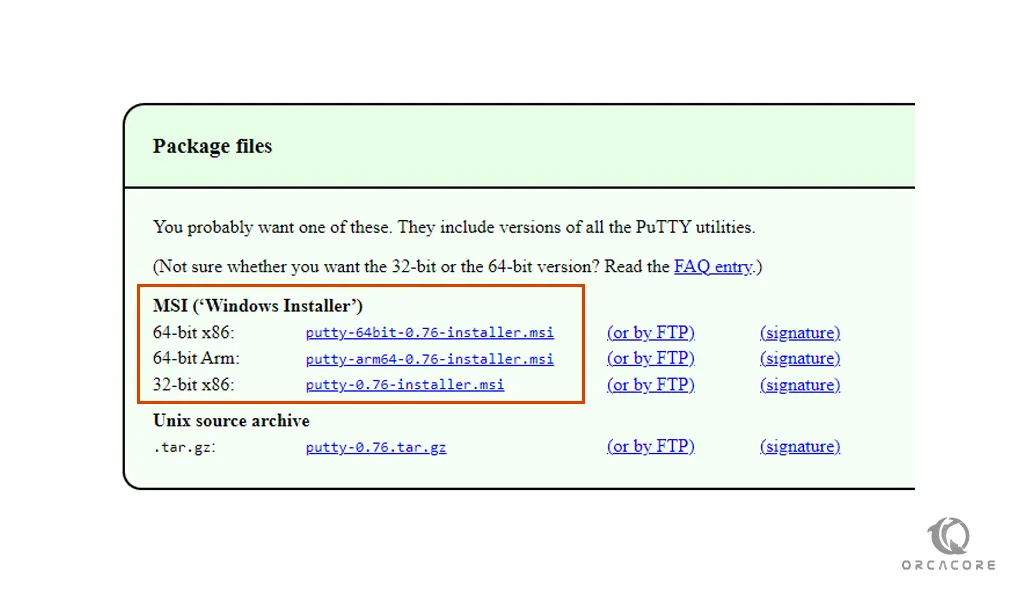
To download PuTTY, you can visit the PuTTY for Windows site. When you get to the page, click the installer.msi link to download PuTTY.
If you don’t know which version to get, you can read the PuTTY FAQ.
2. How to install PuTTY on Windows?
To install PuTTY, double-click on the “.msi” file that you have downloaded. Then, accept the default location to install PuTTY. After that, press Next, and your installation gets started, and when it is finished, click Finish to complete your installation.
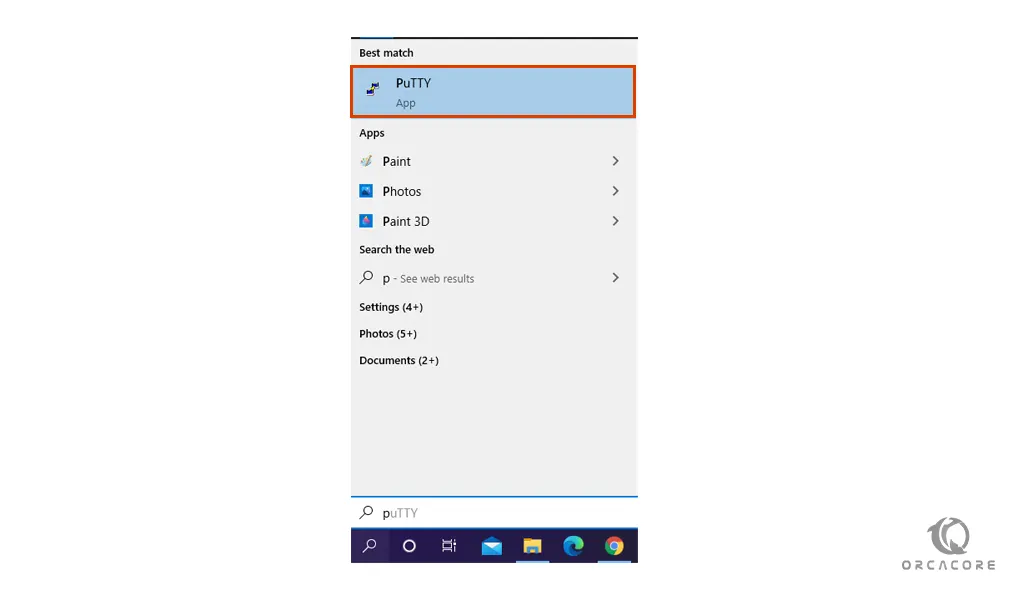
Now you can start PuTTY on your Windows. In your search bar, you can type PuTTY to bring up all PuTTY-related programs.
3. How To Configure PuTTY?
When you open the PuTTY app on Windows, you will see the PuTTY configuration like this.
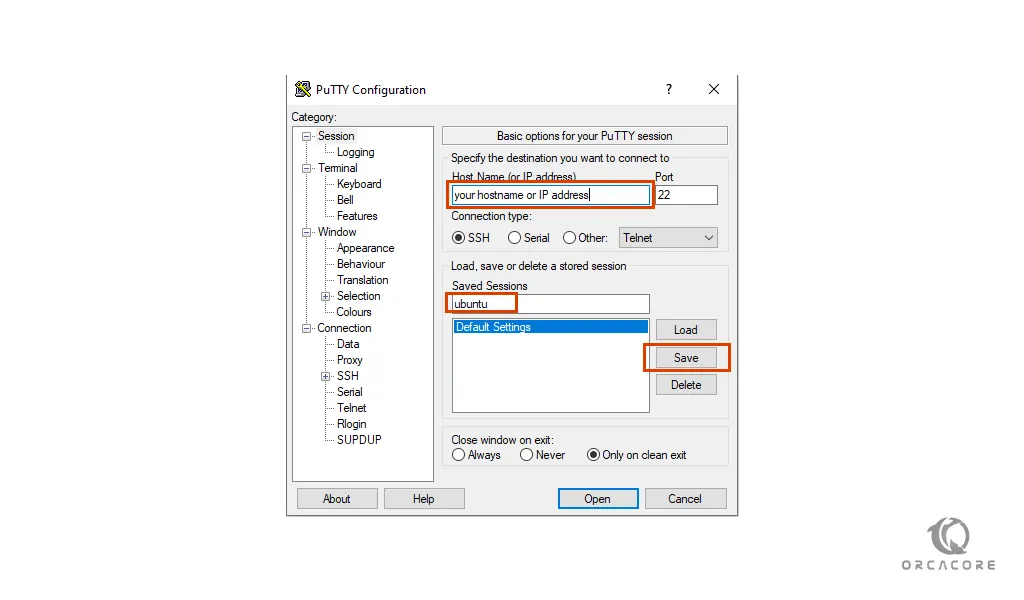
As you see, you can enter the Host Name or IP address. And in the saved sessions, you can save your session by your chosen name. Every time you want to connect to that session, you already have it in your sessions. And you can easily add other hosts in this way.
Then click on the open button to get into the terminal:

Enter the user you want to log in as and then enter your password.
Also, you can change the default settings of your PuTTY on Windows. Let’s see how to do it.
PuTTY Default settings
In the PuTTY Configuration window, choose items from the menu list. like the image below.

You can change the screen and buffer size by going to the window section and changing the rows and columns. Also, change the Lines of scrollback to change the window’s buffer.
To set the default font, go to the Appearance section in PuTTY, under the window.
Go to the Appearance section, under Colours, to change the foreground and background colors by choosing each of the first six lines in the Select a color to adjust option. After selecting each row, click the Modify button, and choose your preferred color. Make sure the following pairs have sufficiently contrasting colors, or you won’t be able to see the characters:
- Default Foreground and Default Background
- Default Bold Foreground and Default Bold Background
- Cursor Text and Cursor Colour
To save these settings, click on the session section. Then, click the Default Settings option in the Saved Sessions area. and click the save button.
Conclusion
At this point, you learn how to use PuTTY on Windows. and get familiar with Putty configuration. In future articles, we will discuss more PuTTY and get into the details.
Hope you enjoy it. Please subscribe to us on Facebook and YouTube.
You may also like to read the following articles: