Share your love
Install and Configure XAMPP on Windows Server 2022
In this guide from the Orcacore website, we want to teach you How To Install and Configure XAMPP on Windows Server 2022.
XAMPP stands for X-operating system, Apache, Mysql, Php, Perl. It is an open resource platform that is readily available for free downloading. It includes attributes like supporting Perl, Mercury Mail, and Filezilla, and so on. And it is multiplatform and is supported through many operating systems such as Windows, macOS, and Linux. Also, it is supported using many report codecs that add to its robustness. It is easy to install and configure.
Table of Contents
Steps To Install and Configure XAMPP on Windows Server 2022
In this guide, you will learn to set up XAMPP on your Windows server. To complete this guide, follow the steps below.
1. Download XAMPP For Windows
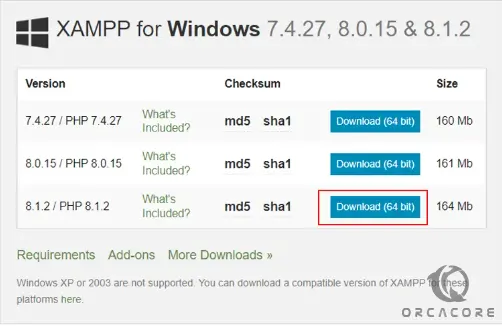
First, you need to visit the Apache Friends Downloads page and download XAMPP from it. You can choose your XAMPP version and download it to your Windows server. Here we download PHP 8.1.
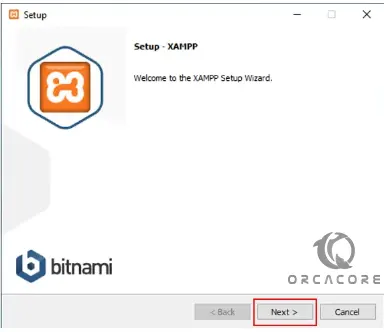
Then, you need to open your downloaded file, and the installation wizard will open.
2. XAMPP Setup Steps on Windows Server 2022
On the welcome screen, click Next.
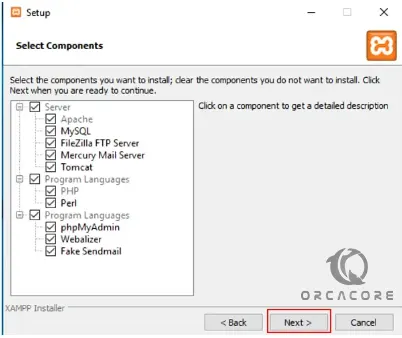
Next, you need to choose the XAMPP components that you want to install. Here we install all the components. Select them all and click Next.
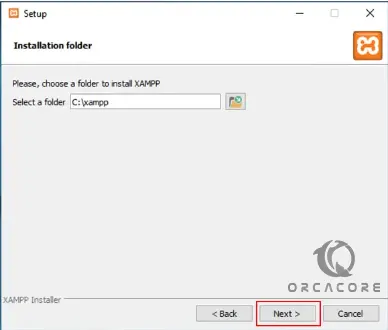
After that, in the Installation Folder, you need to choose the directory where to install XAMPP on your Windows server 2022. Accept the default location and click Next.
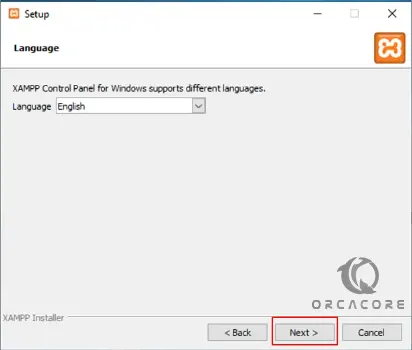
At this point, you need to choose the XAMPP language that you want to use and click Next.
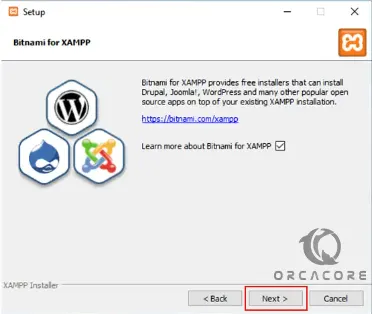
On the next screen, just click Next.
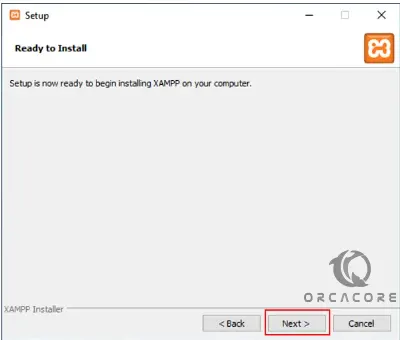
Now your setup is ready to install XAMPP on your Windows server, click Next.
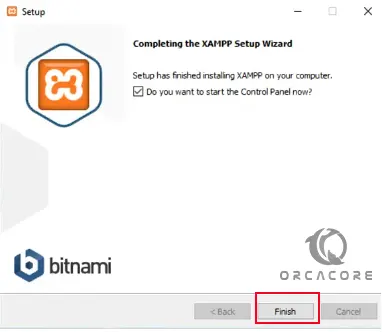
This will take some time to complete. Then, click Finish to complete your XAMPP installation.
3. Access XAMPP Control Panel
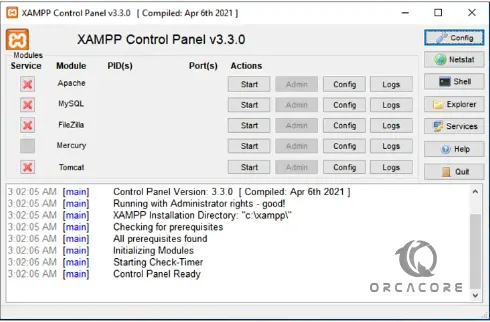
When your installation is completed, you will see your XAMPP control panel on Windows Server 2022.
How To Work With XAMPP?
As you can see, you can perform the following tasks from the XAMPP control panel on your Windows server:
- Start and stop the services of Apache, FileZilla, MySQL/MariaDB, Mercury, and Tomcat.
- Access the Admin page of Apache, FileZilla, MySQL/MariaDB, Mercury, and Tomcat.
- Change the configuration parameters.
- Access the error logs.
Also, you will see the other buttons that you can perform the tasks:
- Config: opens the dialog window with options to configure all or individual components of XAMPP.
- Netstat: It shows all processes that are running on the computer.
- Shell: It opens a UNIX Shell.
- Explorer: It opens the directory where the XAMPP is installed.
- Services: It opens the Windows Services (services.msc)
- Help: opens the dialog box with links to various blogs and forums.
- Quit: Close the XAMPP control panel.
You can use the start button to start the XAMPP modules and their services on the Windows server. When the module starts successfully, the background color of the Module name changes, and the assigned Process ID and Port are displayed under PID(s) and port(s) columns.
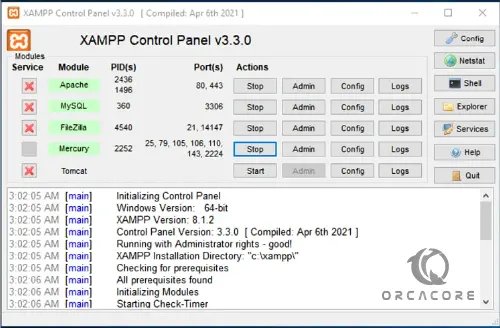
XAMPP Modules
The Admin buttons open various tools used to manage the XAMPP modules.
-Apache Module. It opens a sample webpage that contains links to view the version of PHP and PhpMyAdmin.
-MySQL/Maria DB. It opens the PhpMyAdmin web console.
-FileZilla.When we click on the Admin button of FileZilla, it opens another dialog box, where you must specify the connection parameters.
-Mercury. The admin buttons open a console that is used to manage the SMTP server.
-Tomcat. To run the Tomcat services, we must install JDK or JRE on the computer. When we click on the admin button, it opens a web-based console to manage the Tomcat application.
With the Config buttons, you can edit the configuration files of XAMPP modules.
And the Log buttons will open log files containing details of various events, warnings, and errors. Each module of XAMPP has its own set of log files.
Conclusion
At this point, you learn to Install and Configure XAMPP on Windows Server 2022. The purpose of using XAMPP on Windows Server 2022 is to create a local web server environment for developing, testing, and deploying PHP-based web applications. It includes Apache, MySQL/MariaDB, PHP, and other tools, making it easy to manage and run web projects without setting up each component manually.
Hope you enjoy it. You may also like these articles:
Set up WordPress on Windows Server 2019
Set up PostgreSQL on Windows Server 2019