Share your love
How To Set up WordPress on Windows Server 2019
In this article, we want to teach you How To Set up or Install WordPress on Windows Server 2019.
WordPress is an application that allows you to easily build websites and publish content online.
The software is released under the GNU Public License, which means it is free to download and free to use.
Steps To Set up WordPress on Windows Server 2019
To install WordPress on your Windows Server, you need to enable IIS on your system. To do this, you can follow our article Set up IIS on Windows Server 2019.
Now you can follow the steps below to install WordPress on Windows Server 2019.
Note: you can use this guide for Windows Server 2016 too.
Install WordPress on Windows Server
First, you need to download the Web Platform Installer from the IIS Downloads Page.
Download Web Platform Installer
When you visit the page, click on the Install this extension button.
Then, click on your downloaded file and install the Web Platform Installer on your Windows Server 2019.
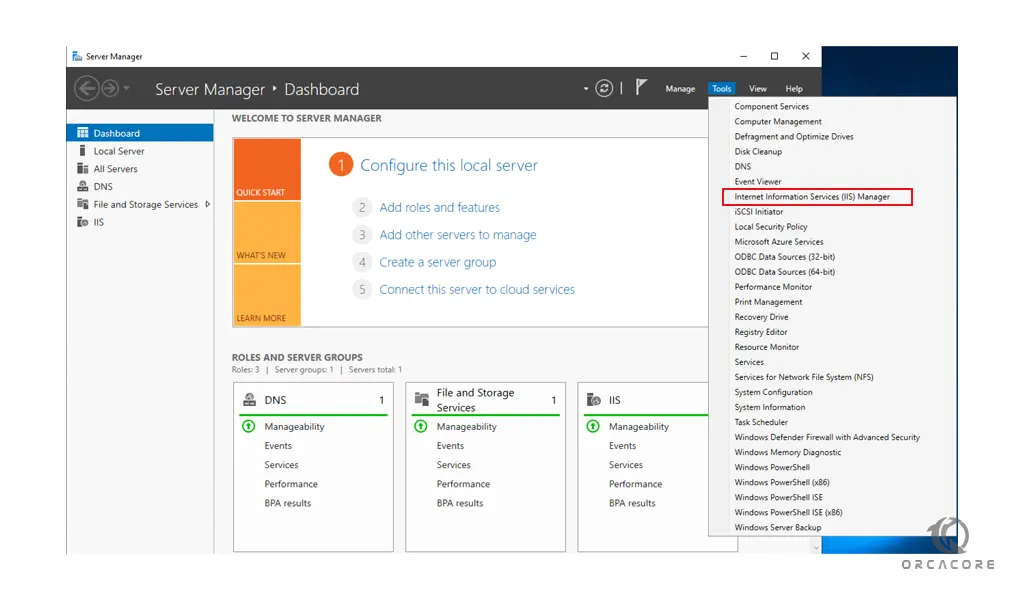
Server Manager
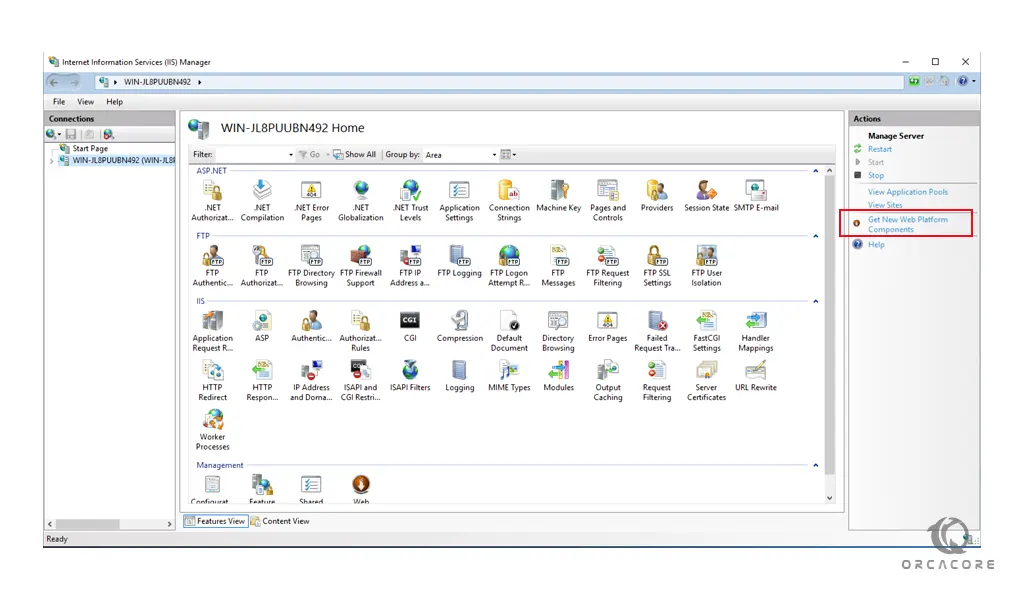
Now open the server manager app and from the Tools menu open the IIS.
On the IIS manager window, you need to click on the Get New Web Platform Components.
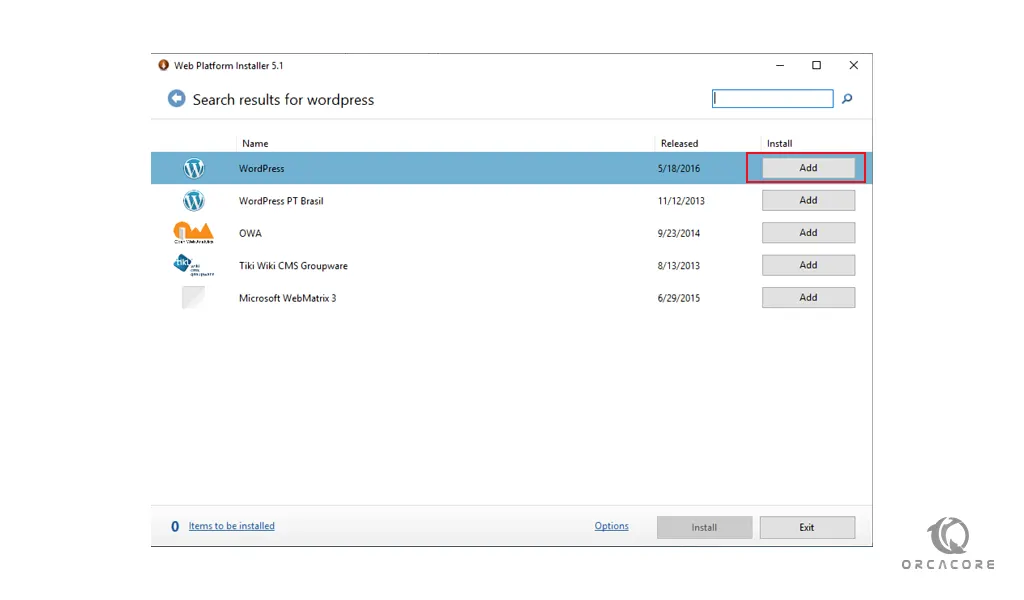
At this point, you need to search for the WordPress app and click on the Add button.
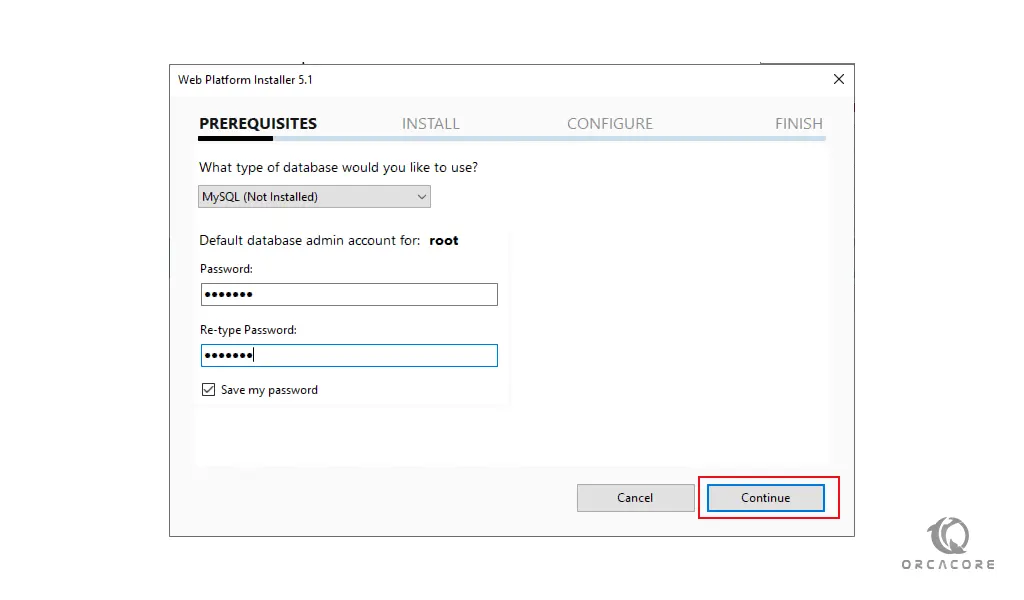
Then, click on the install button. You will see the prerequisites for the installation of WordPress on Windows Server 2019. You need to set a MySQL root password and click on the continue button. And be sure to check the box next to the save my password.
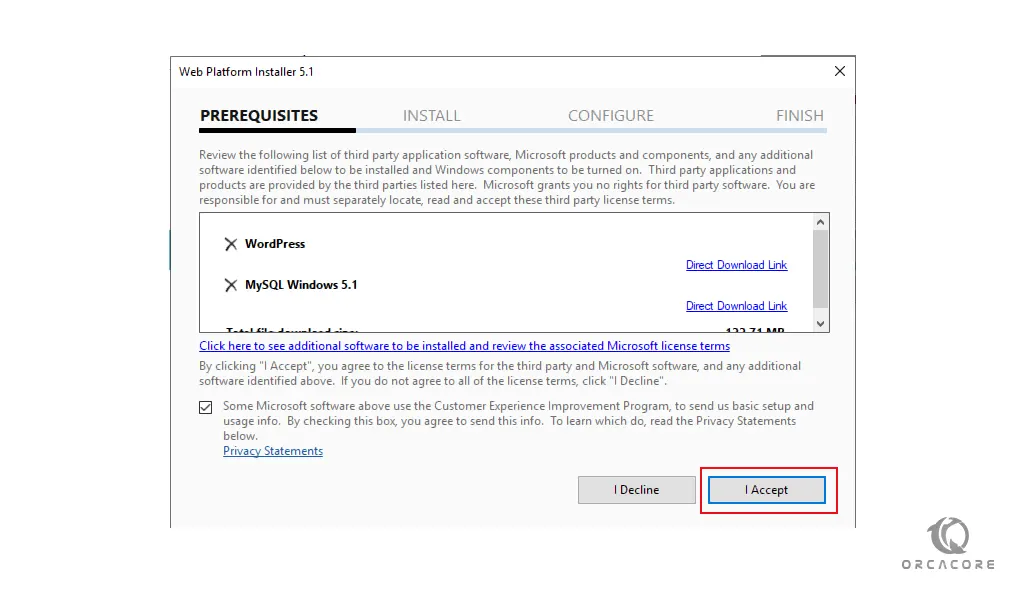
Next, you need to accept the prerequisites for installation.
Then, your WordPress installation on Windows Server 2019 is getting started.
When your installation is completed, you will get into the configure section for WordPress.
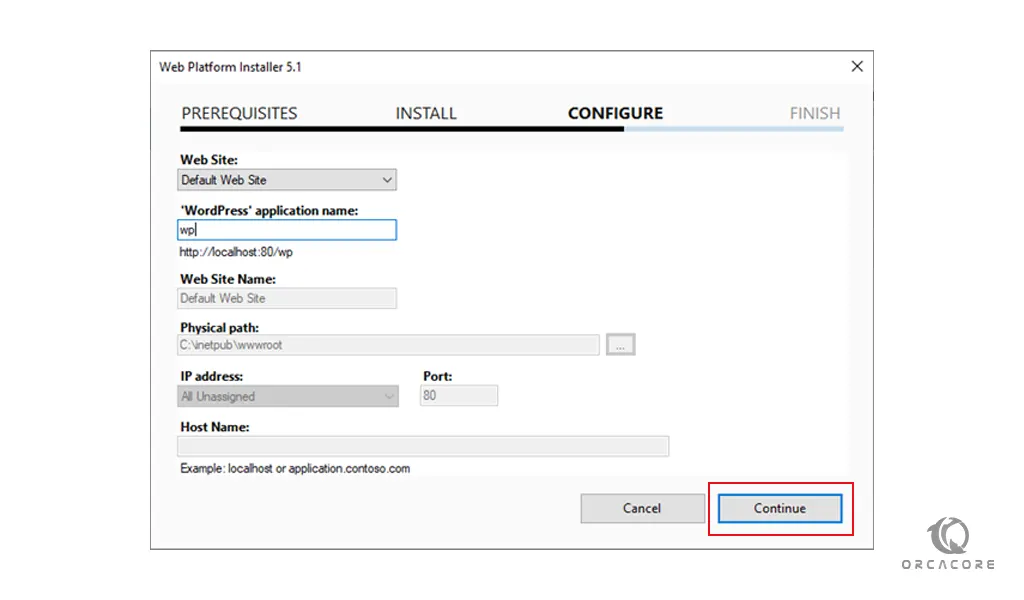
You need to select an application name that hosts the WordPress site and click on the continue button.
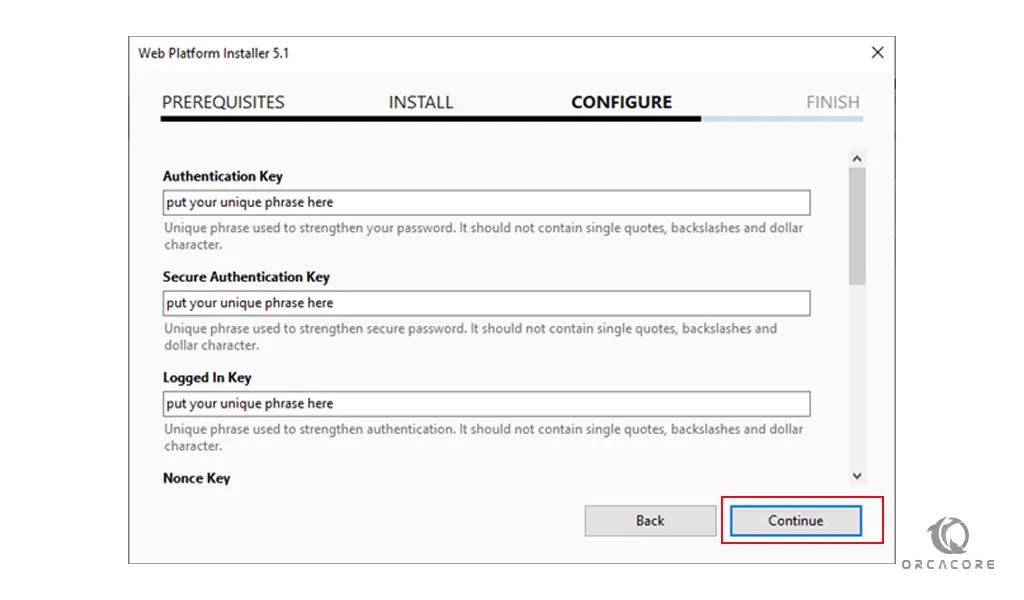
At this point, you need to set some unique phrases that make stronger the security of your WordPress site and click on the continue button.
Note: You should not use the symbols (‘), ($), and (\) in these codes.
You can use Online Key Generator to generate these codes.
Note: In these codes, there is also a $ sign that you must replace with another character!
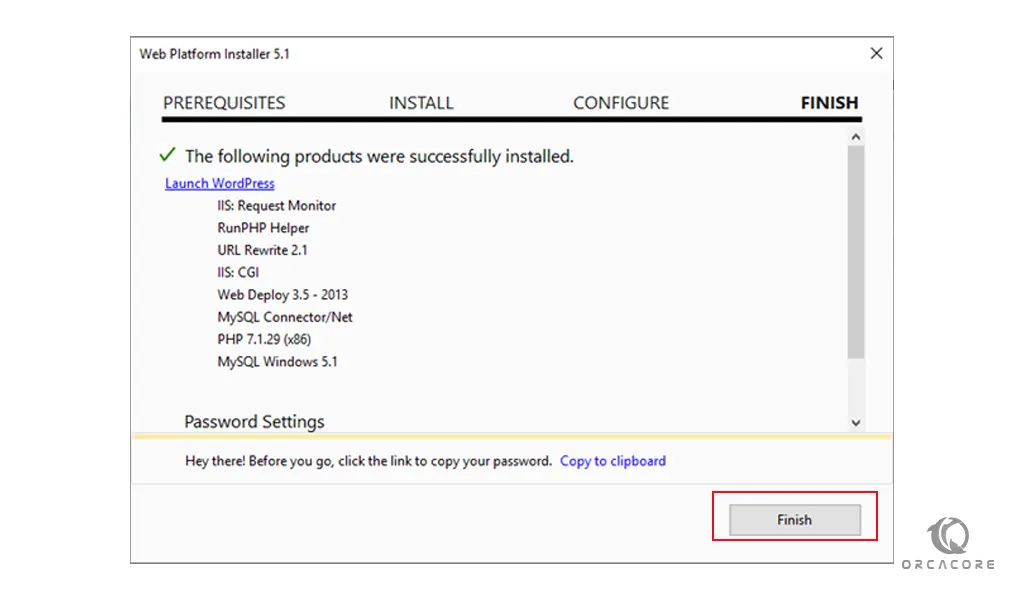
WordPress is now installed on your Windows Server. In the password settings section click on the copy to clipboard and paste it in notepad.
Access WordPress
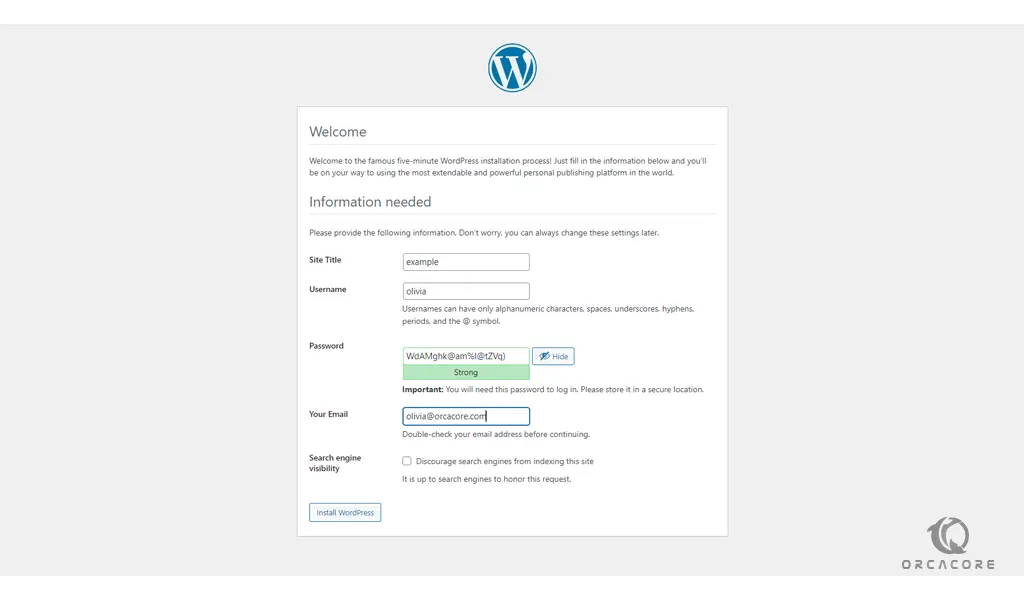
Finally, you need to configure some basic settings for WordPress so that you can log in to the administrator panel. From the previous step click on Launch WordPress.
Select your desired language and click on the continue button.

In the WordPress welcome screen, you need to provide your site information and click on the Install WordPress button.
Make sure to choose a strong password.
After that, you will see the following screen and click on the log-in button to see your WordPress dashboard.

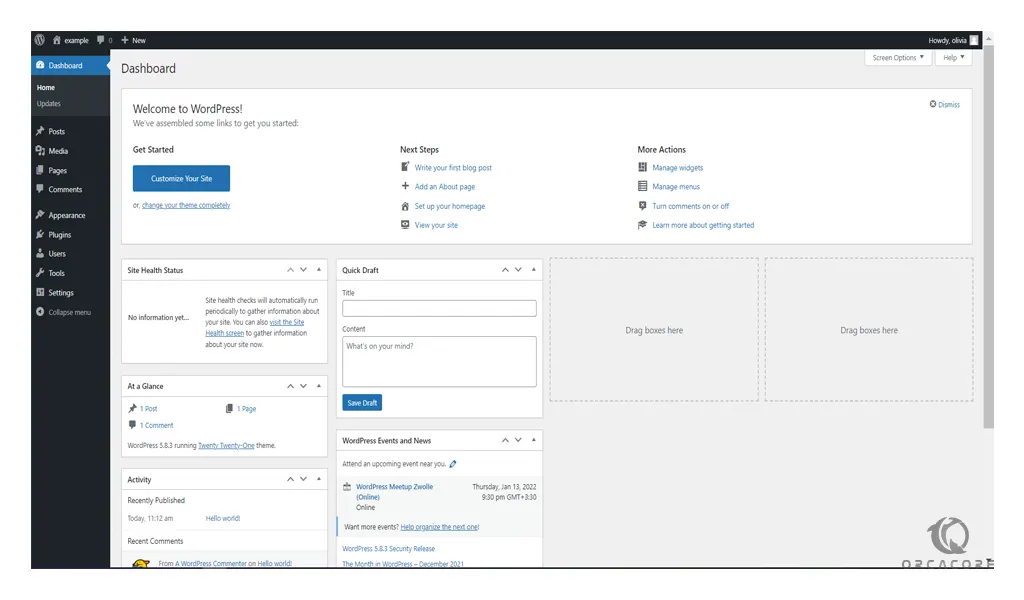
You will see your WordPress dashboard.
Conclusion
At this point, you learn to Set up WordPress on Windows Server 2019.
Hope you enjoy using it.
May you will be interested in these articles:
How To Set up PostgreSQL on Windows Server 2019.