Share your love
1 Quick Step to Reduce Size of Hard Disk on Windows Server

In this article, we want to teach you How To Reduce Size of Hard Disk on Windows Server.
One of the biggest concerns for people who use Windows Server virtually is the size of the hard disk.
Windows alone is a massive operating system and because of its file services and features, users may not be able to use the size of their hard disks.
Now in this guide, you will learn to reduce the size of Windows Server by deleting unnecessary files.
At first, you may be wondering what file may be extra and if it is deleted, it will not cause problems for Windows.
The answer is that the files of some services are not used by default in Windows Server and you never use them, especially in the virtual server service.
For example, a DHCP role does not work on a virtual server on the Internet, but its files are available and your hard drive is busy.
Note: You will be able to install Windows role files and features again from the DVD windows.
How To Reduce Size of Hard Disk on Windows Server
At this point, you can follow the steps below to Reduce Size of Hard Disk on Windows Server.
First, log in to your Windows Server.
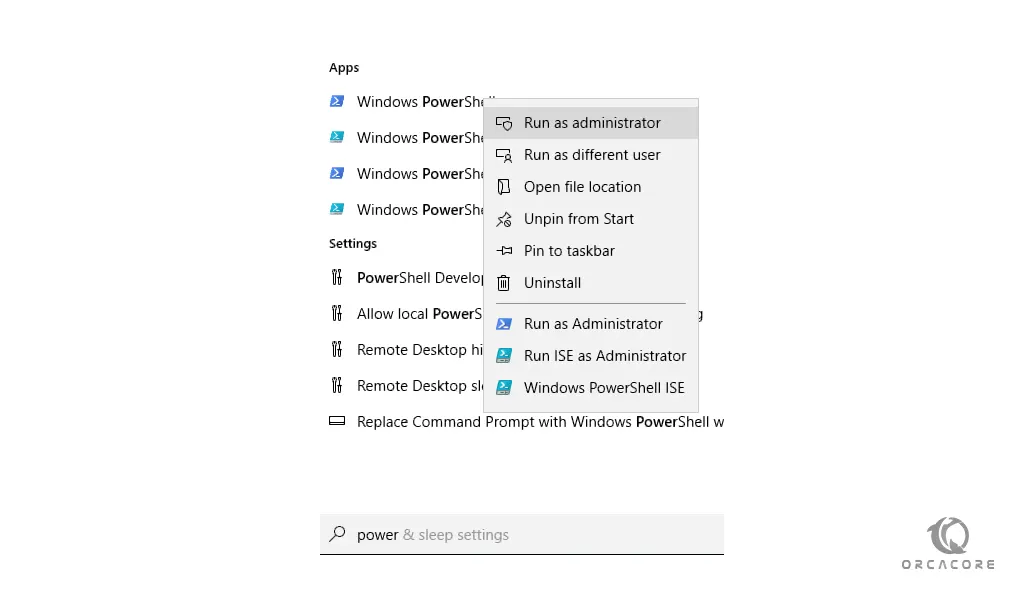
Then, open a PowerShell with Administrator access. To do this, in your search bar type PowerShell and right-click on it, and select run as administrator.

Now you can delete unnecessary packages with the Uninstall-Windows Feature command on the Windows Server.
For example, you can delete the DHCP package with the following command:
Uninstall-WindowsFeature DHCP -RemoveThis command will take some minutes to complete.
Then, you need to restart your Windows Server to apply the new rules.
After that, you can use the following command to check the status of your DHCP service:
Get-WindowsFeature DHCPYou will get the following output:
Output
Display Name                        Name                       Install State
------------                       ----                       -------------
[ ] DHCP Server DHCP RemovedNote: It is recommended to install your desired features and roles first, then, delete the useless packages to don’t get into trouble later.
Conclusion
At this point, you learn to Reduce the Size of the Hard Disk on a Windows Server. You learn to do it by removing the useless packages.
Hope you enjoy it. Also, you may like to read the following articles:
Run Internet Speed Test in Windows PowerShell
Connect Remote Desktop Without a Password in Windows


