Share your love
Install Apache Maven on Debian 12 Command Line Easy Steps
In this guide, we try to teach you to Install Apache Maven on Debian 12 Command Line and Create a Test Project. Apache Maven is a powerful build automation tool that is used for Java projects. With Maven, you can easily build, manage, and deploy Java-based applications. The key features of Apache Maven include:
- Project Object Model (POM)
- Dependency Management
- Build Lifecycle and Plugins
- Convention over Configuration
- Integrated Testing and Reporting
- Artifact Management and Distribution
- Multi-Module Projects
Now you can follow the steps below on the Orcacore website to Install Apache Maven on Debian 12.
Table of Contents
Learn To Install Apache Maven on Debian 12 Command Line
To start, you need to log in to your server as a non-root user with sudo privileges. For this purpose, you can check the Debian 12 Initial Setup Guide.
Then, you need to install Apache. To do this, you can check Apache Web Server Installation on Debian 12.
Also, you need to have Java installed on your server. To do this, you can check Install Java with Apt on Debian 12 Bookworm.
Once you are done, follow the steps below to Install Apache Maven on Debian 12.
Step 1 – Verify Java Installation For Apache Maven
As you may know, Apache Maven is working on Java, So you need to install it on your server. We assumed that you have installed Java from the requirements. To verify it, you can check the version:
java --versionExample Output:

Step 2 – Download Latest Apache Maven From Source
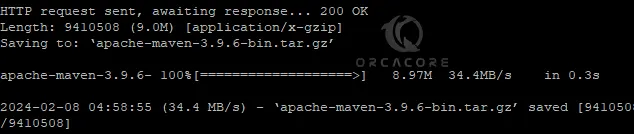
At this point, you need to visit the Maven Downloads Page and get the latest binary package by using the following wget command:
sudo wget https://dlcdn.apache.org/maven/maven-3/3.9.6/binaries/apache-maven-3.9.6-bin.tar.gzOnce your download is completed, you will get the following output:
Next, extract your downloaded file with the following command:
sudo tar -xvf apache-maven-*-bin.tar.gz
Then, move your extracted file to the /usr/share directory with the command below:
sudo mv apache-maven-3.9.6 /usr/share/mavenStep 3 – Set up Maven Environment PATH on Debian 12
To use the maven command tool from anywhere in your terminal, you need to add its folder path in your bash profile. For this purpose, you can run the following commands:
# echo 'export PATH="$PATH:/usr/share/maven"' >> ~/.bashrc
# echo 'export PATH="$PATH:/usr/share/maven/bin"' >> ~/.bashrc
To apply the changes, run the command below:
source ~/.bashrcStep 4 – Verify Apache Maven Installation on Debian 12
At this point, you can check you have successfully installed Maven from source on your server by using the following command:
mvn -v
In your output, you will see:

Step 5 – Create a Test Apache Maven Project
Now to see if your Maven is working correctly, we show you how to create a test project on Debian 12. First, create a directory for your Maven project and navigate to it with the command below:
# mkdir MyMavenProject
# cd MyMavenProject
Inside the project directory, create a file named “pom.xml“. This file will contain the project configuration, dependencies, and build settings. To do this, you can use your favorite text editor like Vi editor or Nano editor:
sudo vi pom.xmlAdd the following content to the file:
<project xmlns="http://maven.apache.org/POM/4.0.0" xmlns:xsi="http://www.w3.org/2001/XMLSchema-instance"
  xsi:schemaLocation="http://maven.apache.org/POM/4.0.0 http://maven.apache.org/xsd/maven-4.0.0.xsd">
  <modelVersion>4.0.0</modelVersion>

  <!-- Define project coordinates -->
  <groupId>com.example</groupId>
  <artifactId>MyMavenProject</artifactId>
  <version>1.0-SNAPSHOT</version>

  <!-- Define project metadata -->
  <name>My Maven Project</name>
  <description>A simple Apache Maven project</description>

  <!-- Define project dependencies -->
  <dependencies>
    <!-- Add dependencies here -->
  </dependencies>
</project>Note: If your project requires any dependencies, you can add them inside the section of the POM file.
When you are done, save and close the file.
Next, inside the project directory, create the directory structure for your Java source code:
# mkdir -p src/main/java/com/example
# mkdir -p src/test/java/com/example
Then, you need to create Java source files in the appropriate directories. For example, create a simple Java class named “App.java” in the src/main/java/com/example directory:
sudo vi src/main/java/com/example/App.javaAdd the following content to the file:
package com.example;

public class App {
    public static void main(String[] args) {
        System.out.println("Hello, Maven!");
    }
}
When you are done, save and close the file.
Next, you can use the following command to build your Maven project on Debian 12:
mvn clean package
This command will compile the source code, run any tests (if present), and package the project into a JAR file.

Finally, you can use the command below to run your application:
java -cp target/MyMavenProject-1.0-SNAPSHOT.jar com.example.AppIn your output, you will see:
Hello, Maven!
Conclusion
Apache Maven simplifies the build and development process for Java projects, promoting consistency, repeatability, and maintainability across different projects and teams. It is widely used in the Java ecosystem and has a wide range of plugins and integrations to support various development workflows and scenarios.
At this point, you have learned to Install Apache Maven on Debian 12 from the Command Line and create a test project with Maven. Hope you enjoy it.
Also, you may like to read the following articles:
Install VirtualBox and Extension Pack on Debian 12 Terminal