Share your love
Install bmon Real-Time Bandwidth Monitor on AlmaLinux 9 in Easy Steps

This tutorial intends to teach you to Install bmon Real-Time Bandwidth Monitor on AlmaLinux 9. bmon is a free and open-source monitoring and debugging command-line tool. It is used to monitor and display network bandwidth usage on a system.
You can follow this guide on the Orcacore website to start your bmon installation in the latest version on AlmaLinux 9 and start using it.
Table of Contents
Steps To Install and Use bmon Real-Time Network Bandwidth Monitor on AlmaLinux 9
To Install bmon Real-Time Bandwidth Monitor on AlmaLinux 9, you must have access to your server as a non-root user with sudo privileges. To do this, you can follow this guide on Initial Server Setup with AlmaLinux 9.
Now follow the steps below to Install bmon Real-Time Bandwidth Monitor on AlmaLinux 9.
Step 1 – Build and Install bmon Real-Time Bandwidth Monitor on AlmaLinux 9 From Source
First, you must run the system update with the following command:
sudo dnf update -yAlso, install the Epel repository with the command below:
sudo dnf install epel-release -yThen, install the required packages for bmon on your AlmaLinux server by using the command below:
sudo dnf install make libconfuse-devel libnl3-devel ncurses-devel git autoconf automake gcc -yNext, clone the bmon from the source by using the command below on AlmaLinux 9:
sudo git clone https://github.com/tgraf/bmon.gitOutput
Cloning into 'bmon'...
remote: Enumerating objects: 706, done.
remote: Counting objects: 100% (3/3), done.
remote: Compressing objects: 100% (3/3), done.
remote: Total 706 (delta 0), reused 1 (delta 0), pack-reused 703
Receiving objects: 100% (706/706), 860.74 KiB | 3.77 MiB/s, done.
Resolving deltas: 100% (395/395), done.When your download is completed, switch to your bmon directory with the command below:
cd bmonNow run the following commands to build and install the bmon Real-Time Bandwidth Monitor tool:
# sudo ./autogen.sh
# sudo ./configure
# sudo make
# sudo make install
Step 2 – Run bmon to Check Real-Time Bandwidth Usage on AlmaLinux 9
After your installation is completed, you can run your bmon service to monitor live bandwidth usage on your server:
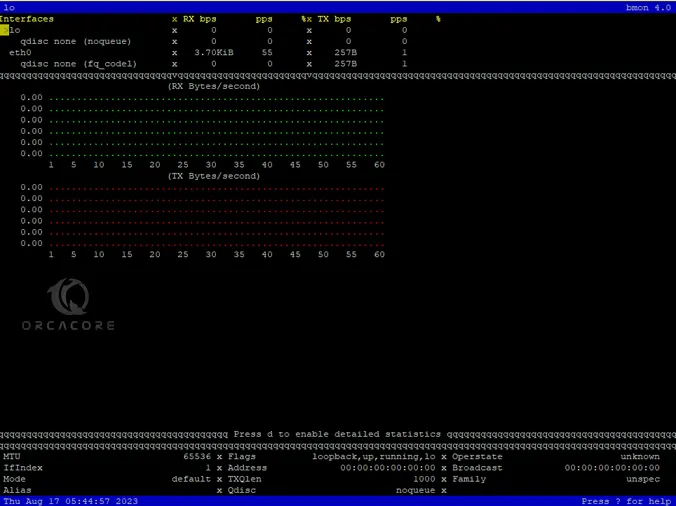
bmonOn your screen, you will see something similar to this:

Step 3 – How To Use bmon Bandwidth Monitoring Tool?
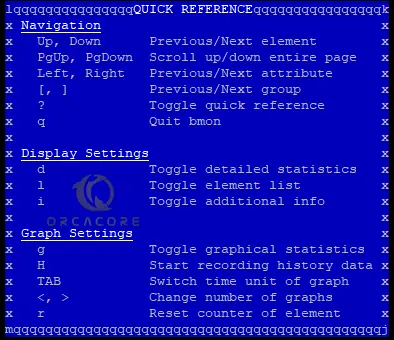
To get a quick reference of bmon, you can press Shift + ? in your terminal. You will see:
By default, bmon only shows interface information. To load the graphics you can press g, i, or d for detailed graphical visualization of information.
Also, you can use bmon to monitor a specific bandwidth network interface on AlmaLinux 9. To do this, you can use the -p option with your desired interface. For example:
bmon -p eth0To get the results in bit per second, you can use the -b flag. For example:
bmon -bp eth0You can define the intervals per second by using the -r option. For example:
bmon -r 2 -p eth0Step 3.1 – Use bmon Input Modules
Netlink is used to transfer information between the kernel and user-space processes. By default, Netlink is the input module. To use bmon Netlink input modules, you can use the following command on AlmaLinux 9:
bmon -i netlink 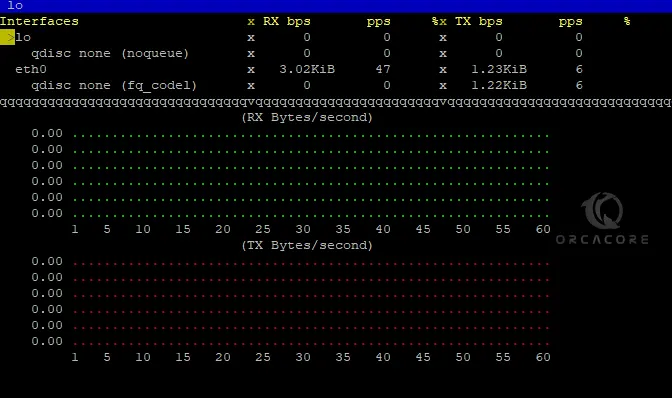
Also, you can use proc as an input module. To do this, you can run the command below:
bmon -i proc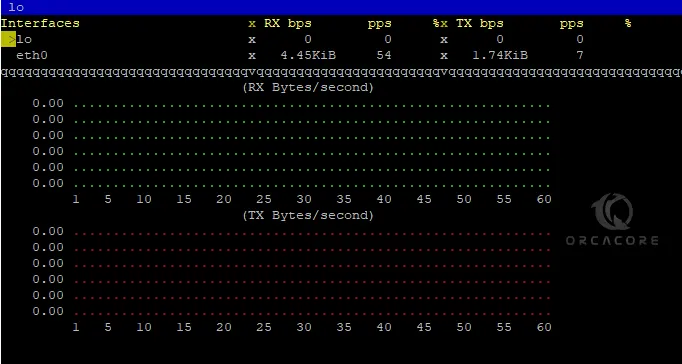
dummy is the programmable input module for debugging & testing purposes. You can use dummy as an input module for bmon:
bmon -i dummy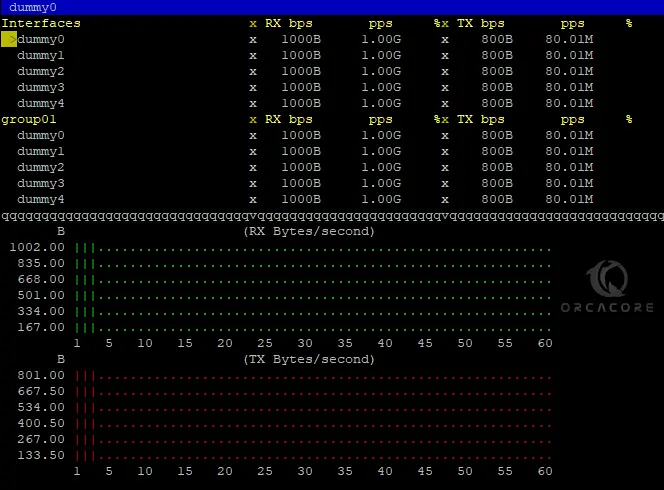
To disable the data collection, you can use Null with your bmon on AlmaLinux 9:
bmon -i nullStep 3.2 – Use bmon Output Modules
curses are used as a display library for text-based terminals. By default, curses are the output modules. To get output in curses, run the following bmon command:
bmon -o curses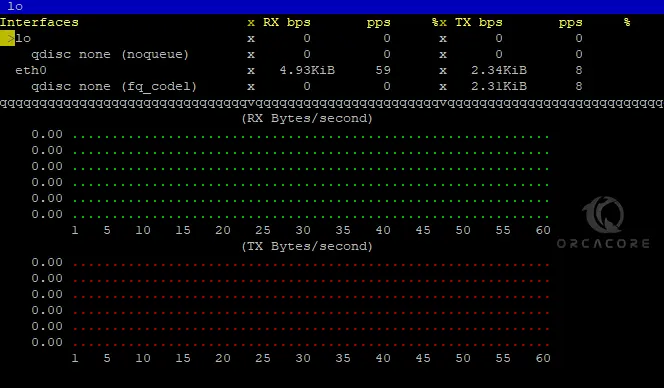
When curses are not available, you can use ascii instead. To get output in ascii, run the following bmon command on AlmaLinux 9:
bmon -o ascii Output
Interfaces RX bps pps % TX bps pps %
lo 0 0 0 0
qdisc none (noqueue) 0 0 0 0
eth0 0 0 0 0
qdisc none (fq_codel) 0 0 0 0
Interfaces RX bps pps % TX bps pps %
lo 0 0 0 0
qdisc none (noqueue) 0 0 0 0
eth0 3.49KiB 54 1.41KiB 3
qdisc none (fq_codel) 0 0 1.41KiB 3
Interfaces RX bps pps % TX bps pps %
lo 0 0 0 0
qdisc none (noqueue) 0 0 0 0
eth0 3.23KiB 51 930B 2
qdisc none (fq_codel) 0 0 930B 2
Interfaces RX bps pps % TX bps pps %
lo 0 0 0 0
...Also, you can use format mode to get the output. To do this, you can run the command below:
bmon -o formatOutput
lo 864 864 6 6
qdisc none (noqueue) unknown unknown unknown unknown
eth0 772373799 7184990 718996 63774
qdisc none (fq_codel) unknown unknown unknown unknown
lo 864 864 6 6
qdisc none (noqueue) unknown unknown unknown unknown
eth0 772376874 7186270 719042 63776
qdisc none (fq_codel) unknown unknown unknown unknown
lo 864 864 6 6
qdisc none (noqueue) unknown unknown unknown unknown
eth0 772379971 7186548 719091 63777
qdisc none (fq_codel) unknown unknown unknown unknown
lo 864 864 6 6
qdisc none (noqueue) unknown unknown unknown unknown
eth0 772383396 7186946 719145 63780
qdisc none (fq_codel) unknown unknown unknown unknown
lo 864 864 6 6
...To get more help and information, you can use the following commands:
# bmon --help
# man bmon
Conclusion
At this point, you have learned to Build and Install bmon Real-Time Bandwidth Monitor on AlmaLinux 9, Run the service, and start using it with input and output modules. Hope you enjoy using it.
You may also interested in these articles:
Install Nagios Monitoring Tool on AlmaLinux 9