Share your love
Install Grafana on Windows Server 2022 – Best Monitoring Tool

This tutorial intends to teach you how to Install Grafana on Windows Server 2022. Grafana is an open-source and amazing web-based analytics and visualization platform. It allows users to create customizable dashboards to visualize data from various sources such as databases, cloud services, and other monitoring tools.
You can download the latest version of Grafana from the official site and start the setup installation on Windows Server 2022. To do this, follow the rest of the article on the Orcacore website.
Table of Contents
How To Install Grafana on Windows Server 2022?
To Install Grafana on Windows Server 2022, you must have access to your Windows Server and follow the steps below.
We will use the Grafana Installer to Install Grafana on Windows Server 2022.
Step 1 – Download Grafana Installer
At this point, you can visit the Grafana Downloads page and click on the Windows installer to get the latest version of the Grafana Enterprise edition on Windows Server 2022.
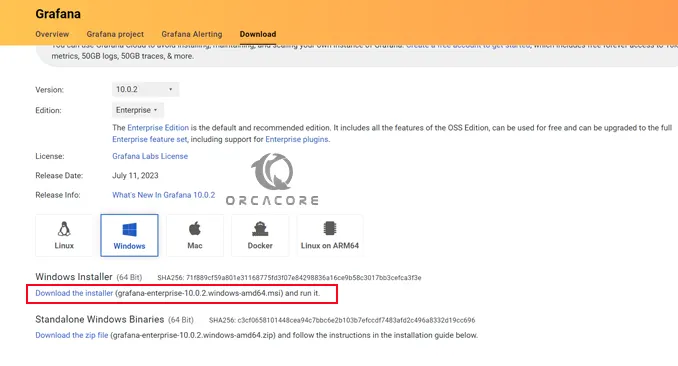
When your download is completed, click on your Grafana downloaded file to open the setup wizard.
Step 2 – Grafana Installation steps on Windows Server 2022
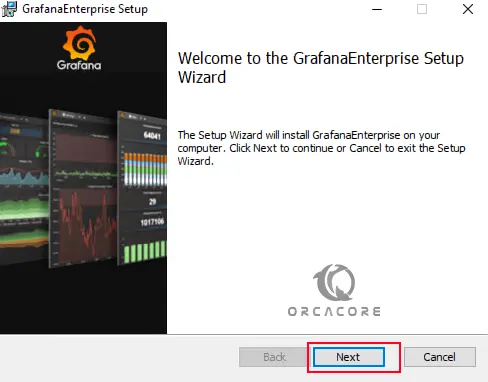
First, you will see the welcome screen. Simply click Next.
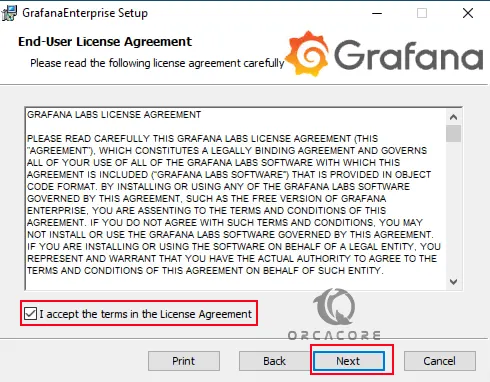
Next, accept the license agreement and click Next.
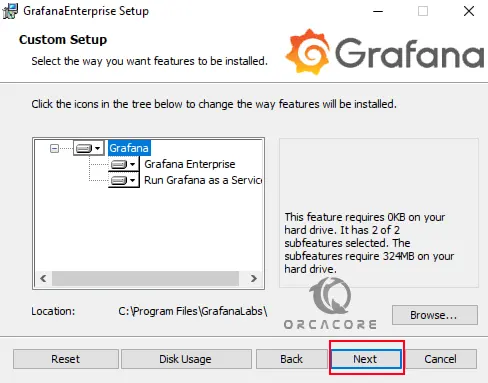
At this point, you must select the Grafana components. By default everything has been done, you can simply click Next. Or you can make your desired changes and click Next.
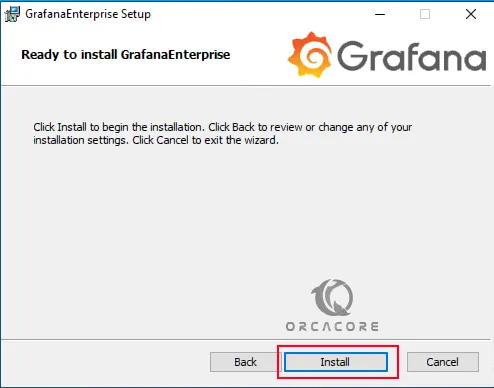
Now your Grafana app is ready to install. Click Install.
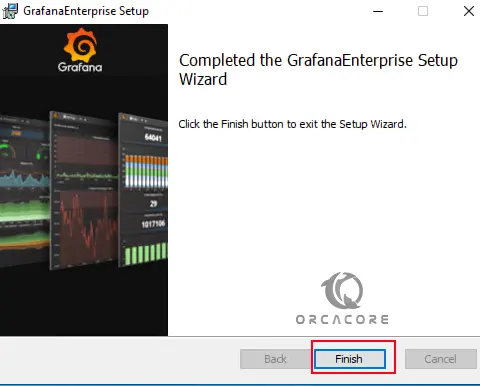
When your installation is completed, click Finish.
Step 3 – Access Grafana Dashbaord on Windows Server
At this point, you can easily access your Grafana dashboard from your web browser. In your web browser type:
http://localhost:3000/loginOr, if you wish to access Grafana from other computers on your network, you’ll need to use the local IP address of your Windows Server:
http://windows-server-ip-address:3000/loginYou should see the Grafana login screen. Enter admin as the username and password and click login.

Then, you must change the admin password for security reasons and click Submit.

At this point, you should see your Grafana dashboard on your Windows server.
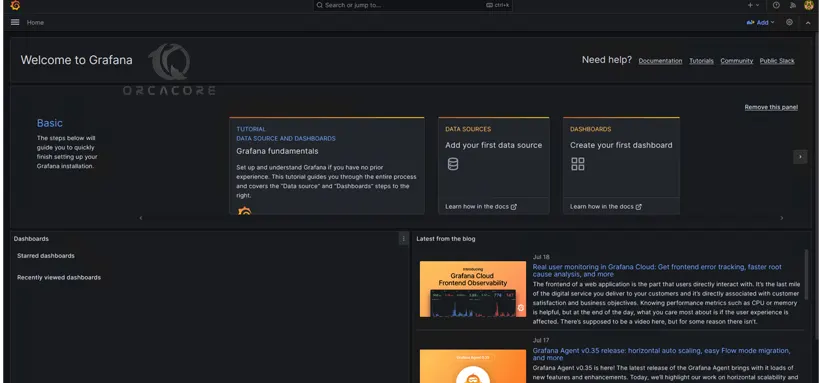
From here you can start to monitor your data. You can proceed to the next step to create your first dashboard with Grafana.
Step 4 – Start Using Grafana on Windows Server
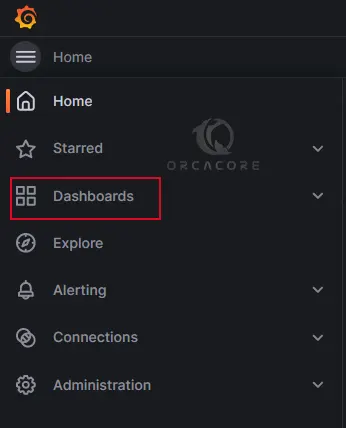
At this point, you can easily create your first dashboard and start using Grafana on Windows Server 2022. To create your first dashboard, click Dashboards in the left-side menu.
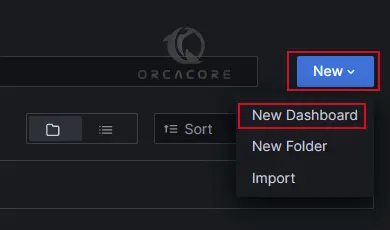
Then, click New and select New Dashboard from the dropdown menu.
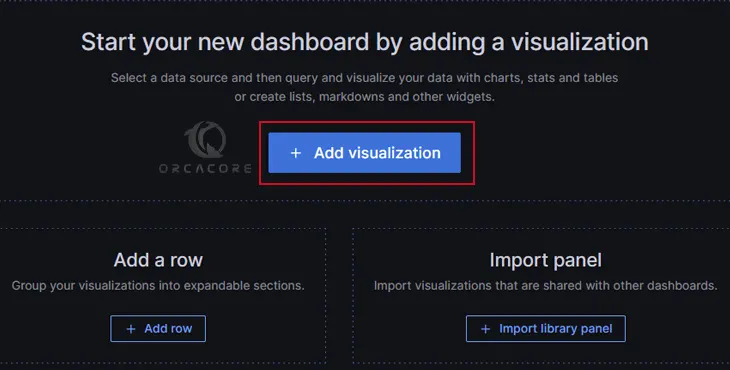
Next, click on + Add visualization.
From the data source, click — Grafana —.
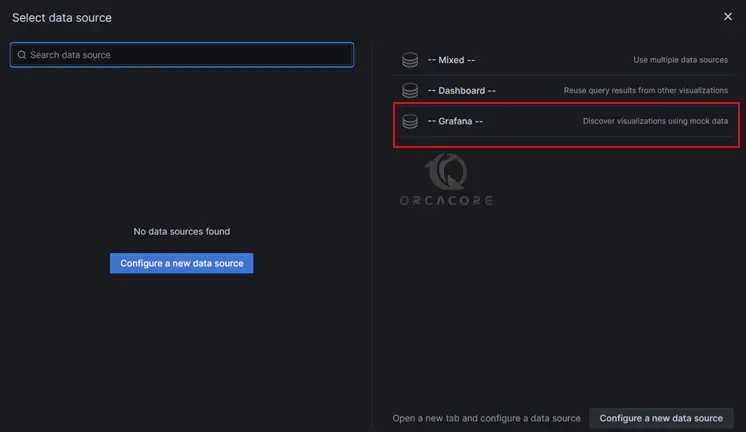
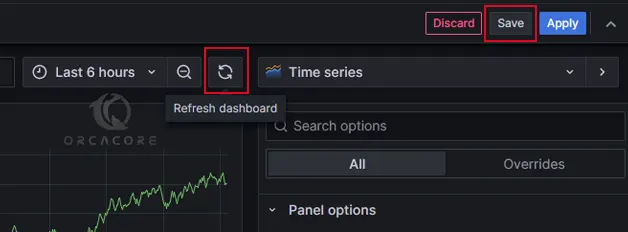
This configures your query and generates the Random Walk dashboard. Click the Refresh dashboard icon to query the data source. And click Save to save the dashboard.
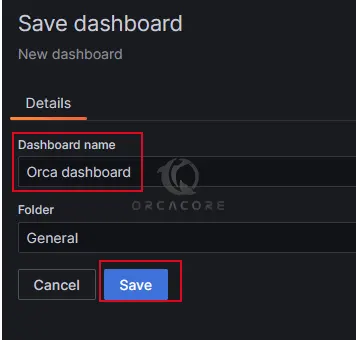
Enter a name for your password and click save.
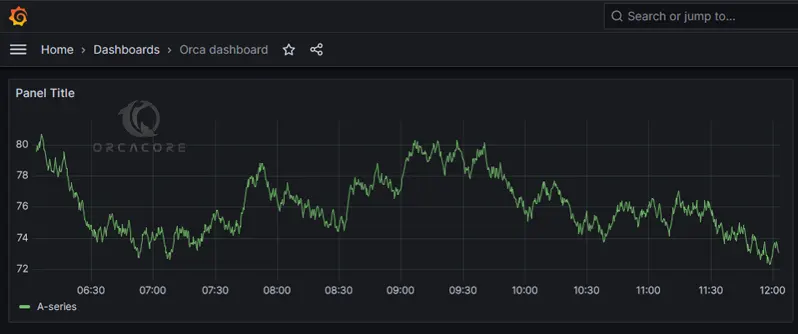
That’s it, you have created your first dashboard with Grafana.
For more information, you can visit the Grafana Documentation page.
Conclusion
Grafana is a powerful tool that is used for data visualization and monitoring. It is widely used in DevOps, IT operations, and engineering teams to get into their systems and applications. With Grafana, you can build interactive and dynamic dashboards with graphs, charts, tables, and alerts. They help you to effectively monitor the performance and health of systems, applications, networks, and infrastructure.
At this point, you have learned to Install Grafana on Windows Server 2022, Access it from a web browser, and create your first dashboard with Grafana on your server.
Hope you enjoy using it. You may be interested in these articles:
Install MSIX App on Windows Server 2022