Share your love
Install Joomla on Rocky Linux 9
In this tutorial, you will learn to Install and Configure Joomla on Rocky Linux 9.
Joomla is an open-source Content Management System (CMS) used to build websites and online applications. It is free, extendable, and separated into front-end and back-end templates (administrator). Joomla is developed using PHP, Object Oriented Programming, software design patterns, and MySQL (used for storing the data).
Steps To Install and Configure Joomla on Rocky Linux 9
To complete this guide, you must log in to your server as a non-root user with sudo privileges and set up a basic firewall. To do this, you can follow our guide on Initial Server Setup with Rocky Linux 9.
In this guide, we will install Joomla by using the LAMP Stack. So you need t have it installed on your server. To do this, you can follow our guide on Installing LAMP Stack on Rocky Linux 9.
Also, you need a domain name that is pointed to your server’s IP address.
When you are done, follow the steps below.
PHP Configuration For Joomla
At this point, you need to install some PHP extensions on your Rocky Linux server by using the command below:
sudo dnf install php-curl php-xml php-zip php-mysqlnd php-intl php-gd php-json php-ldap php-mbstring php-opcacheThen, you need to open the php.ini file and make some configuration changes to it. To do this, open the file with your favorite text editor, here we use vi editor:
sudo vi /etc/php.iniFind the lines below and set them to the values as shown below:
memory_limit = 256M
output_buffering = Off
max_execution_time = 300
date.timezone = America/New_YorkNote: Remember to set the timezone of your own.
When you are done, save and close the file.
Create Joomla Database on Rocky Linux 9
At this point, you must log in to your MariaDB shell and create a Joomla database and user. To do this, run the command below:
sudo mysql -u root -pFrom your MariaDB shell run the command below to create the database, here we named it joomla_db:
MariaDB [(none)]> CREATE DATABASE joomla_db;Next, use the command below to create a Joomla user and grant all privileges to it on Rocky Linux 9, here we named it joomla_user and set a strong password for it:
MariaDB [(none)]> GRANT ALL PRIVILEGES ON joomla_db.* TO 'joomla_user'@'localhost' IDENTIFIED BY 'password';Flush the privileges and exit from your MariaDB shell:
MariaDB [(none)]> FLUSH PRIVILEGES;
MariaDB [(none)]> EXIT;
Joomla Installation on Rocky Linux 9
At this point, you need to visit the Joomla Downloads Page and get the Full zip package of the latest version of Joomla.
sudo wget https://downloads.joomla.org/cms/joomla4/4-2-5/Joomla_4-2-5-Stable-Full_Package.zip?format=zipWhen your download is completed, unzip your downloaded file into the /var/www/html/joomla directory with the command below:
sudo unzip Joomla_4-2-5-Stable-Full_Package.zip?format=zip -d /var/www/html/joomlaNow set the correct permissions and ownership to your Joomla directory:
# sudo chown -R apache:apache /var/www/html/joomla/
# sudo chmod -R 775 /var/www/html/joomla/
Create Apache Virtual Host
At this point, you need to create an Apache virtual host for Joomla on Rocky Linux 9. To do this, create and open the virtual host file with your favorite text editor, here we use vi:
sudo vi /etc/httpd/conf.d/joomla.confAdd the following contents to the file:
Note: Use the server’s Fully Qualified Domain Name (FQDN) or public IP.
<VirtualHost *:80>
   ServerAdmin admin@example.com
   DocumentRoot "/var/www/html/joomla"
   ServerName example.com
   ErrorLog "/var/log/httpd/example.com-error_log"
   CustomLog "/var/log/httpd/example.com-access_log" combined

<Directory "/var/www/html/joomla">
   DirectoryIndex index.html index.php
   Options FollowSymLinks
   AllowOverride All
   Require all granted
</Directory>
</VirtualHost>
When you are done, save and close the file.
To apply the changes, restart Apache:
sudo systemctl restart httpdConfigure Firewall
Now if you don’t allow HTTP and HTTPS through the Rocky Linux firewall, use the following commands:
# sudo firewall-cmd --add-service=http --zone=public --permanent
# sudo firewall-cmd --add-service=https --zone=public --permanent
Reload the firewall to apply the new rules:
sudo firewall-cmd --reloadAccess Joomla Web Interface
At this point, you can continue your Joomla installation on Rocky Linux 9 from the Web interface. Enter your server’s IP address or domain name in your web browser:
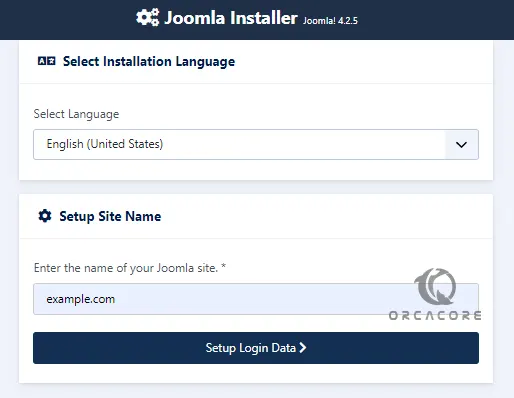
http://server-ip or domain.comYou will see your Joomla installer. Select your desired language and enter your Joomla site name and click Set up login data.
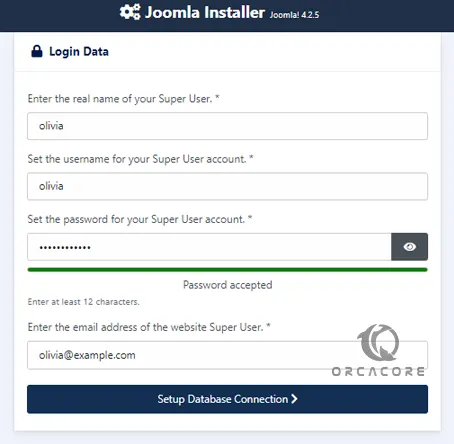
Next, you need to enter your login data and click Setup database connection.
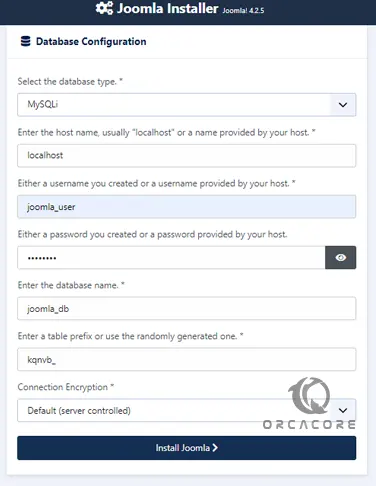
Then, enter the database credentials that you have provided before on Rocky Linux 9 and click Install Joomla.
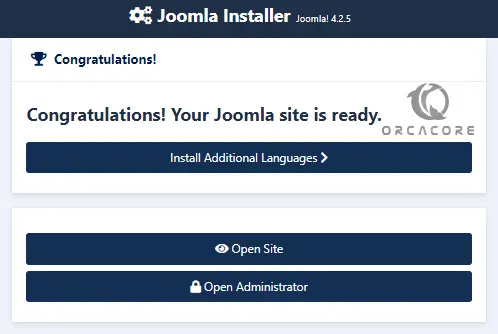
When your installation is completed, you will see the following screen. Click Open Administrator.
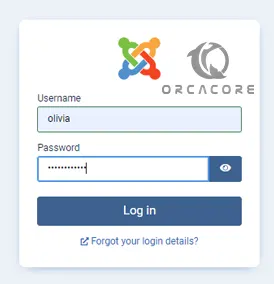
Then, enter your Joomla super username and password and click Login.
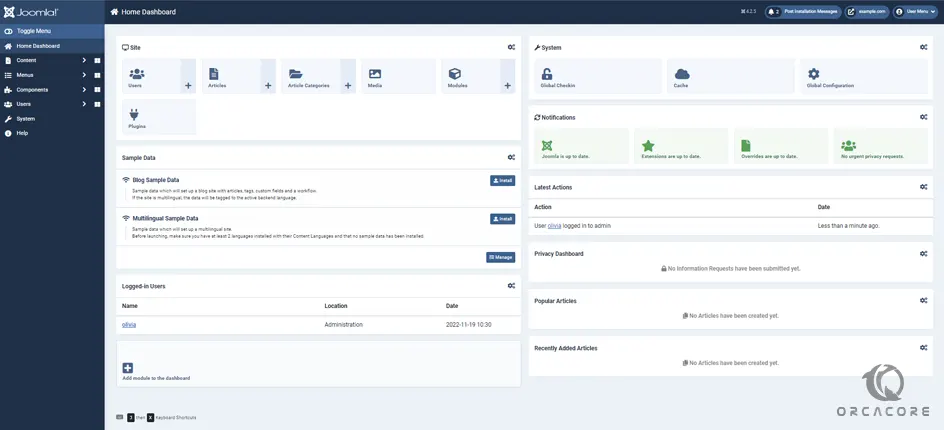
At this point, you will see your Joomla dashboard.
That’s it, you are done.
Conclusion
At this point, you have learned to Install and Configure Joomla on Rocky Linux 9.
Hope you enjoy it. You may be like these articles:
Install Zabbix on Rocky Linux 9


