Share your love
OpenVPN Installation and Configuration on AlmaLinux 9

In this guide, we want to teach you an Ultimate guide for OpenVPN Installation and Configuration on AlmaLinux 9. OpenVPN is an open-source VPN protocol that makes use of virtual private network (VPN) techniques to establish safe site-to-site or point-to-point connections. It uses the TLS/SSL protocol for key exchange and can travel through firewalls and network address translators (NATs).
You can now follow the guide steps provided by the Orcacore team to start OpenVPN Installation and Configuration on AlmaLinux 9.
Table of Contents
Steps To OpenVPN Installation and Configuration on AlmaLinux 9
To complete OpenVPN Installation and Configuration on AlmaLinux 9, you must log in to your server as a non-root user with sudo privileges and set up a basic firewall. To do this, you can follow our guide on Initial Server Setup with AlmaLinux 9.
Also, you must disable SELinux. To do this, you can follow this guide on Disable SELinux on AlmaLinux.
Step 1 – Enable IP Forwarding on AlmaLinux 9
First, you need to update your local package index with the following command:
sudo dnf update -yNow, you need to enable IP forwarding so that the incoming packets can be forwarded to different networks.
To enable IP forwarding, open the sysctl config file with your favorite text editor, here we use vi:
sudo vi /etc/sysctl.confAdd the following line to the file:
net.ipv4.ip_forward = 1When you are done, save and close the file.
Step 2 – Install OpenVPN AlmaLinux 9
The OpenVPN packages are available in the EPEL repository on AlmaLinux 9. So install the Epel repo on your server by using the command below:
sudo dnf install epel-release -yNow use the following command to install the OpenVPN AlmaLinux 9:
sudo dnf install -y openvpnStep 3 – Install Easy RSA on AlmaLinux 9
At this step of OpenVPN Installation and Configuration on AlmaLinux 9, you need to install Easy RSA which helps you set up an internal certificate authority for use with your VPN.
Download Easy RSA
Use the wget command to download Easy RSA on AlmaLinux 9. Find the download link of easy-rsa in the latest version on the Releases page. And paste it in the following command:
# cd /etc/openvpn

# sudo wget https://github.com/OpenVPN/easy-rsa/releases/download/v3.1.1/EasyRSA-3.1.1.tgz
When your download is completed, extract your file:
sudo tar -xvzf EasyRSA-3.1.1.tgzNext, move your extracted file to a new directory named easy-rsa:
sudo mv EasyRSA-3.1.1 easy-rsaConfigure Easy RSA
At this point, you need to add and build an SSL certificate for your OpenVPN on AlmaLinux 9. First, navigate to your easy-rsa directory:
cd /etc/openvpn/easy-rsaThen, open the vars file with your favorite text editor, here we use vi:
sudo vi varsAdd the following content to the file:
set_var EASYRSA "$PWD"
set_var EASYRSA_PKI "$EASYRSA/pki"
set_var EASYRSA_DN "cn_only"
set_var EASYRSA_REQ_COUNTRY "USA"
set_var EASYRSA_REQ_PROVINCE "Newyork"
set_var EASYRSA_REQ_CITY "Newyork"
set_var EASYRSA_REQ_ORG "osradar CERTIFICATE AUTHORITY"
set_var EASYRSA_REQ_EMAIL ""
set_var EASYRSA_REQ_OU "osradar EASY CA"
set_var EASYRSA_KEY_SIZE 2048
set_var EASYRSA_ALGO rsa
set_var EASYRSA_CA_EXPIRE 7500
set_var EASYRSA_CERT_EXPIRE 365
set_var EASYRSA_NS_SUPPORT "no"
set_var EASYRSA_NS_COMMENT "osradar CERTIFICATE AUTHORITY"
set_var EASYRSA_EXT_DIR "$EASYRSA/x509-types"
set_var EASYRSA_SSL_CONF "$EASYRSA/openssl-easyrsa.cnf"
set_var EASYRSA_DIGEST "sha256"
When you are done, save and close the file.
Note: You can change the value of country, city, province, and email according to your requirements.
Now, initiate the PKI directory with the following command:
./easyrsa init-pkiFinally, use the following command to build your OpenVPN CA certificates on AlmaLinux 9:
sudo ./easyrsa build-caYou will be asked to enter a new CA and PEM pass phrase.
When you are done, proceed to the next step of OpenVPN Installation and Configuration on AlmaLinux 9.
Generate Server Certificate Files
At this point, you can get your key pair and certificate request. To do this, run the following command:
sudo ./easyrsa gen-req orca-server nopassSign the Server Key With the CA
To sign your server key with the CA, run the following command.
sudo ./easyrsa sign-req server orca-serverEnter Yes and enter the CA passphrase that you have created.
Then, you need the Diffie-Hellman key for key exchanging purposes. Generate the key by running the following command:
sudo ./easyrsa gen-dhThis will take some time to complete. You will get the following output:
Output
DH parameters appear to be ok.

Notice
------

DH parameters of size 2048 created
at: /etc/openvpn/easy-rsa/pki/dh.pem
Next, copy all these files to the /etc/openvpn/server/ directory:
# cp pki/ca.crt /etc/openvpn/server/
# cp pki/dh.pem /etc/openvpn/server/
# cp pki/private/orca-server.key /etc/openvpn/server/
# cp pki/issued/orca-server.crt /etc/openvpn/server/
Generate Client Key and Certificate
At this point, you can get the client key by running the following command:
sudo ./easyrsa gen-req client nopassNext sign your client key with the generated CA certificate:
sudo ./easyrsa sign-req client clientEnter Yes and enter the CA passphrase that you have created.
Then, copy these files to the /etc/openvpn/client/ directory:
# cp pki/ca.crt /etc/openvpn/client/
# cp pki/issued/client.crt /etc/openvpn/client/
# cp pki/private/client.key /etc/openvpn/client/
Step 4 – Configure OpenVPN Server File on AlmaLinux 9
At this step of OpenVPN Installation and Configuration on AlmaLinux 9, you need to create and open a new config file in the OpenVPN server directory on AlmaLinux 9 with the following command:
sudo vi /etc/openvpn/server/server.confThen add the following content to the file:
Here we use Google’s public DNS servers. You can pick different DNS servers.
port 1194
proto udp
dev tun
ca /etc/openvpn/server/ca.crt
cert /etc/openvpn/server/orca-server.crt
key /etc/openvpn/server/orca-server.key
dh /etc/openvpn/server/dh.pem
server 10.8.0.0 255.255.255.0
push "redirect-gateway def1"
push "dhcp-option DNS 8.8.8.8"
push "dhcp-option DNS 8.8.4.4"
duplicate-cn
cipher AES-256-CBC
tls-version-min 1.2
tls-cipher TLS-DHE-RSA-WITH-AES-256-GCM-SHA384:TLS-DHE-RSA-WITH-AES-256-CBC-SHA256:TLS-DHE-RSA-WITH-AES-128-GCM-SHA256:TLS-DHE-RSA-WITH-AES-128-CBC-SHA256
auth SHA512
auth-nocache
keepalive 20 60
persist-key
persist-tun
compress lz4
daemon
user nobody
group nobody
log-append /var/log/openvpn.log
verb 3
When you are done, save and close the file.
Manage OpenVPN Server
At this point, you need to start and enable your OpenVPN service on AlmaLinux 9 by using the following commands:
# sudo systemctl start openvpn-server@server
# sudo systemctl enable openvpn-server@server
Verify your OpenVPN service is active and running on your AlmaLinux server:
sudo systemctl status openvpn-server@serverOutput
● openvpn-server@server.service - OpenVPN service for server
Loaded: loaded (/usr/lib/systemd/system/openvpn-server@.service; enabled; >
Active: active (running) since Mon 2022-11-21 03:10:42 EST; 35s ago
Docs: man:openvpn(8)
https://community.openvpn.net/openvpn/wiki/Openvpn24ManPage
https://community.openvpn.net/openvpn/wiki/HOWTO
Main PID: 71113 (openvpn)
Status: "Initialization Sequence Completed"
Tasks: 1 (limit: 23609)
Memory: 1.7M
...At this point, a new network interface will be created upon the successful start of the OpenVPN server. Run the following command to see the details:
ifconfigOutput
tun0: flags=4305<UP,POINTOPOINT,RUNNING,NOARP,MULTICAST> mtu 1500
inet 10.8.0.1 netmask 255.255.255.255 destination 10.8.0.2
inet6 fe80::f8aa:7b68:e7d8:b89f prefixlen 64 scopeid 0x20<link>
unspec 00-00-00-00-00-00-00-00-00-00-00-00-00-00-00-00 txqueuelen 500 (UNSPEC)
RX packets 0 bytes 0 (0.0 B)
RX errors 0 dropped 0 overruns 0 frame 0
TX packets 6 bytes 288 (288.0 B)
TX errors 0 dropped 0 overruns 0 carrier 0 collisions 0Step 5 – Configure OpenVPN Client File on AlmaLinux 9
To connect the client to the OpenVPN server, you need the client configuration file for that. To generate the client configuration file, run the following command:
sudo vi /etc/openvpn/client/client.ovpnAdd the following content to the file:
client
dev tun
proto udp
remote vpn-server-ip 1194
ca ca.crt
cert client.crt
key client.key
cipher AES-256-CBC
auth SHA512
auth-nocache
tls-version-min 1.2
tls-cipher TLS-DHE-RSA-WITH-AES-256-GCM-SHA384:TLS-DHE-RSA-WITH-AES-256-CBC-SHA256:TLS-DHE-RSA-WITH-AES-128-GCM-SHA256:TLS-DHE-RSA-WITH-AES-128-CBC-SHA256
resolv-retry infinite
compress lz4
nobind
persist-key
persist-tun
mute-replay-warnings
verb 3
When you are done, save and close the file.
Step 6 – Configure Routing on AlmaLinux 9
At this step of OpenVPN Installation and Configuration on AlmaLinux 9, you need to allow OpenVPN through the AlmaLinux 9 firewall. To do this, run the following commands:
# sudo firewall-cmd --permanent --add-service=openvpn
# sudo firewall-cmd --permanent --zone=trusted --add-service=openvpn
# sudo firewall-cmd --permanent --zone=trusted --add-interface=tun0
# sudo firewall-cmd --add-masquerade
# sudo firewall-cmd --permanent --add-masqueradeNext, set the routing to forward the incoming traffic from the VPN to the local network:
# sudo routecnf=$(ip route get 8.8.8.8 | awk 'NR==1 {print $(NF-2)}')
# sudo firewall-cmd --permanent --direct --passthrough ipv4 -t nat -A POSTROUTING -s 10.8.0.0/24 -o $routecnf -j MASQUERADE
Reload the firewall to apply the changes:
sudo firewall-cmd --reloadStep 7 – Configure OpenVPN on a Client Machine
At this step of OpenVPN Installation and Configuration on AlmaLinux 9, you can use the /etc/openvpn/client/client.ovpn file on any client machines to connect to your server.
Windows:
On Windows, you need to download the OpenVPN binaries from the OpenVPN community which come with a GUI.
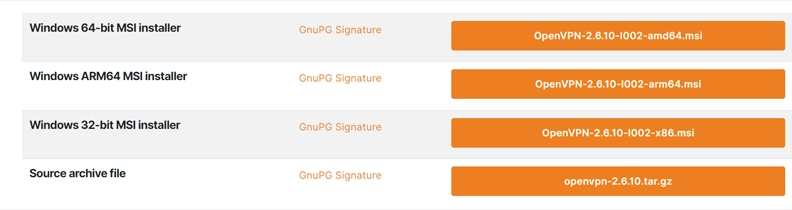
Then, locate your “.ovpn” configuration file in the right directory, c:\Program Files\OpenVPN\config, and click connect in the GUI.
Note: OpenVPN GUI on Windows must be executed with administrative privileges.
macOS:
On macOS, the open-source application on the Tunnelblick gives an interface similar to the OpenVPN GUI on Windows and comes with OpenVPN and the required TUN/TAP drivers.
Locate your “.ovpn” configuration file into the ~/Library/Application Support/Tunnelblick/Configurations directory. and you can double-click on the “.ovpn” file.
Linux:
On Linux, you should install OpenVPN from your distribution’s official repositories. Then, you can use OpenVPN by running the following command:
sudo openvpn --config ~/path/to/client.ovpnAfter you set up a successful client connection, you can verify that your traffic is being routed through the VPN by checking Google to tell your public IP.
Conclusion
At this point, you have learned OpenVPN Installation and Configuration on AlmaLinux 9 step by step. First, you should enable the IP forwarding, then, you can install the OpenVPN server, configure the easy rsa, and finally configure your OpenVPN server and client, and access from a client machine.
Hope you enjoy it. Also, you may like these articles:
Pritunl VPN Server Setup on Debian 12